When we think about wildlife photography most will think about one or more of commonly found species of animals. These species are mammals, birds, amphibians, reptiles, fish, invertebrates or insects which are the most commonly seen and recorded when it comes to photography. Most of that list are all familiar to us and they will most undoubtedly include the larger species in that category. But what about the more lesser known and smaller species that when you find and photograph them show a whole new world that at times may seem as alien to us? How does one break down that barrier from the large and familiar to the small and intricate? Well for me and I am sure to most of you that world is exposed using macro photography.
Now if you are new to wildlife photography or perhaps you have been doing for some time now I am sure you are familiar with the technique of macro photography where you can purchase a specialized lens that will allow you to get super close and focus on small details that are not familiar to most of us in our day to day lives. These lenses open up a world that may be seldom seen and reveal detailed and interesting subjects that we may of not of even know existed. This is where many including myself will often get lost into the world of macro photography as it can become very addictive and very creative.
So how does macro photography connect into wildlife photography for that very concept to some may seem a bit confusing. Now if you have a dedicated macro lens then you are well on your way to explore this hidden world and can literally spend countless hours exploring a whole new world that many wildlife subjects inhibit. But for those who don’t own a dedicated macro lens what does one do? Dedicated macro lenses can be pricey depending on what your goals are and since they are a speciality lens they can be either be cost prohibitive or take up even more room in your already crowded camera bag. Well fear not for you can get bit by the macro bug with a simple, cost effective and compact solution.
Extension Tubes

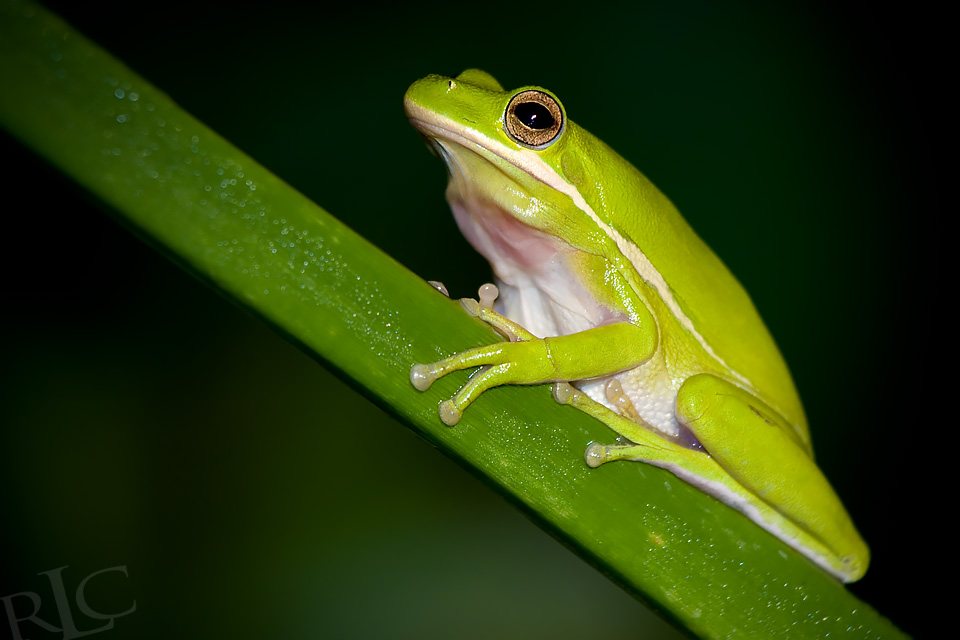
Extension (ik-sten-shuh n.) is the term used to describe the distance that the front element of your lens can be moved forwards. The further forward the element, the closer your lens can focus to your subject. This very inexpensive yet very versatile accessory is perfect for those times when you want to do some very interesting and creative images. They basically can perform two functions both of which are sometimes forgotten by wildlife photographers. These hollow tubes have no glass, but move the back of the lens away from the focal plane of the camera thus getting you closer to the action. Let’s say you find a small tree frog while photographing around a freshwater pond what do you do?
Sure, your telephoto lens will do the job but since these frogs are small they won’t fill the frame. As you move in closer and closer sooner or later your lens will fail to focus. That is because lenses all have a minimal focusing distance and the longer the lens you are using the longer this distance can be. Maybe you find yourself sitting on a beach and photographing shorebirds and after a while they move so close to you again your lens can’t focus and your shorter lens is about 20 yards away from you. If you get up and move, you will scare away your subjects.
If you have an extension tube simply mount it in between your camera body and your lens and you now can photograph those subjects much closer since you have shortened your minimal focusing distance. This is a great way to now fill that frame with some amazing images since your lens now can focus at much more shorter distances and give you great flexibility. They also come in different heights and the more (taller) they are, the closer you can focus on your subjects. You can also “stack” the tubes to get extremely close. The closer you can focus, the more magnification you get. A word of caution however is that the more “extension” you use the more light you will need to properly expose your subject which will require you to use a longer shutter speed or you can increase your ISO. They keyword when doing macro wildlife photography which may be completely reverse to what you are used to is “slow and steady”.
Depth-of-field is very narrow when doing macro photography so don’t be afraid to raise your ISO in order to get a small enough aperture to give you adequate depth-of-field. If your subject is still you should definitely use a tripod. Using a tripod will let you use a low ISO to maximize image quality and eliminate camera shake. If you are hand-holding the camera you may need to use a faster shutter speed than normal to obtain a sharp image. The extra magnification also magnifies camera shake as well as the subject so a good rule of thumb is shutter speeds of 1/250 second or more are ideal and anything less you should use a tripod or something around you to hold the camera as still as possible.
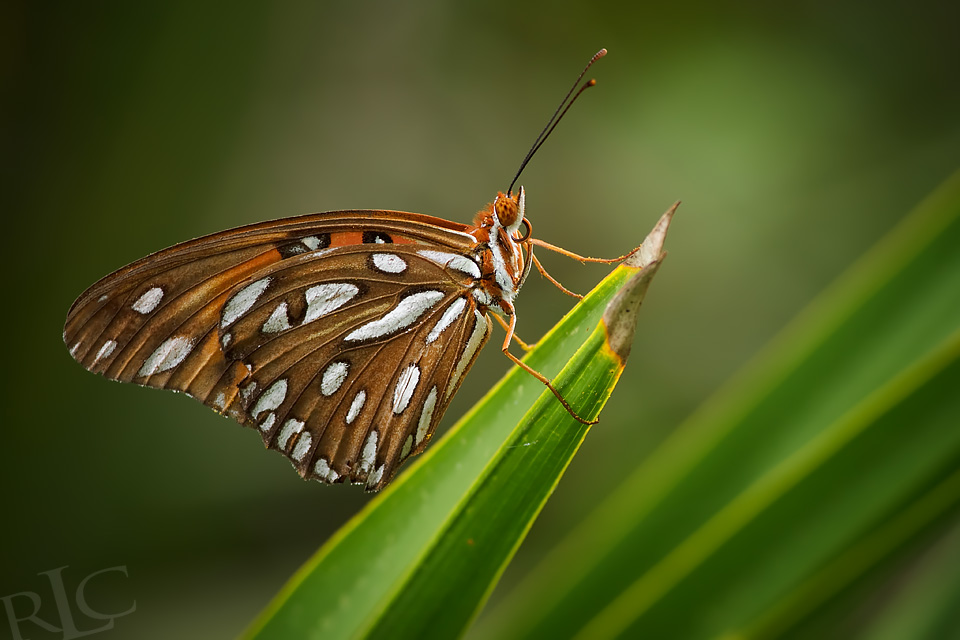
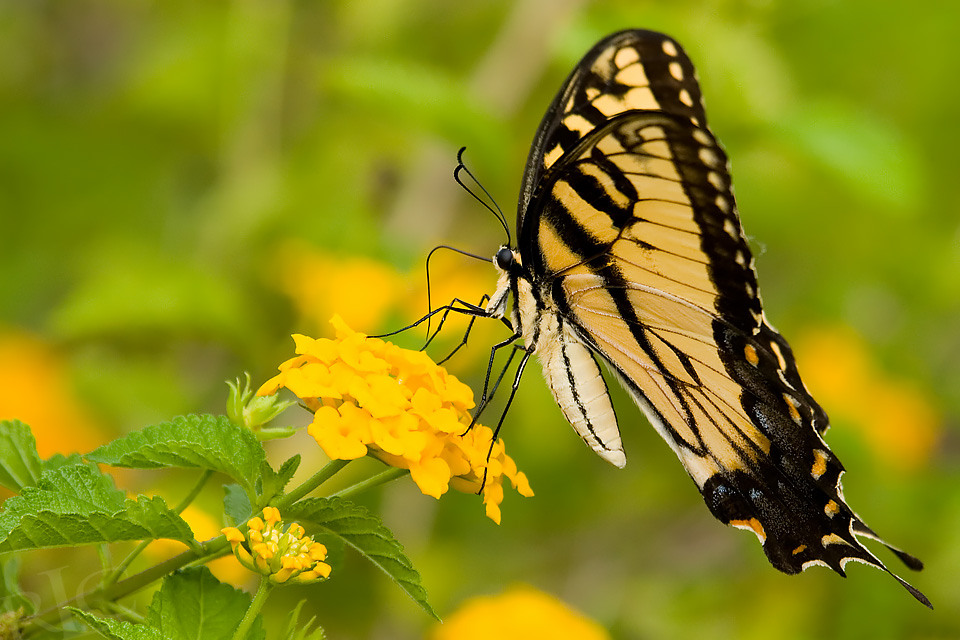
Extension tubes will also turn your lenses especially ones that are over 70mm into powerful macro lenses so if you don’t want or have a true dedicated macro lens these tubes are excellent for just such work such as butterflies, bugs and for extreme close-ups of wildlife that will reveal their world they live in now larger then life. My personal lens of choice to do macro photography using extension tubes is my 70mm-200mm telephoto lens which give me amazingly sharp images and the zoom range give me great flexibility when photographing macro subjects.
Keep in mind however that when you are using an extension tube you will not be able to focus to infinity so if you find your subject moving away or switch to another subject further away from you then you will need to remove it from your camera. However they versatility of extension tubes when used can rival a true dedicated macro lens that sometimes can cost 10x what you would pay for a good set of extension tubes. Speaking of which the most cost effective and popular extension tubes are made by Kenko and they make extension tubes for just about every camera manufacture. You of course also get extension tubes from Canon, Nikon, Olympus but Sony users will need to purchase a third party version and Kenko is highly recommended.
So What Sort Of Wildlife Subjects Can You Find And Take Photos Of With Extension Tubes?
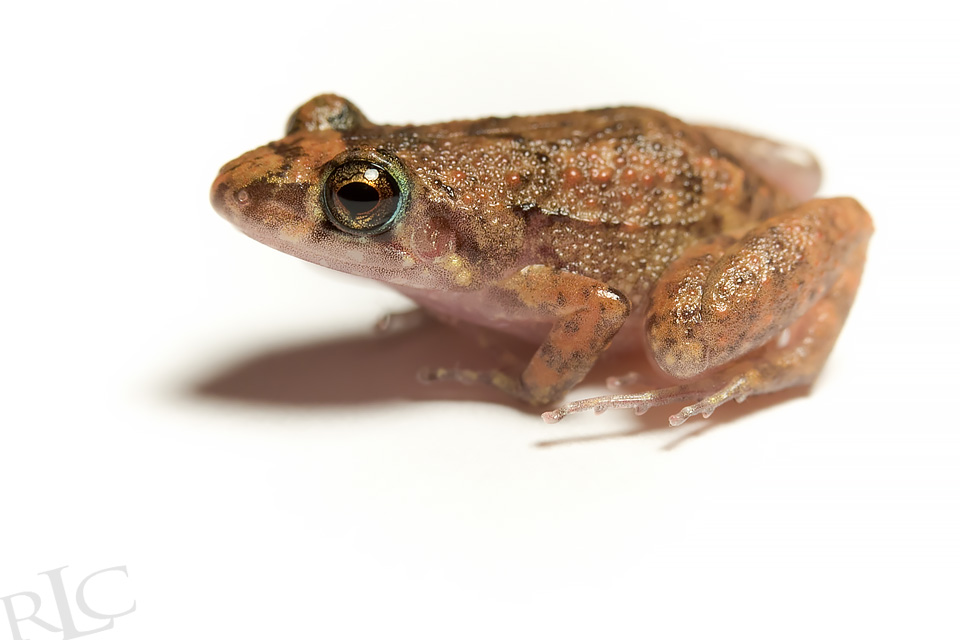
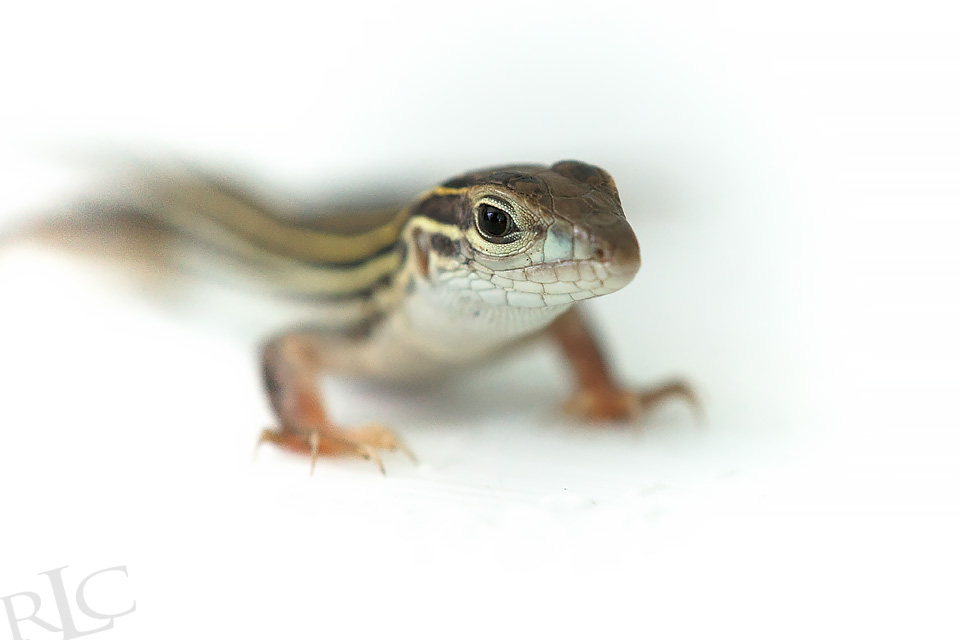
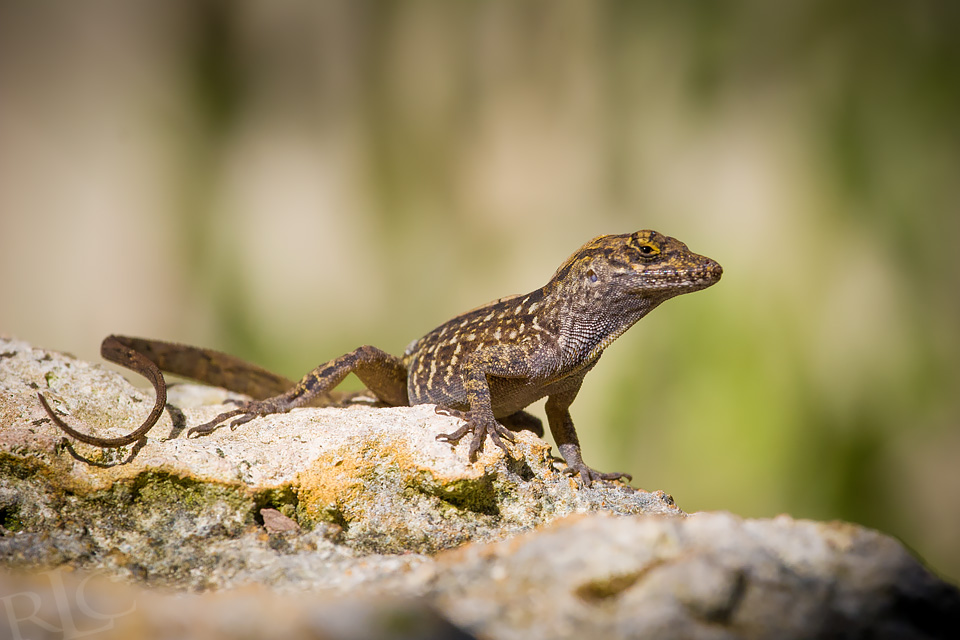
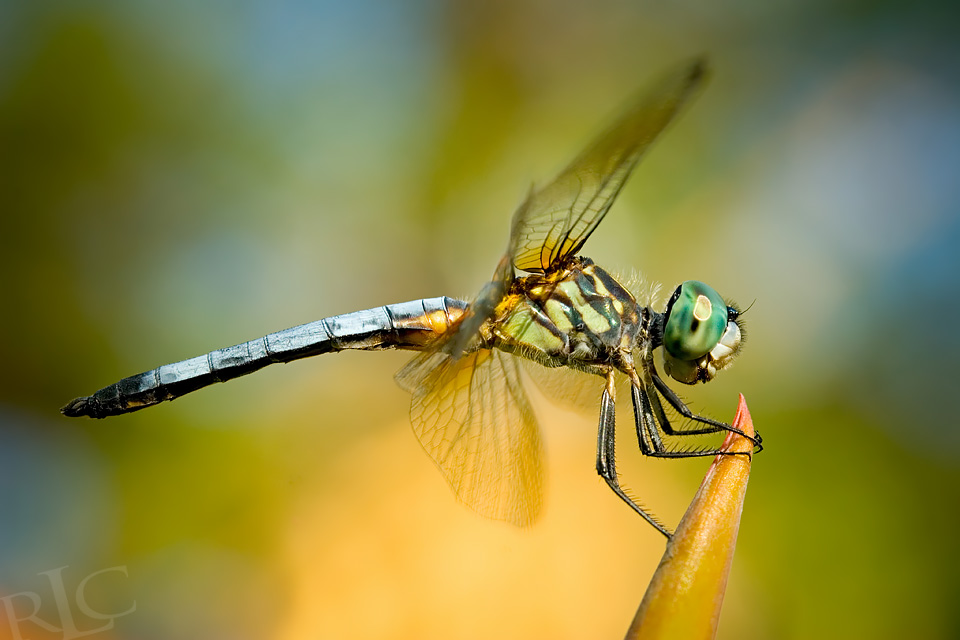
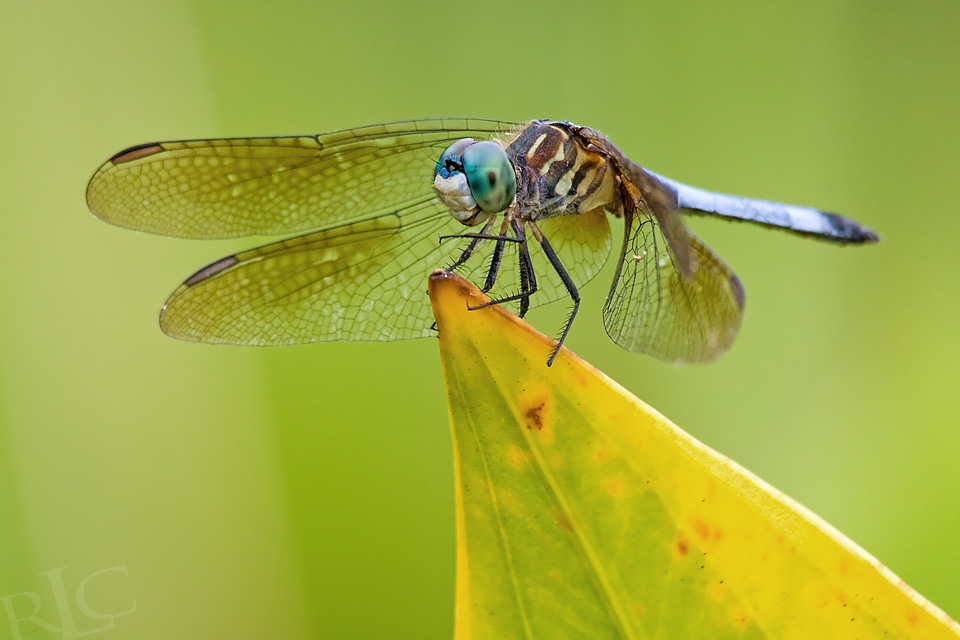
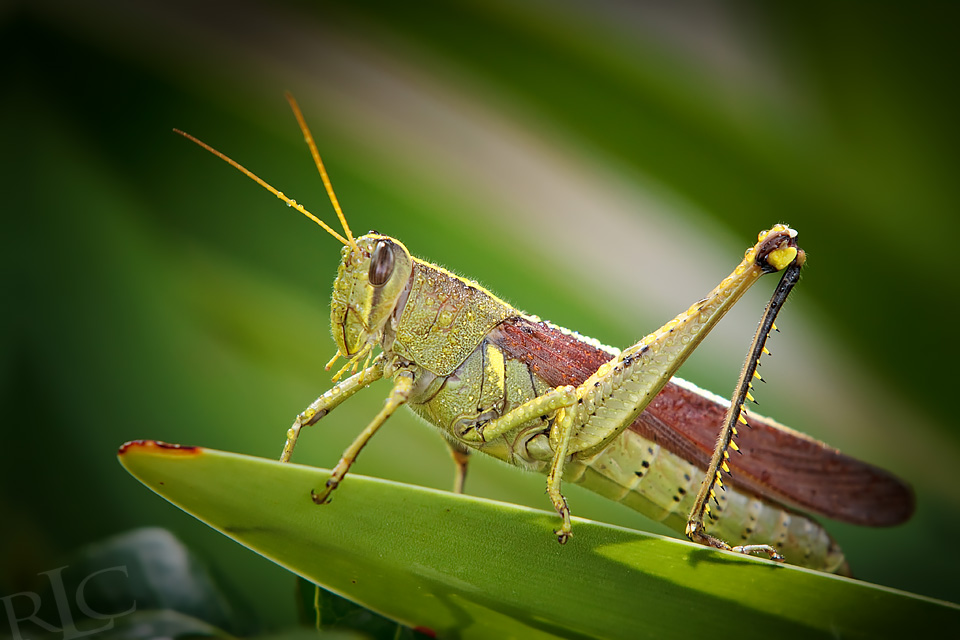
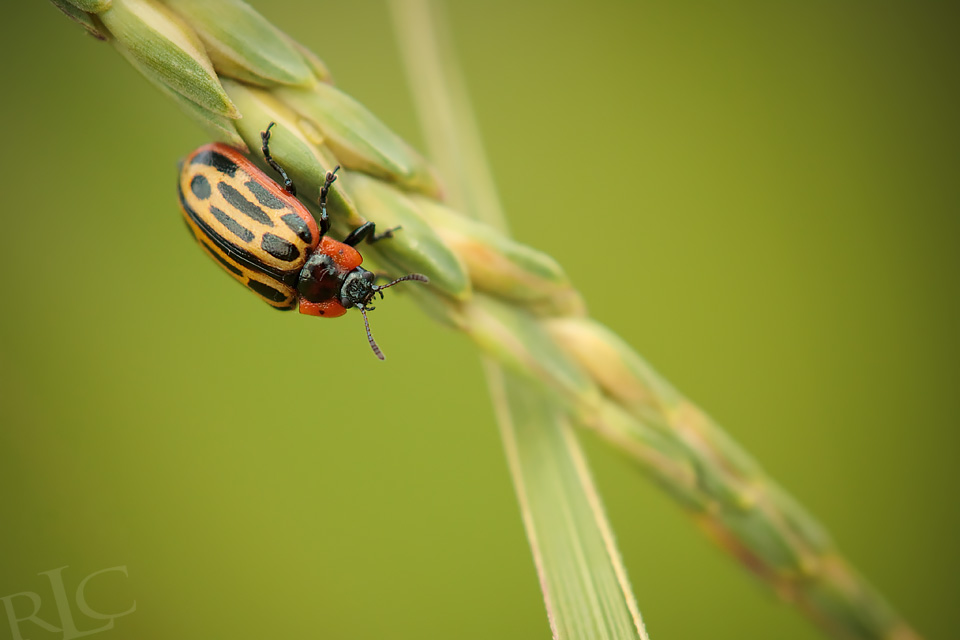
At first you may struggle to think much less see wildlife macro subjects but if you start to look around I would bet you would be amazed just what you can photograph using your lens of choice and some extension tubes. Here is a small gallery of just such possible subjects I have found that I enjoy photographing to get you thinking and set you out on your adventure in the world of wildlife macro photography:


About Wildlife Photography At The Bryan Peterson School Of Photography
Each week for four weeks this exciting course will take you on a journey like no other as you will explore how to capture some of life’s most beautiful creatures from the birds of prey, songbirds and shorebirds, as well as many of our common and not so common animals, reptiles and amphibians that you can find right in your own backyard.
Think you don’t have lots of wildlife around you? Then be prepared as we will unlock the secrets that will help you seek out that wildlife as well how to photograph birds and animals that you can find once you learn the secrets to locating and identifying them.
Every lesson is jammed packed with information, tips, and tricks on how to capture award winning image from the camera to the digital darkroom. We will also explore some very interesting techniques that take the ordinary and turn it into a piece of art that will give you the tools to see the world around from a whole new perspective.
When you are ready to step outside an immerse yourself into nature or perhaps you will be joining a wildlife photography safari or workshop this course will get you prepared when you arrive and have that split second decision to capture the moment flawlessly each and every time.
Wildlife Photography is based in part on the article written by Robert La Follette that appeared in Florida Wildlife Magazine as well as very popular on-location workshops Robert conducts in the Tampa, Florida area but takes that article and information much deeper and in-depth. Whether you are a beginner or a seasoned pro it is considered the “how-to” blueprint on wildlife photography and this course will give you the insight and information like no other available today and everyone is welcomed to learn the “Formula For Success”.
This is the most comprehensive course taught on the internet about photographing wildlife today! Don’t delay, sign up now and you too can learn how to take the amazing wildlife photographs!


