“Dodging and burning are steps to take care of mistakes God made in establishing tonal relationships.” – Ansel Adams
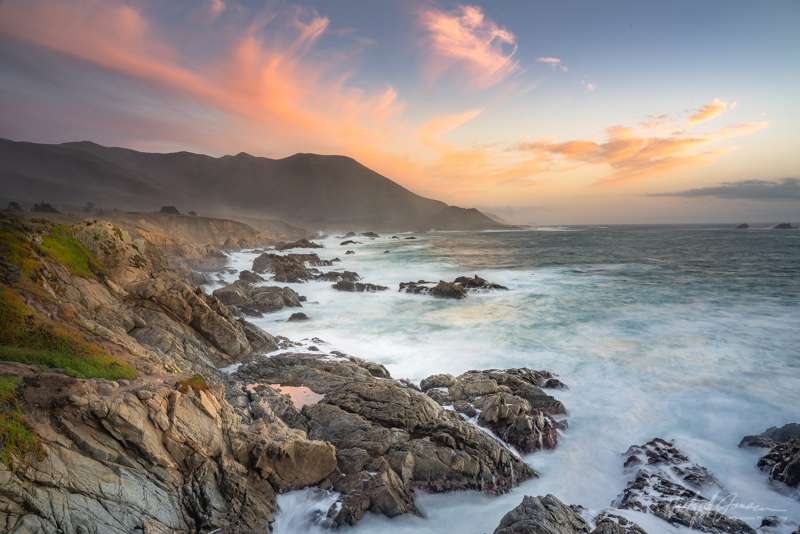
Ansel Adams embraced post-processing in the darkroom by dodging and burning (making adjustments that affect both light and dark areas of the image). The lesson that we learned from him is that post-processing is just as important as actually taking the picture. Ansel Adams would spend entire days locked up in his darkroom creating his masterful prints. They didn’t come out of the camera that way, but he had a vision in mind when he took the picture.
And that is just as true today. When we shoot with care taking into consideration composition, exposure and the histogram of the image, we can effectively create what we saw in digital form. It is also important to think about what kind of post-processing adjustments you might make to the image.
Some of the tools we now use in Lightroom and Photoshop allow us to make creative decisions in order to fulfill the artist’s vision. However, as the photographer goes through the learning process, they start to “see” their images differently, and recognize beginner mistakes that can elevate the quality of their images. This article will point out some of the most common mistakes.
Over Processed Images
The key to learning post-processing in Lightroom is to memorize what all the sliders do and what leeway you will have in using them. You don’t want to overdo a slider and have an adverse effect on your image. Here are a few tips that will help.
Don’t Overdo Your Saturation Slider
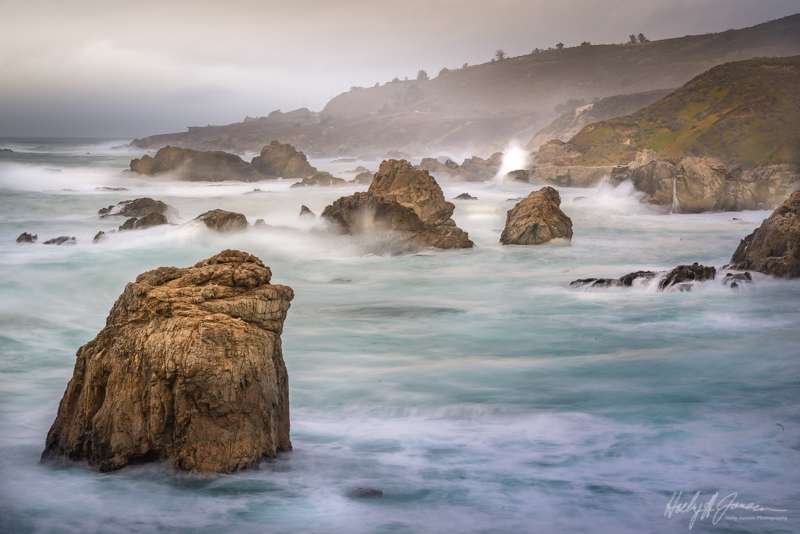
One of the most common mistakes a beginner photographer makes when first learning post processing is over saturating their images. It seems that when you spend hours on an image, you don’t actually give yourself the option to really “see” what you have created.
A good rule of thumb is to try the vibrance slider first before adding saturation. Vibrance is a smart-tool which only increases the intensity of the more muted colors and leaves the already well-saturated colors alone. It’s sort of like fill light, but for colors. Vibrance also prevents skin tones from becoming overly saturated and unnatural. Then use your saturation slider sparingly, watching for over-saturation in skin tones as well as blown out reds and greens.
Another tip would be to look away from your image for a few minutes. Look out the window or look at a different image and come back to the original.
One of my favorite features of Lightroom is to use the Snapshot view in the Develop module. This will easily give you a way to create another version of the same picture and compare the two.
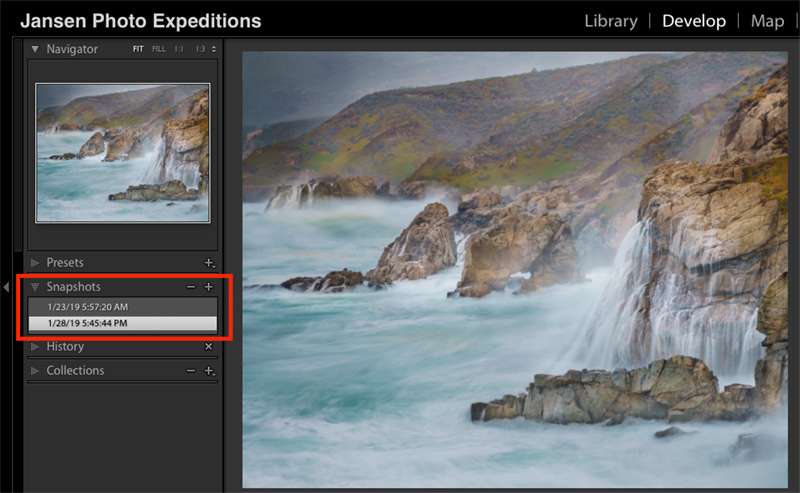
The Snapshot
The snapshot view in Lightroom gives you the unique ability to work on an image and save a digital facsimile. Lightroom saves just the image adjustments in the catalog and does not take up any additional disk space. If you would like to create a virtual copy of an image to show up separately in the Lightroom Library module, you can do this as well. The snapshots will only show up for a singular image in the Develop module in Lightroom.
You can save a version in a snapshot and create a whole new image or save just pieces of the previous edit by copying the adjustments and pasting only selective adjustments into the new version. After I have made the new adjustment, I save it as a snapshot and then compare the two. Quite frequently, the version that I thought was the best I could do, looks lackluster next to the newer, more creative version.
Don’t Overdo the Shadow Slider
One of the best ways to edit a landscape image is to bring down the highlights and bring up the shadows in Lightroom. But watch out when using the shadow slider. It can leave your image looking flat if you use too much. This can be a dance between using the shadow, highlight and exposure slider, balancing each so that your image looks its best.
The Dehaze Filter
The dehaze filter is a useful tool that should be used sparingly. This filter can give you a dramatic look in the sky of your landscape image, but if overused, it will affect the sky negatively by adding a strange greenish blue cast. This filter is best used sparingly or with the local adjustment brush so you can control the effect. You can also use a selective filter to add more blues back in the sky by decreasing the color temperature to the cooler blue side and bring back the natural color of the sky.
Over-sharpening
Over-sharpening is one of most common mistakes of the beginning photo editor. Sharpening is essential for a correctly edited digital image, but you need to get a handle on the settings that work for your camera. For my camera, I tend to set my sharpening to about 100, my radius to 1.2-1.4 and my detail to 25. You can push these settings higher, but watch for halos and glows around the edges of the image. Also be careful of sharpening if you have cropped your image. If you are sharpening an image based on the full resolution size, it will easily look over sharpened when cropped.
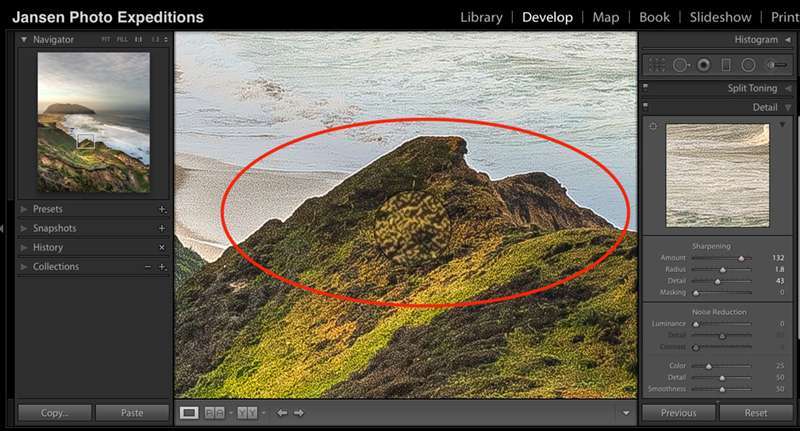
The highlighted area showing the halo is over sharpened.
In addition to all of these recommendations, over-processed images occur when we get too close to the work and don’t give ourselves some space and time to actually “see” what we have created. Hopefully, the tips suggested and a little dedicated screen break from time to time will help us to stop spoiling the pictures we worked so hard to make.
If you would like some help with your grasp on photo editing, join us at for our next Lightroom Quick Start for an enriching learning experience right here on BPSOP.
In this class, I cover the basic tools to use Lightroom as your go-to editing and organizational tool. This 4-week class covers the basics that will get you up and running quickly in an efficient way. Try our next Lightroom class and learn to use the essential program for editing and organization.
BPSOP Instructor – Holly Higbee-Jansen
 Holly Higbee-Jansen is photographer, trainer, blogger, and landscape photography workshop leader who enjoys teaching and the creative process. Her passions include teaching photography workshops in beautiful locations in California, Iceland, Costa Rica and the American West with her husband Mark. Holly also teaches online classes on Lightroom, Photoshop and photographic technique. Get Holly’s Free E-Book on “Landscape Photography and the Light“ and find out about her newest workshops at Jansen Photo Expeditions.com.
Reach Holly by email at [email protected] and read her blog at JansenPhotoExpeditions.com/Blog
Holly Teaches:
Do you want to learn to create images that show the beauty of the scene you saw when you took the photograph? Do you want to learn the other essential side of digital photography, photo editing and get up to speed quickly?
This course is designed to get you up and running FAST in this incredibly powerful program. In this two week information packed class, you will learn how to import, organize and perform simple and effective editing processes that will let you produce beautiful adjustments to your pictures.
iPhone Photography
In this class, we will introduce you to the magic of iPhone photography using several shooting and editing apps that will give you the ability to make your pictures sing in a fun and easy way. You will learn how to crop, change saturation, brightness and affect the overall look of your pictures with HDR, drama and grunge filters and other techniques. You will be amazed at the simple and effective methods.


