One of the reasons why I am such a Lightroom Classic fan is the organizational options. It can be a monumental task of managing a large collection of photos. I know this because I have over 70,000 images now in my Lightroom catalog. You may wonder how I keep track of all of them, and with Lightroom, it’s pretty easy!
Folder Organization
The first part of Lightroom organization is actually your folder hierarchy on your computer. You need to pick a consistent way to name your folders, preferably NOT by date.
You need to think about what kind of photographs you like to shoot. Do you shoot events? Do you like travel photography? Do you shoot pictures of your kids? For example, if you shoot a lot of travel photography, I would create a folder like this: Yosemite 2018_04. This folder will reflect the images you took in Yosemite, April of 2018. Maybe you were shooting your kids at a birthday party. It could be Megan’s Bday 2018_04. However you decide to organize it, make it consistent. For example, that Yosemite folder could be 2018 Half Dome Climb or Mom’s Bday in Yosemite. Do you see that all of these could reflect the vacation you had in Yosemite, but could be hard to find if you don’t have a consistent way of naming your images?
Why You Shouldn’t Organize By Date
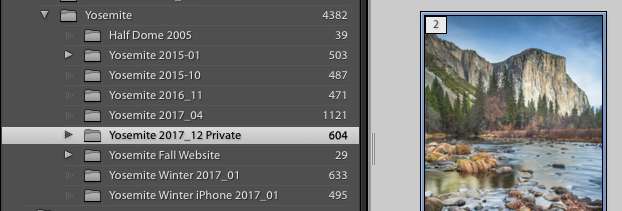
There’s a couple of reasons why I wouldn’t organize by date. The first reason is personal, I can’t remember where I was last week, let alone April of 2016! But I do remember that I was in Yosemite sometime in the spring of 2016, so my name of Yosemite 2016_04 would be easy for me to find. As you can see, I have a main folder heading in my Folders of Yosemite. Then you can see all the different trips I have made to Yosemite broken down by date. That is really the first step of the organization of your images.
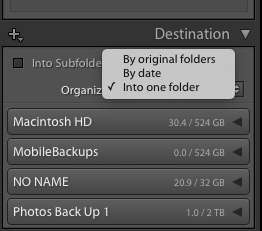
When you first import images into Lightroom, it will default to organizing by date. Just be sure you change the settings so the destination reflects that you want your images organized into one folder.
Star Ratings
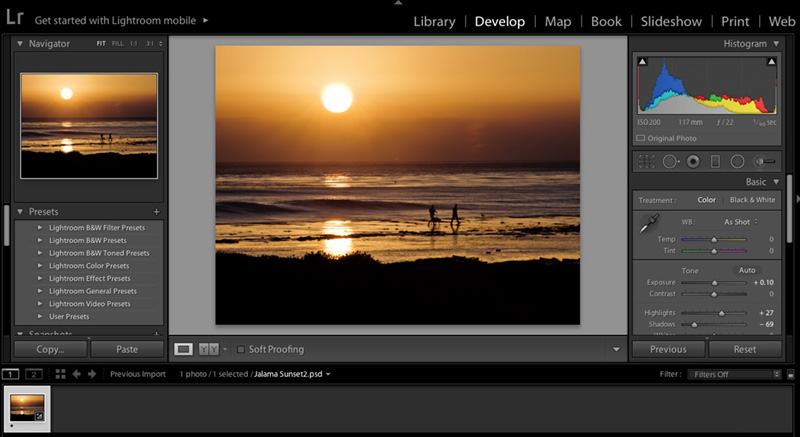
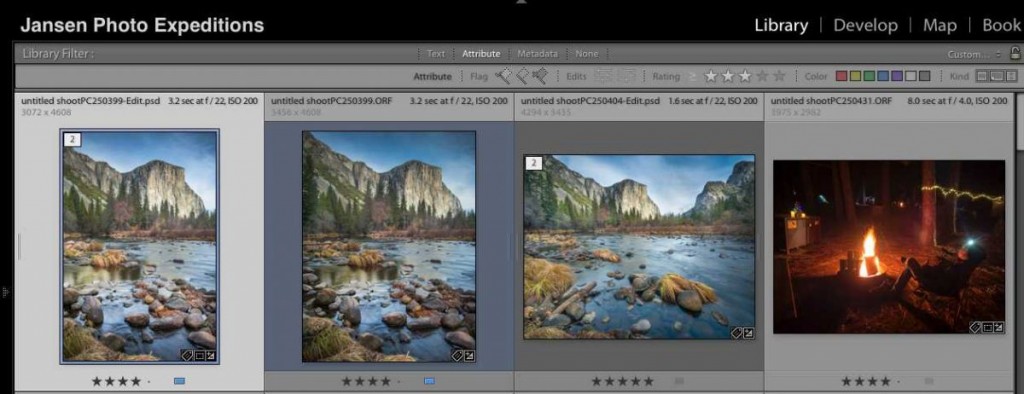
The other important addition to your Lightroom organization is to use star ratings. Star ratings can be confusing unless you use the top ratings sparingly. When I first import my images into Lightroom, I will quickly cull through my images. During this first round, I will mark with one star the images that I like and x to the images I want to throw away. (The x key will tell Lightroom that you are rejecting an image. After you have gone through your images, you can delete all of your rejected images at once.) Go to the Photo menu and choose “Delete Rejected Photos”. You can delete all the rejects at once simply and easily.
Lightroom will ask you if you want to delete it from the hard drive or just remove it from the Lightroom library. Delete them from the hard drive instead of just removing them from Lightroom, that way they will be gone forever.
After I have used the one-star rating, I will go through those images and give a 2-star rating to the ones I want to do further editing. Once I have my editing to those images, I will go back and consider a 3-star rating. This rating would only be for those images that I would want in my portfolio and the 4-star rating would only be given to the best of the best.
Collections
My other favorite way of organizing images in Lightroom in using Collections. I would use a collection to store my favorite pictures from a certain shoot. It makes it a fast and easy way to find the best pictures from a shoot especially if you are doing a slide show or want to sync those images to Lightroom mobile. I would use the same naming convention as mentioned above in folders and even create subsets of images from the same location. But you can organize it a little differently in collections.
For example, suppose you took a trip to California. Your folder would be named California 2018_02, but in your California collection, you should only put the best of the best from that trip. Then, you can create subsets of your California folder and name those subsets San Francisco, Yosemite, and Big Sur.
Can you see how this new way of organization could change your whole way of working with your images? It will take a little time to learn, but it will pay off so you will have more time to shoot and be creative doing the thing you love to do, photography!
Learn other ways to organize and edit your images as we go into more detail in the Lightroom Quick Start Class. Learn to use this great program and create more creative beautiful images!
BPSOP Instructor – Holly Higbee-Jansen
 Holly Higbee-Jansen is photographer, trainer, blogger, and workshop leader who enjoys teaching and the creative process. Her passions include teaching photography workshops in beautiful locations in California, Iceland, Costa Rica and the American West with her husband Mark. Holly also teaches online classes on Lightroom, Photoshop and photographic technique. Get Holly’s Free E-Book on “Landscape Photography and the Light“ and find out about her newest workshops at Jansen Photo Expeditions.com.
Reach Holly by email at [email protected] and check out her blog and photography portfolio at: HollyJansenPhotography.com
Holly Teaches:

Do you want to learn to create images that show the beauty of the scene you saw when you took the photograph? Do you want to learn the other essential side of digital photography, photo editing and get up to speed quickly?
This course is designed to get you up and running FAST in this incredibly powerful program. In this two week information packed class, you will learn how to import, organize and perform simple and effective editing processes that will let you produce beautiful adjustments to your pictures.
iPhone Photography
In this class, we will introduce you to the magic of iPhone photography using several shooting and editing apps that will give you the ability to make your pictures sing in a fun and easy way.You will learn how to crop, change saturation, brightness and affect the overall look of your pictures with HDR, drama and grunge filters and other techniques. You will be amazed at the simple and effective methods.


