We live in a hectic, fast paced world. It seems like everyone is always pressed for time. A Mary Chapin carpenter song wraps it up perfectly – ” … everybody’s got to go, got to be, got to get somewhere.” I know this feeling all too well and have consciously made changes in my life to slow down and just breath in many ways. When we slow down we see more. And you really need to see your subject in order to connect with it. It doesn’t matter if it’s a person, pet or thing. If you don’t take the time to get to know your subject, all you are doing is taking a snapshot. So slow down, connect and make your subject shine through your lens.
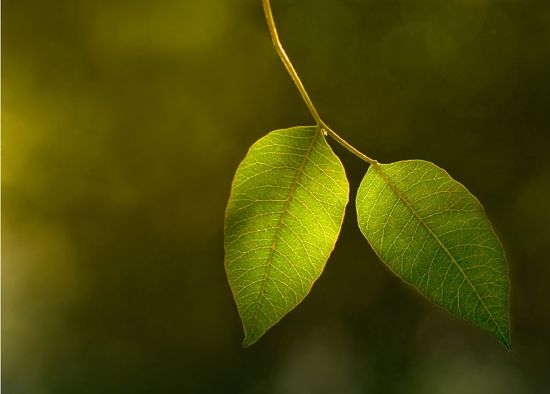
One way to do that is to isolate your subject. There are various ways to do this. A common way is with selective focus. Shooting with a wide aperture and creating a shallow depth of field is an easy and effective way to showcase your subject and turn the background into a dreamy blur. Keeping your subject a good distance from the background (try 20 feet or more) and using a long focal length will help too. I took the following photo with my Nikon 85mm lens, f/1.8 @ 85mm. The background was a bunch of bushes and trees that were about 25-30 feet away. I found a few dangling leaves with some backlighting. I think the backlighting made all the difference in the world. There were all kinds of leaves dangling, but it was the backlit ones that made me stop in my tracks. It took me a few minutes to find these leaves, but it was well worth the time. I spot metered on the leaves. I wanted to expose for the leaves to show the intricate detail. For me, it’s that detail that makes the leaves both beautiful and fascinating. The combination of backlighting and selective focus made the leaves shine.
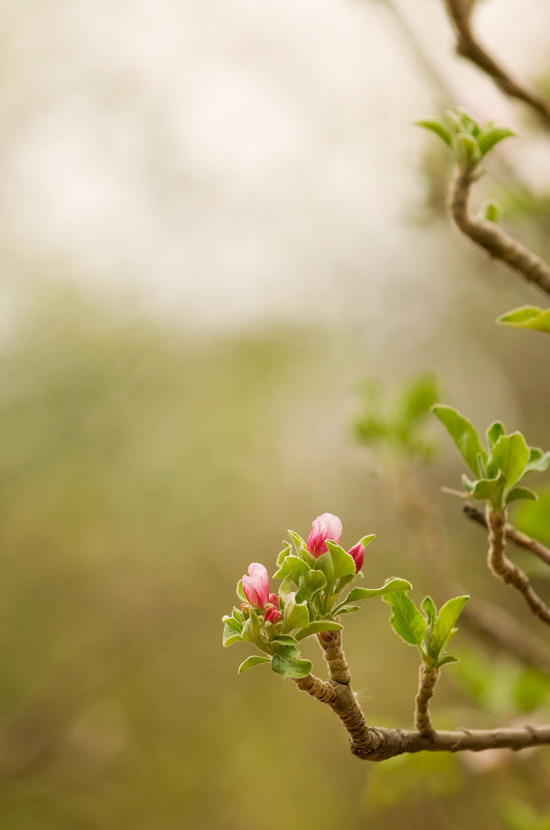
You can also use negative space to isolate your subject as in the picture below. I used a combination of negative space and selective focus. I used a shallow depth of field to blur the background and then used negative space to help draw the focus to the tiny blossoms. The negative space on top pushes the eye down to the colorful, tiny blossoms. I shot the following peach blossom buds with my Nikon 70-200mm lens, f/5.6 @ 200mm. The slightly overcast day provided soft light, which was perfect to photograph these delicate buds. I could have shot this tighter like the leaves above, but I think the all that negative space on top made the composition more interesting and even showcased the buds better than a close-up shot. So, consider combining different elements to place the focus on your subject. It’s all in the way you see your subject and how you want to tell your story.
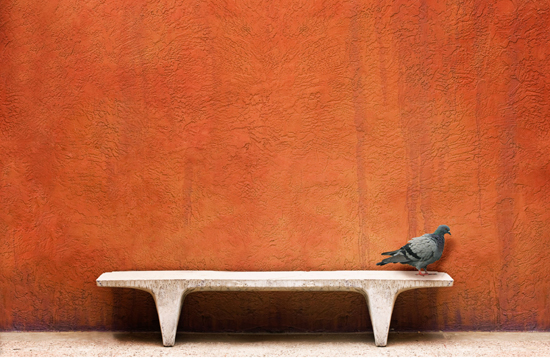
You can also use just negative space to isolate your subject. You don’t have to shoot shallow. The following photo of the pigeon on the bench is a perfect example. For me, the colorful, textured wall was just as interesting as the pigeon. I wanted to show the detail in everything, but still keep the focus on the pigeon. Using negative space was an ideal way to do that. I think the pigeon really stands out in that sea of orange color. I thought the wall looked like an urban forest with the stains and textures. I enhanced the color in PhotoShop to give it a little punch. Never underestimate the importance or power of your background. The background should always be a crucial element in your composition, no matter what you are photographing. Colorful walls make great backgrounds for all kinds of subjects including pets, people, vases, etc. Always be on the lookout for colorful walls. I took the following photo using my Nikon 28-70mm, f/8 @ 40mm.
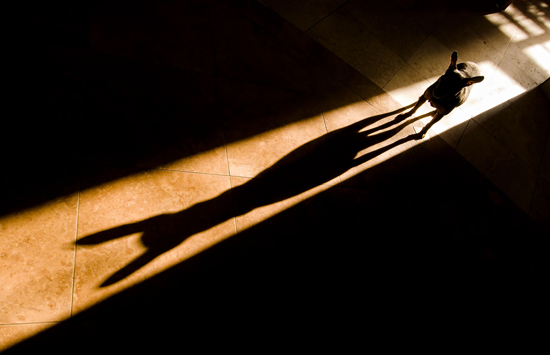
Framing is an excellent way to isolate your subject. There are numerous and creative ways to frame your subject. Using light and shadows is one way. Take the time to observe the light and shadows in your own home at various times of the day. Every home has windows, so watch for interesting patterns of light and shadows that fall on the floor when a subject is present. I took the following picture of my dog early one morning. I love how he is framed in the beam of light. The light was streaming through my office window, then through my office doors out into the living room. If you look closely, you can see the pattern of light from the window shutters (top right corner). My office has two doors and one of them was halfway closed – hence the beam of light across the floor. When my little dog stepped into the beam of light, my heart skipped a beat. I knew I had to get a picture of that. I grabbed my wide-angle lens because I wanted to get the long light shaft and the entire shadow. Shadows are longer early in the day and late in the day, so be on the lookout for long shadows. They can make a strong impact. This shot required no special setup other than enticing my dog to stay put. The light streaming in through the windows and doors created that unique frame on it’s own. I underexposed the image slightly to make the shadows darker and photographed this using my Nikon 12-24mm, f/5 @ 18mm.
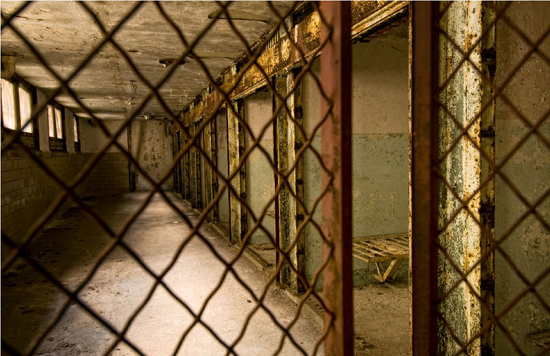
Combining framing and selective focus is another way to isolate your subject. Sometimes you need to use both when you have a challenging scene. I recently visited the Eastern State Penitentiary in Philadelphia. It is a fascinating place to take pictures. I took several images in Death Row and finally settled on the one below. I used both framing and selective focus to highlight the metal cot in the first cell. I thought that personalized the setting and made a strong impact emotionally, at least it did for me. I also took pictures where the metal gate in front had the focus and the cellblock was blurred. I also took pictures where everything was in focus except the metal gate. I spent a lot time taking pictures in that area trying different focal points and compositions, until I settled on the one that worked for me. Some settings are more challenging than others to photograph. But it’s the challenging scenes that teach you the most. I took the following photo using my Nikon 12-24mm, f/5.6 @ 17mm.
If you take the time to slow down and invest in your subject, you will learn a lot about yourself and become a better photographer too.
Jill Flynn
www.visualharmonyphotography.com
Jill teaches Pet Photography for BPSOP


