There are a lot of really helpful menu commands you can discover if you make a habit of right-clicking various items inside of Lightroom 3. Here are a couple of Folder panel tips every Lightroom user should know about.
Update Folder Location
Let’s say you bought a new hard drive and you want to copy your entire existing folder structure of photos to the new drive and have Lightroom point to this new drive instead of the old one. This is where Lightroom’s Update Folder Location command comes in handy. Here’s how to copy your existing folder structure to a new drive and keep Lightroom in the loop:
1. Open Windows Explorer (or Finder on a Mac).
2. Copy the entire folder structure (as-is without changing the structure) to the new drive.
3. Open Lightroom.
4. Once the copy operation is complete, right-click (Mac: ctrl-click) the top-most-level folder in the Folders panel and choose Update Folder Location.
5. In the resulting dialog box, navigate to and select that same top-most-level folder in the new drive (the one you just copied over there).
Lightroom will update the catalog to point to the new folder (and everything inside of it). Give it a test run to make sure everything is as it should be before removing the originals from the old drive.
This entire process is made much simpler if the top-most-level folder (or parent folder) containing all your photos is visible in the Folders panel because then you only have a single folder to update.
Add Parent Folder
Let’s say you have a folder structure by year like this:
Which is fine, but now you need to move or copy all those folders to a new drive. In this setup you would need to move one year at a time because Lightroom won’t let you select multiple folders for a move operation, or if you did the Update Folder Location trick above you would have to update each folder separately. However, if the parent folder of all those year folders was added to the Folders panel you could just select the parent folder and move or copy it to the new drive, which would bring along all the subfolders and their contents.
To add that folder, just right-click (ctrl-click on Mac) and choose Add Parent Folder from the contextual menu.
This results in that parent folder appearing in the Folders panel.
This not only makes it easier to manage folders but also gives you one more collapsible level of structure in your Folders panel.
Promote Subfolders
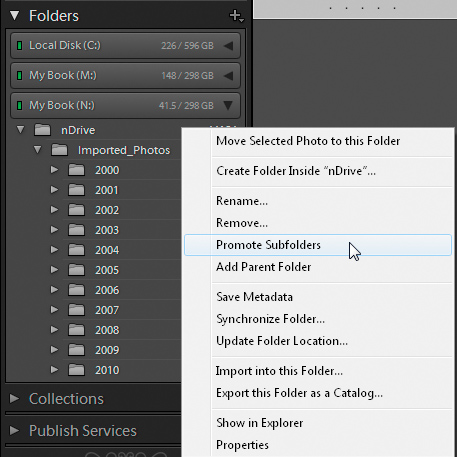
On the subject of adding a parent folder I also want to show you how you can remove a parent folder from the Folders panel. Let’s say you have an upper level folder showing in the Folders panel, and there are not any photos stored at the root level of this folder. This is just a parent to your parent folder and it only contains other folders. For example, in this screen capture the folder called nDrive is just the parent of my Imported_Photos folder and contains no photos of its own.
It really is just taking up space in my Folders panel and I’d like to just remove it from the catalog. It will still exist on the drive of course, but I won’t see it in Lightroom anymore. If I right-click (ctrl-click on Mac) the nDrive folder and choose Promote Subfolders:
I will get prompted with this confirmation dialog:
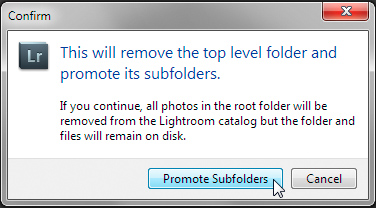
Lightroom is making sure I really want to remove that folder because any photos stored at the root of that folder would also be removed from the catalog. Since there aren’t any photos at that level I’ll click the Promote Subfolders button and the nDrive folder vanishes from the Folders panel.
Note: Having a solid backup in place prior to such a big operating is always a good idea.
One of the most important things every Lightroom user can do is to remember to perform all file/folder management tasks (moving, renaming, deleting, etc.) from inside of Lightroom so that you maintain the connection between the Lightroom catalog (database) and you photos. These are some of the things we cover in my Lightroom for Everyone here at BPSOP. If you’ve ever struggled with any aspect of Lightroom then this class is for you. I’m also happy to answer any questions you may have about my class or Lightroom in general, just visit my blog and drop me a line: http://lightroomers.com
Cheers!
Rob Sylvan / Instructor for BPSOP
Rob Teaches:


