Renewing the Magic with the Sol 45


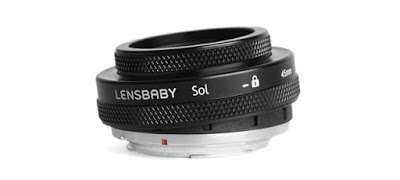
I have been testing something new from my friends at Lensbaby and am madly in love with this little lens! It’s called the Sol 45 and it has renewed the magic that Lensbaby has always brought to my photographs. This is a lightweight sweet spot lens, 45mm, with a fixed f/3.5 aperture and a 14 inch minimum focus distance.  It’s all metal and tilts within the rule of thirds and also locks into a center position. The magic comes with a secondary feature,  it has “bokeh blades”, two little arms that sit out to the side of the lens that can be moved in front to get texture in your bokeh, or left to the side when you don’t want to use them. You can also rotate them so the texture can go in any direction to match or contrast with the lines in your subject. So now I can add a texture to my background right in camera, how cool is that? It is also inexpensive at $199 and very simple to use.

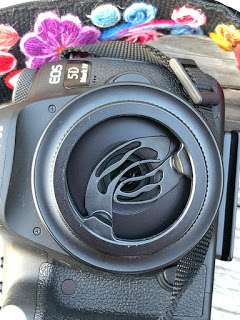
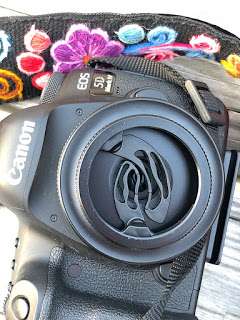
Here is a shot of the inside of the lens with the blades together and also out of the way:

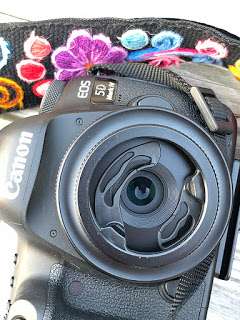
You can change the tilt of the blades easily:

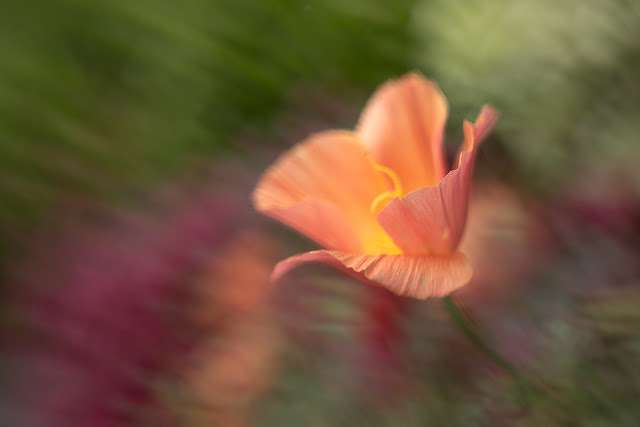
I haven’t taken this lens off my camera since it arrived. I have been feeling a shift in my work recently for more blur and limited depth of field, and the fixed f/3.5 aperture fits that beautifully. Shooting for selective focus makes you slow down, compose carefully, and think about what it is you want to highlight in your subject. Careful focus placement is also essential with this type of work.

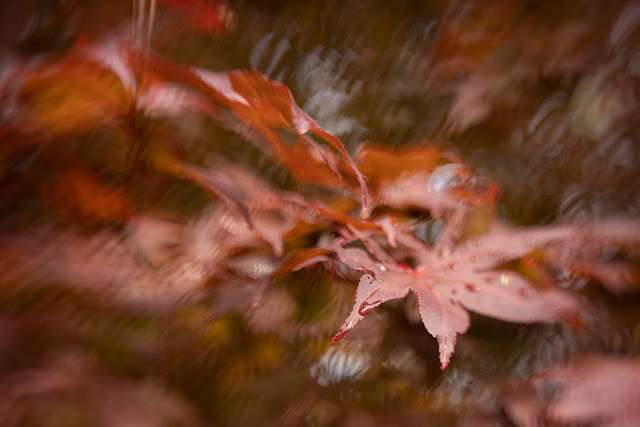
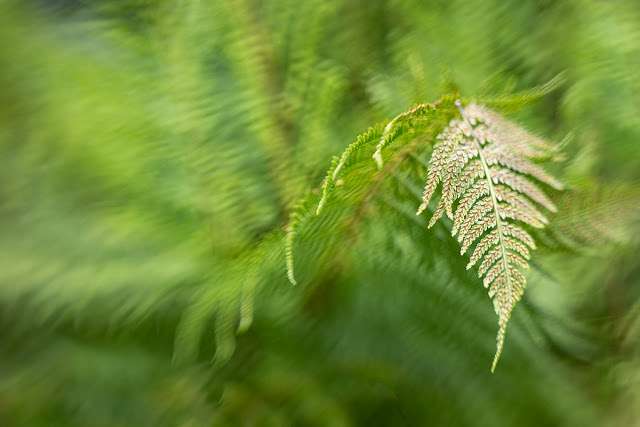
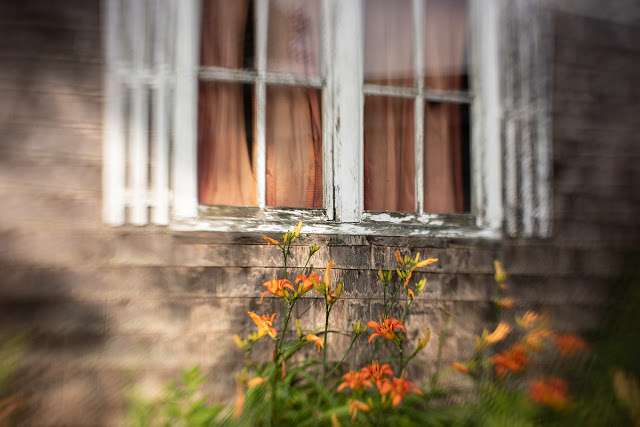
Here are some samples of what I have been shooting, straight out of the camera. I have used the Lensbaby Macro Lenses for some images, the +2 is just right for the Sol 45:


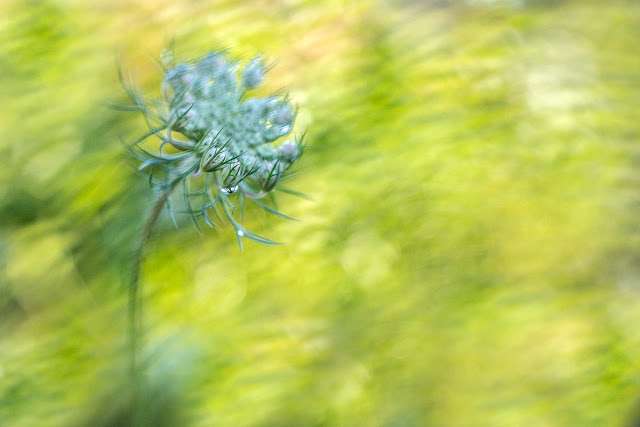
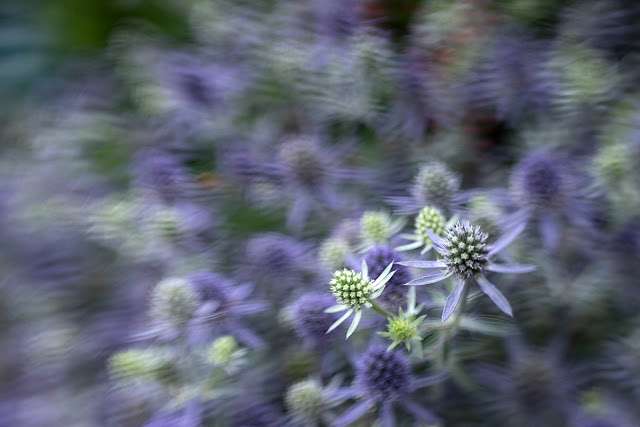
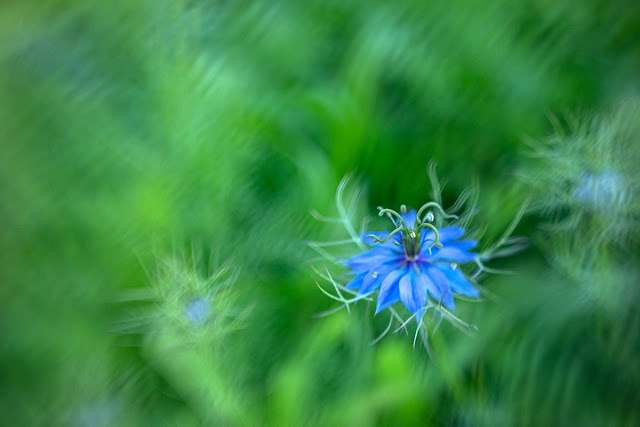
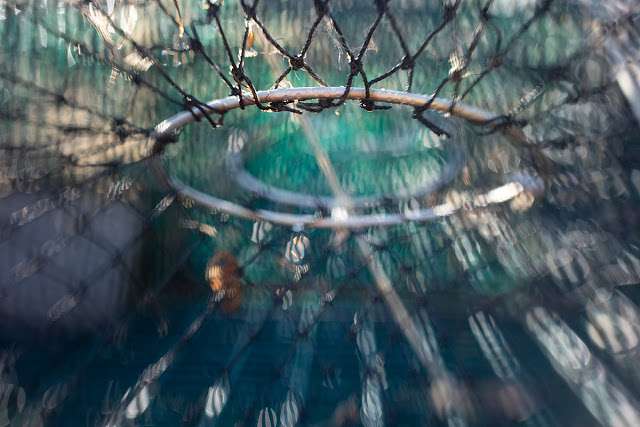
This lens is definitely not just for macro and not just for flowers, I had fun shooting many different subjects, even lobster traps!

There is also a version for Micro 4/3rds users, the Sol 22 has a minimum focus distance of 3.5 inches.

A few tips for using the Sol 45:

~A background with lots of lines will show more effect.
~You can push the blades out of the way if you don’t want the effect for a particular subject.
~Remember the minimum focus distance, if you get closer than the Sol can focus you will get frustrated.
~ Try tilting, don’t put all of your subjects in the center.
~Compose and focus carefully, use selective focus to draw your viewer’s eye to what you found to be more interesting in the scene.

Happy Shooting,

“I just wanted to thank you for another wonderful class. I have to confess that each week when I read the new assignment, my first reaction was mild panic and a deep certainty that I would not be able to produce anything worthwhile that fit within the parameters you had set. But before I knew it, the ideas started to flow, and I quickly became obsessed (no, that isn’t too strong a word!) with exploring the possibilities. I can honestly say that the photos I produced in response to your assignments are among my favorites. Thanks for bringing out a creative side I didn’t know I had!”

Barbara Geiger
Understanding Color

“Thank you so very much for this course! It’s allowed me to take the blinders off and present my images for what I want them to be without being a slave to the “reality” of the camera. I would also add that in conjunction with your printing course, this has been the most useful course I’ve ever taken. Your notes are more than comprehensive and your comments and critiques are direct, clear, and always directed to the improvement of the art.”

Bill
After the click

” I want to thank you for this class and for your patience and availability to answer all of my questions. I have learned very much through this class. I have used LR in the past, but mostly for editing images. I now have a better grasp in the organization of my images, an even better understanding of editing images, and an understanding of the value of presets. I still have a lot to learn, but this has put me on the road to be able to improve my photography. Again, thank you! ”

Dale Yates
Lightroom Quickstart

Classes Starting Soon!

Understanding Exposure and Your DSLR

Instructor: Bryan Peterson Duration: 6 Weeks Cost: US$169 Without que…

Wireless Flash Techniques for Outdoor & Nature Photographers

Instructor: Rick Burress Duration: 4 Weeks Cost: US$129 Learn Photoshop…

The Real Photoshop Course

Instructor: Charlie Borland Duration: 4 Weeks Cost: US$129 Are you a …

The Ultimate Guide to Adobe Bridge CC

Instructor: Rick Burress Duration: 4 Weeks Cost: US$129 The Anti-Catalo…

After the Click – Refining Your Vision in Lightroom & Camera Raw

Instructor: Mark English Duration: 4 Weeks Cost: US$129 Why do some ima…

Editing in Adobe Camera Raw

Instructor: Rick Burress Duration: 4 Weeks Cost: US$129 If you love pho…

Exploring Adobe Photoshop Lightroom & Lightroom for Mobile

Instructor: Holly Higbee-Jansen Duration: 4 Weeks Cost: US$129 In this …

Lightroom Quick Start

Instructor: Holly Higbee-Jansen Duration: 4 Weeks Cost: US$129 Do you w…

Mastering Apple Photos

Instructor: Jon Canfield Duration: 4 Weeks Cost: US$129 Mastering Apple…

Luminar Essentials

Instructor: Jon Canfield Duration: 4 Weeks Cost: US$129 Luminar is an …

The Art of Printing and Selling Your Art

Instructor: Mark English Duration: 2 Weeks Cost: US$76 The print is the…

The 50 Most Useful Tips in Photoshop CC and Photoshop Elements

Instructor: Roger Morin Duration: 2 Weeks Cost: US$76 This two-week cla…

50 MORE Photoshop Tips & Tricks

Instructor: Roger Morin Duration: 2 Weeks Cost: US$76 This two-week cla…
Translate »