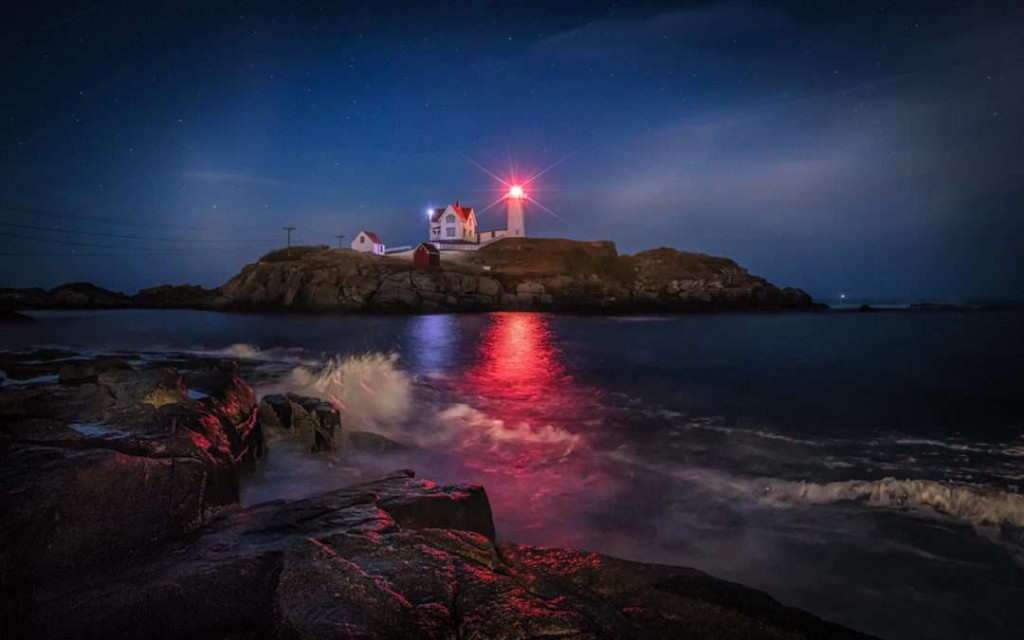
Eastern Point Lighthouse in Maine
Those five magic words sum it all up for me with photography: “It’s all about the light!” Whether sunrise to sunset, the light is the key. But truth is, with shooting after dark, it is also all about the light! I think I have always been infatuated with shooting after the sun goes down but things have changed so much, especially when digital cameras arrived many years ago. Playing around and experimenting with different light sources can open up a whole new world with shooting after dark. With your LCD screen, you can instantly see how your nighttime endeavors are working.
In this article, I wanted to talk about some of the different ways to capture images using different lighting ideas and methods and the endless possibilities that await anyone who has a desire to shoot after dark. I have always experimented with so many different techniques and taught many different courses specifically on shooting after dark and I hope to show what you can achieve out there and why you might want to choose one method over another.
When I am planning to shoot after dark, there are so many options and some might work better than others. You can for example; shoot the Milky Way without any light on the foreground and the Milky Way and night sky become the only real light source in the image. You could also try different lighting techniques for the foreground that might add a completely different effect to the image of the Milky Way. Shooting after dark opens up a whole new world and experimentation really is the key. A lot of trial and error can add up to some great techniques that can really change your attitude about bringing out that camera after dark.
Some of the different ways to shoot After Dark can include:
- Light painting
- Moonlight
- Overexposure
- Artificial light sources like mercury vapor, etc.
- Car headlights
- Car trails
- Lightning
- LED Light Panels
- Cities and architecture
The sky really is the limit and I wanted to show some different examples on why you might want to try different methods and also open up your mind to trying different things after dark like car trails or lightning. So many different things that you can do after dark but also different techniques to give you different results. You will get out what you put into it and eventually, you will have new ideas to try in many different locations, anywhere in the world!
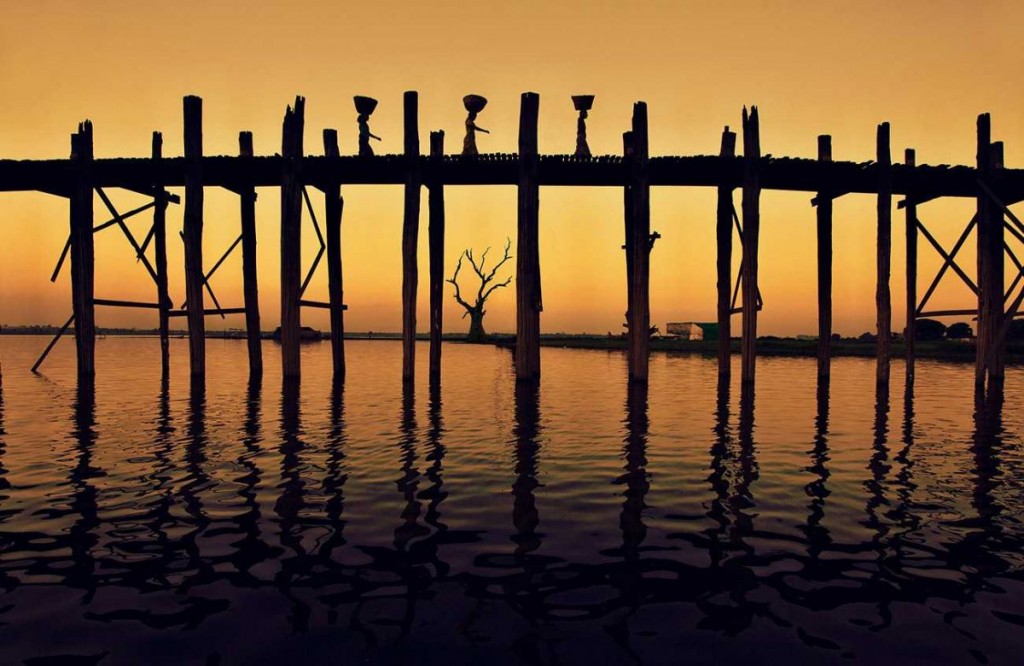
The Ubein Bridge in Burma at sunset
Lightpainting
The definition of photography is actually “painting with light” so I guess we have all been “lightpainting” since we started shooting. I have been experimenting with different light sources, and playing with lightpainting for as long as I can remember. I’ve tested out an incredible amount of flashlights and light sources throughout the years and they can really be a complete game changer for your images. If you haven’t tried to use different flashlights in some of your images after dark, it is something that can be a total game changer. One important note to remember: try and always lightpaint from the side as frontal lighting is way too flat!
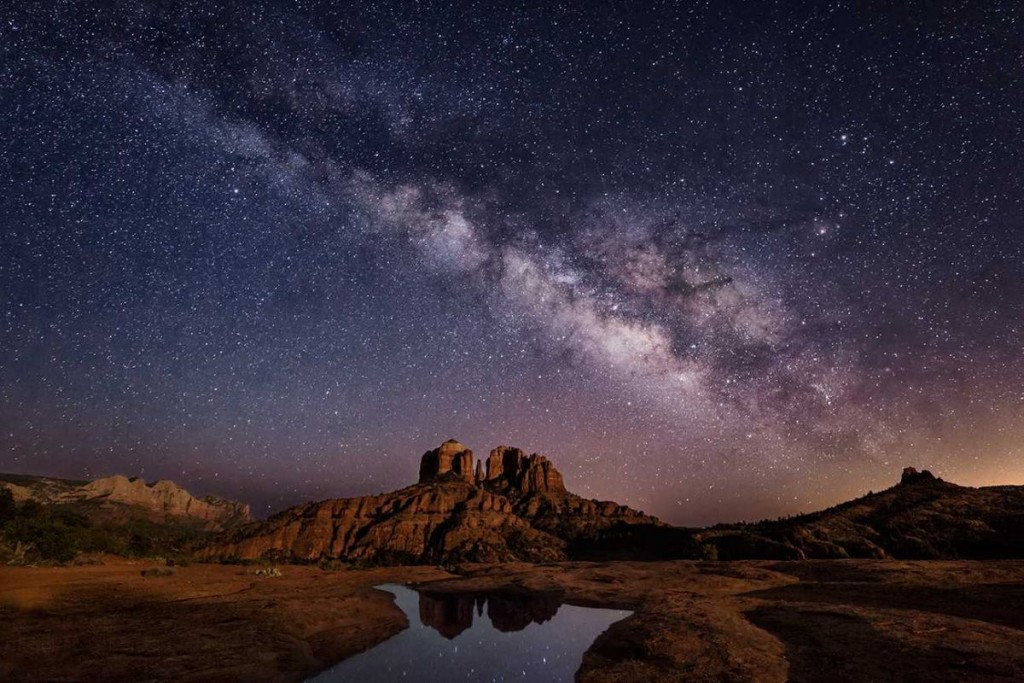
A few weeks ago, a friend and I shot Cathedral Rock and the Oak Creek River, where I live here in Sedona. I wanted to test out a new flashlight and do some light painting and also shoot a similar image with only the moonlight. We were in complete darkness when we arrived at 10:30 PM by the river and we set up to do light painting with my new light. When we finished those images, I shot star trails until the moon came up and then I changed my exposure and only shot by moonlight. So I actually came away with three different shots that night but my main test was comparing light painting against moonlight and what a similar shot might really look like between both light sources.
Below are both images, the first with only lightpainting and the second with only moonlight. I used a layer mask to paint in the moonlight on the second image so you could see exactly the difference. They both look pretty cool and this turned out to be a good eye opening test for us! The third image is one with star trails and only moonlight, which I also like.
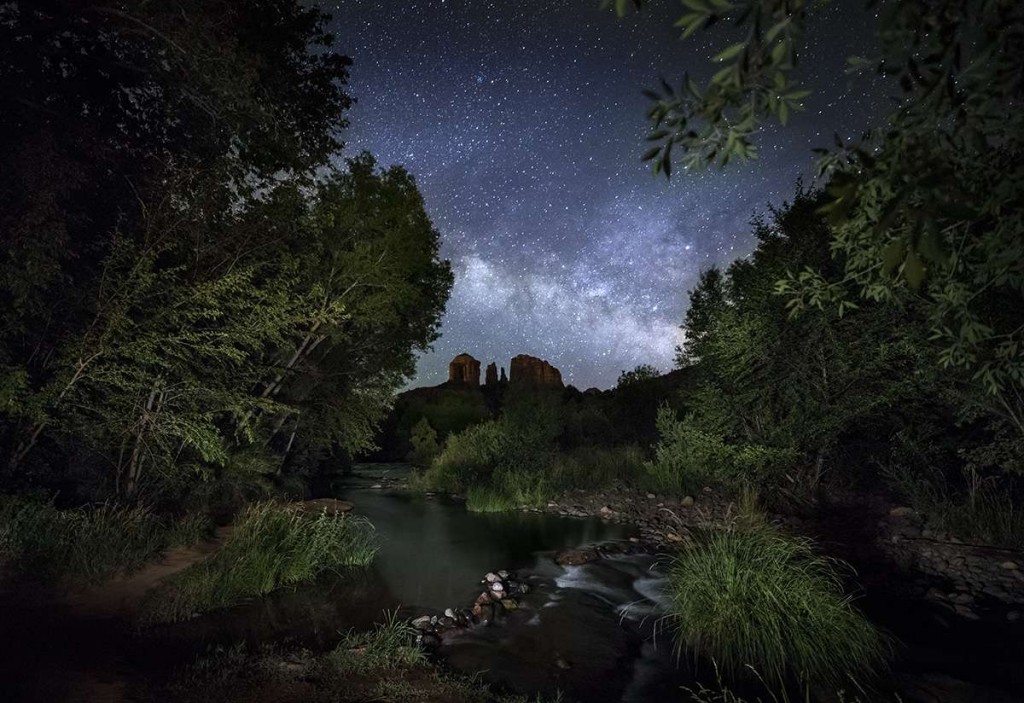
Milky Way and lightpainting above Sedona
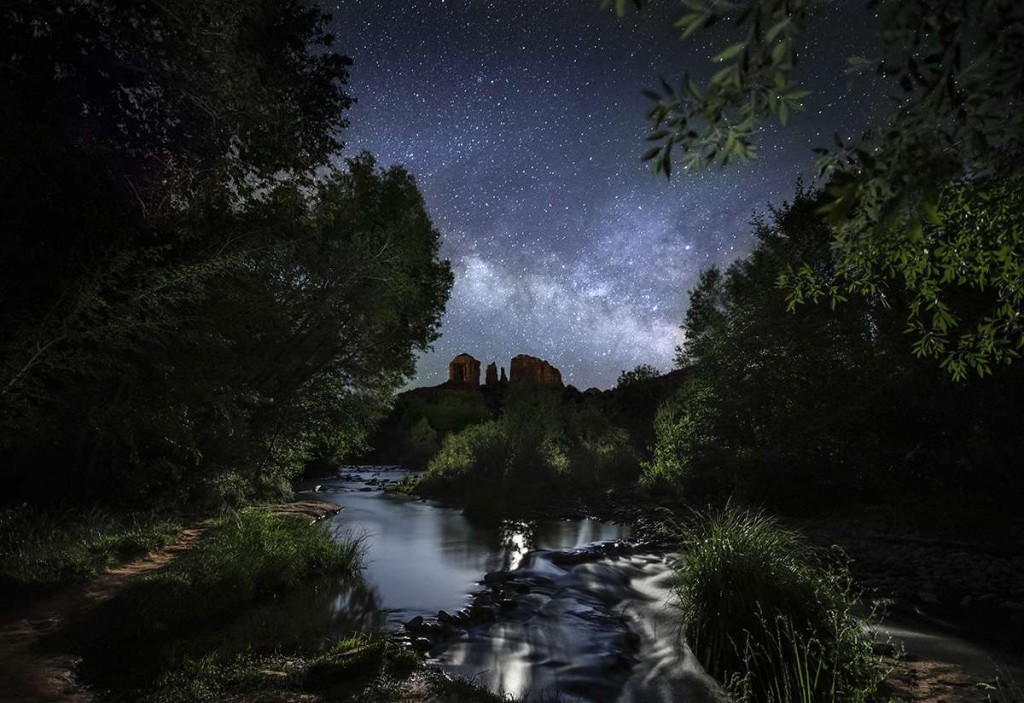
Milky Way and moonlight above Sedona

Star trails and moonlight above Sedona
By comparing the first two images above, you can really see the difference between using a flashlight compared to using the moonlight. I knew by getting there before moonrise, that I could try both of these techniques from the same location. That is something that I love to do as its sometimes hard to know which camera technique might be better for a particular image. Sometimes I prefer light painting and sometimes I prefer the moonlight or another technique.
The next image, is another one I did here in Sedona in the exact same way, but in reverse. I went out with a friend around 1am to shoot Cathedral Rock, from a different vantage point, and we shot first with moonlight and then left our cameras in the same place until the moon went down around 2:30am and then we shot the Milky Way. Later, when I worked on the images, I layer masked them together in Photoshop. I knew with this setting that I could never lightpaint the red rocks nearly as good as the moon could light them. Sometimes it’s pretty obvious that the moonlight will work better than any kind of light painting.
Moonlight and Milky way above Sedona
In the image below, also in the red rocks of Sedona, I planned on capturing a panorama of the Milky Way, just before the moon went down, so that I could get beautiful moonlight all across the red rocks. The moon was less then half full and if the moonlight is not too bright, you can combine everything in the same shot so that you don’t have to do any layer masking and do multiple images. It is also crucial that the moonrise or moonset is as far away from the Milky Way as possible. Moonlight by the Milky Way can ruin the image. Milky Way panoramas require more work but I love capturing them as all of the work is worth all of the effort!
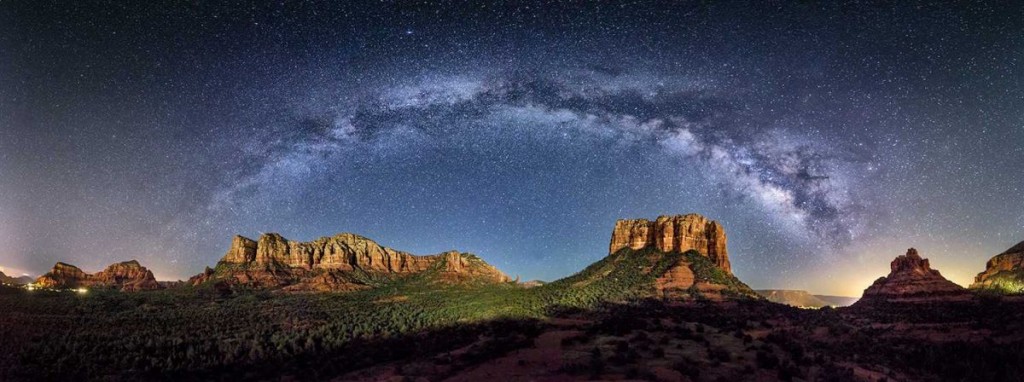
Milky Way panorama and moonlight above Sedona
Below are more examples of lightpainting only, where it was completely dark out except for sometimes possibly distant lights. The only real source of light was my flashlight and sometimes the light painting can be for the main focal point or can be just for the foreground. I have many kinds of flashlights with different power intensities and color temperatures and finding the right one for a particular image is key.
Lightpainting only:
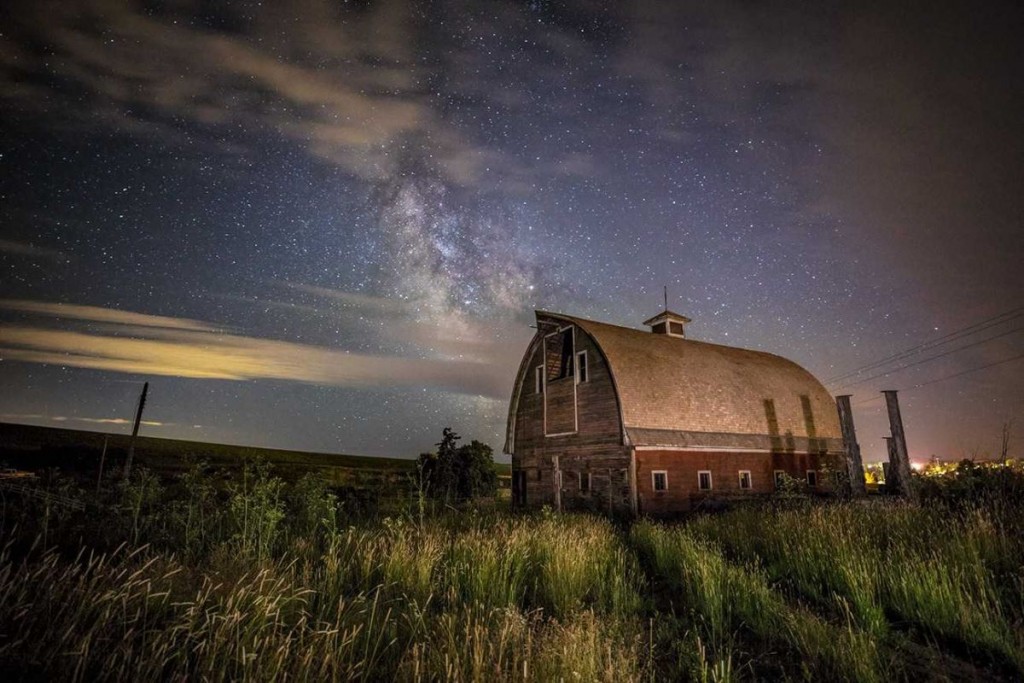
Lightpainting an old barn and tall grass in the Palouse
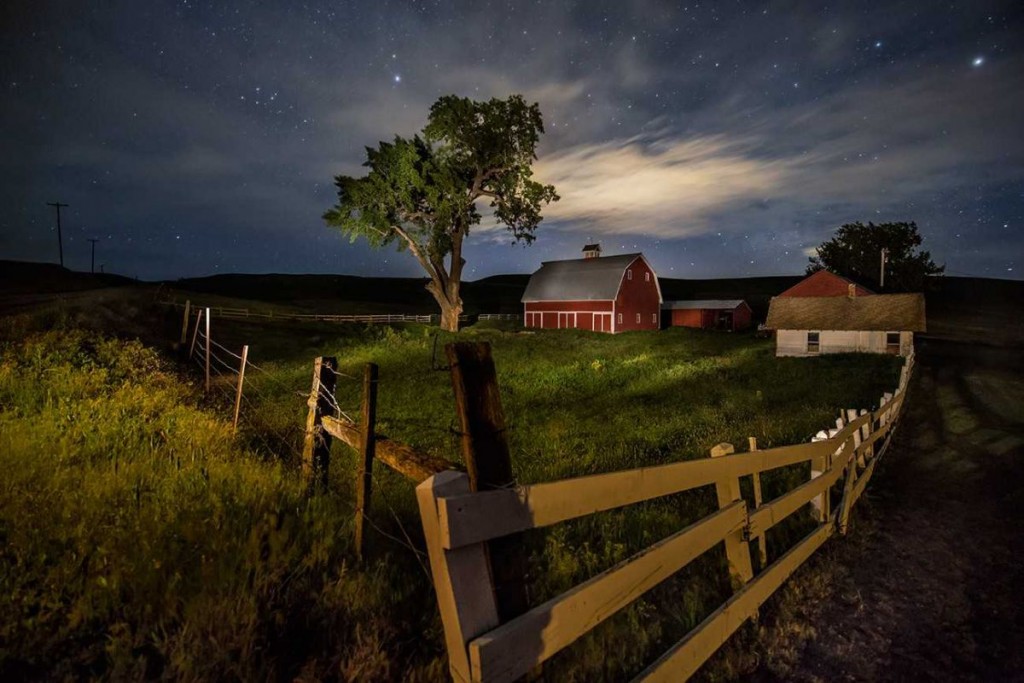
Lightpainting on my friends’ property in the Palouse
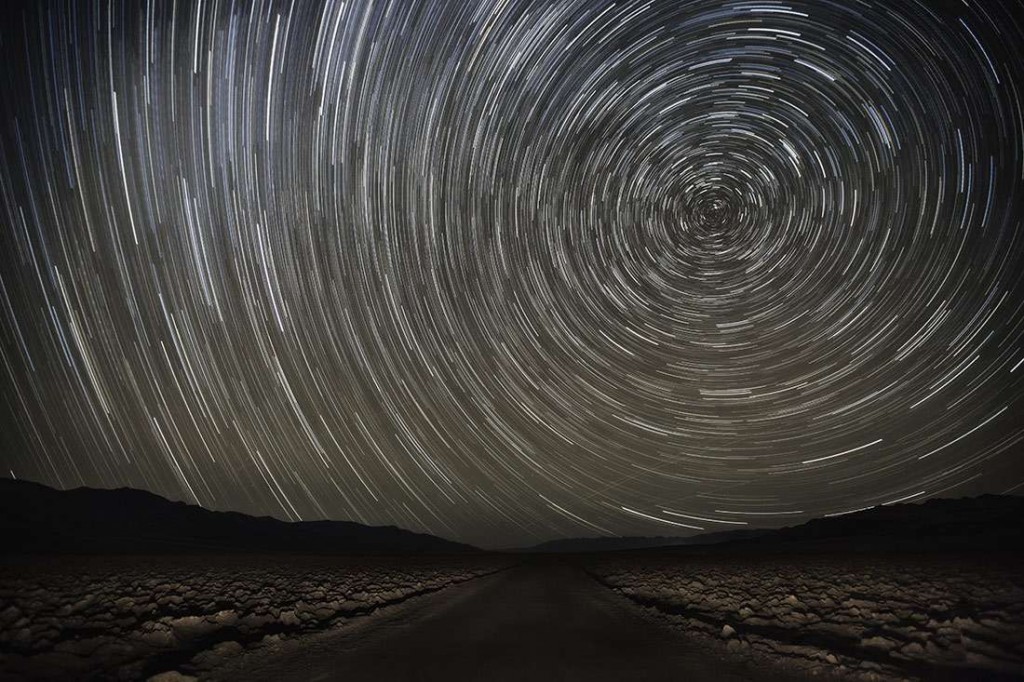
Lightpainting on the Devils Golfcourse in Death Valley
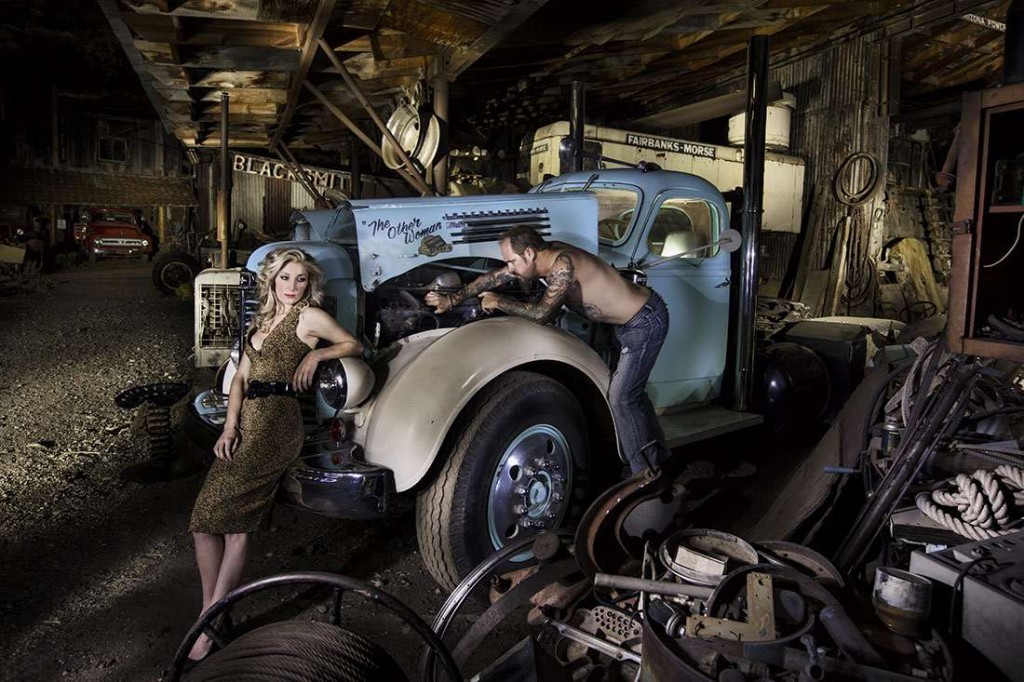
Lightpainting in an auto graveyard near Sedona
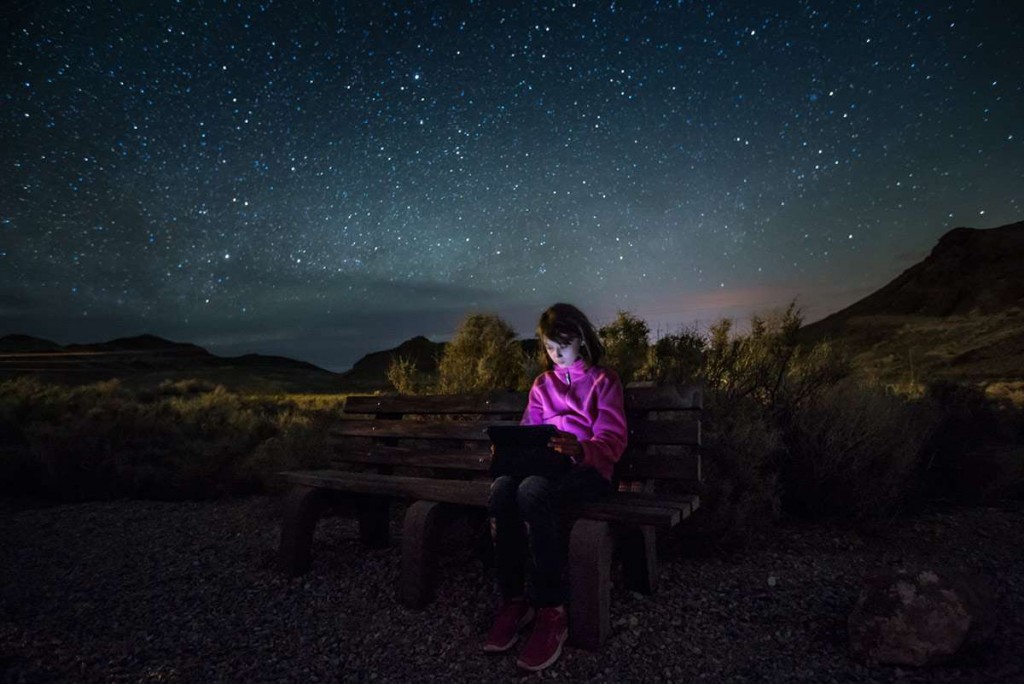
Lit by an iPad in Death Valley National Park
Sometimes, I like to include people in my after dark images and there are different ways to do that, usually with light painting. But I also like to use the light from a cellphone or iPad and you can come up with some pretty creative after dark images this way. The first image below was a two minute exposure in complete darkness at a junkyard. I positioned the two people just where I wanted them, while I had my headlamp on and then turned off my headlamp. I told them not to move for two minutes, which was not easy, but I knew in my head exactly what I wanted to capture before I set them up. I used a very low powered flashlight to paint them as low light is crucial with shots like this. It usually takes about 10 or 12 attempts before you get something you like, but the payoff is definitely worth it and I captured exactly what I had envisioned.
With the next image below with the young girl, we were in Death valley on one of my workshops. I placed her on a park bench in a perfect location and I lit her with just her iPad to illuminate her red fleece and her face. I knew how the shot would come out even before I took the photo. With enough experimenting, you can predict your results. And she got a pretty cool portrait from that fun night under the stars!
Stay tuned for Part II coming soon!
-BPSOP Instructor: Scott Stulberg
Scott Teaches:
Eye to Eye: Capturing the Face


