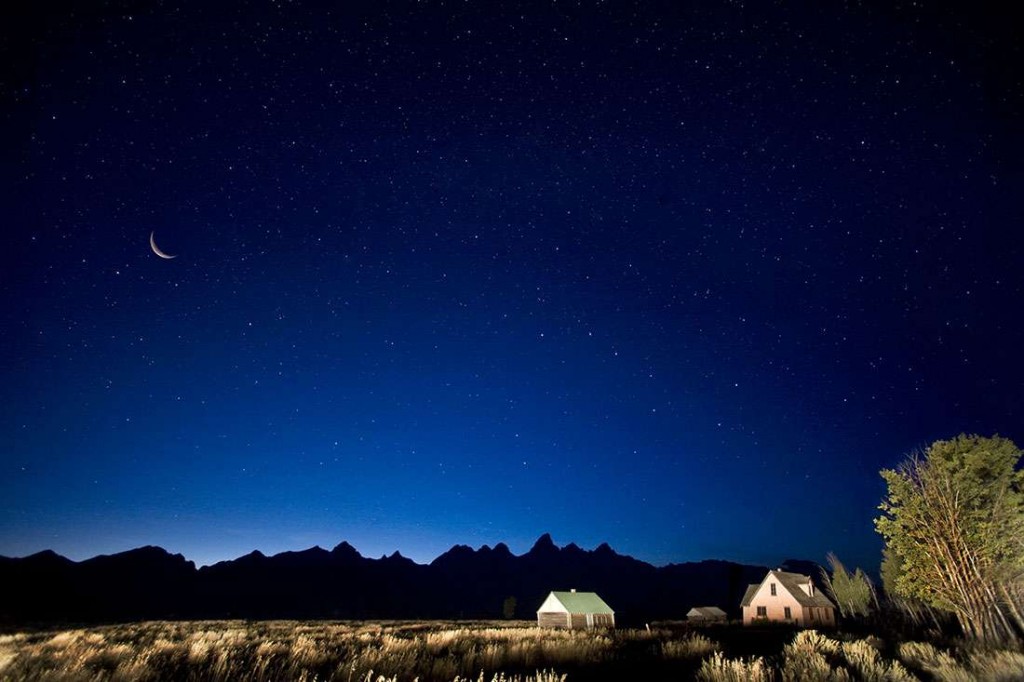
Car headlights in Jackson Hole
Lightpainting vs car headlights
I have experimented with light painting and car headlights for many years and sometimes, the lights from car headlights can be absolutely amazing. Often, while I’m in the middle of shooting a shot after dark, and using my flashlight, a car will drive by somewhere close by or in the distance, and sometimes it can ruin the shot but sometimes you get what I call a “happy accident”. It can give you a look and feel that you really could not have gotten any other way. Often I hope a car will come into my night shot and other times, I have to have someone drive their car to get the look and feel I am hoping for.
The shot below of the Mormon Row Barns and Tetons in Jackson Hole Wyoming, we were teaching a workshop and how to light paint the barns and houses. Out of nowhere, a car drove by and his lights lit the bushes and houses just beautifully. He drove towards the homes and then turned left and was out of the picture as fast as he came into it. Although we tried to re-create it afterward with our own car, we could not get the same beautiful look that he had given us by accident.
I love car headlights and sometimes, like I mentioned, I have students or friends drive in the perfect spot or I will wait for a car to drive by, although sometimes you have to wait forever for a car to pass by. But for me, it is worth the wait. The following two shots show the difference between using lightpainting and car headlamps. The first image below with the Milky Way is one in the Palouse of my friends old abandoned house using just my flashlight.
In the second image below, I shot star trails with my students and I had my friend drive about a quarter mile away and talked to him by telephone, and guided him to drive to the perfect spot to give me a great light source and angle with his car headlights, all across the wheat fields and the house. We shot that shot first before the star trails and later used that to layer mask it into the star trails final shot.
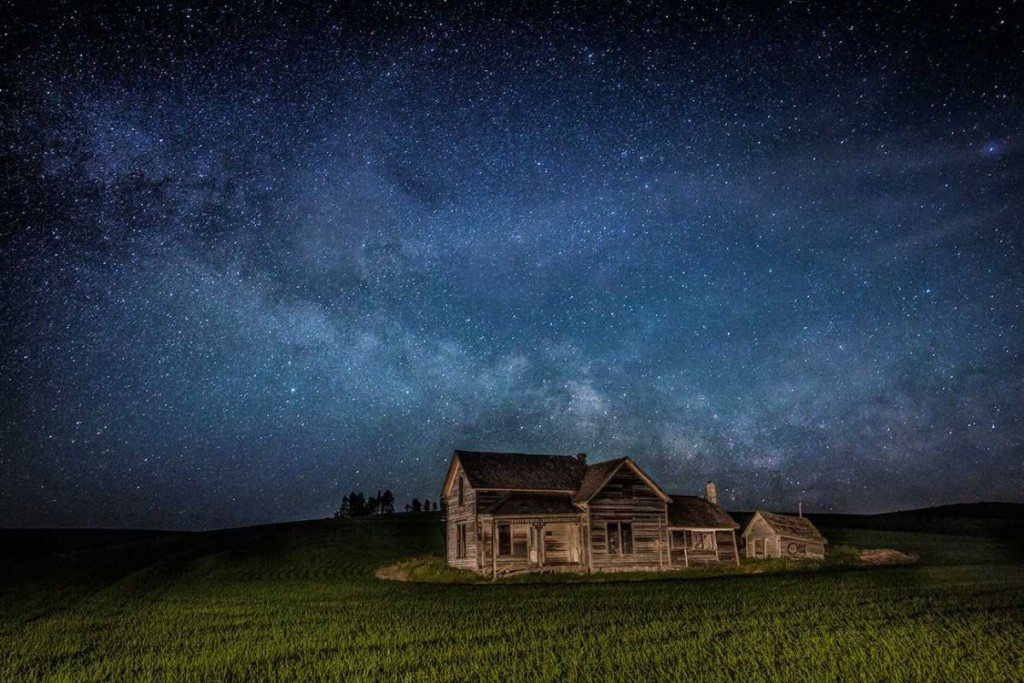
Lightpainting in the Palouse
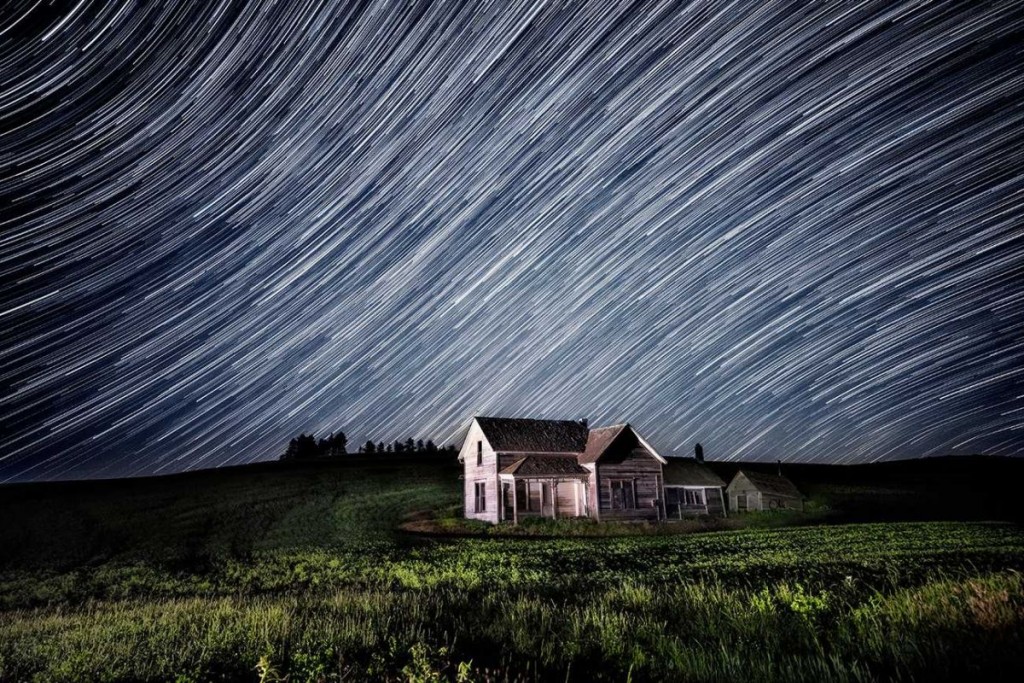
Lightpainting with car headlights in the Palouse
The following image with the star trails was one that I did recently with my students on one of my Italy workshops. We were in Tuscany and I wanted to shoot the Milky Way and star trails over the famous Cypress Grove. I had been lightpainting just the field in some of the Milky Way shots but I realized that I also really liked when cars were driving by on the bridge and their headlights lit up the foreground beautifully. I decided to use one of the headlight images for the foreground rather than my light painting for my final image as sometimes you just can’t be as good as headlights. While we were sitting and talking in the car, waiting for our star trails images, I later found out that I had captured one of the biggest meteors of my life. I wish I had seen it with my eyes but was extremely happy that my camera had captured it. I later put the star trails and meteor in the same image along with the car headlights image as the foreground. Was one fun night in beautiful Tuscany!
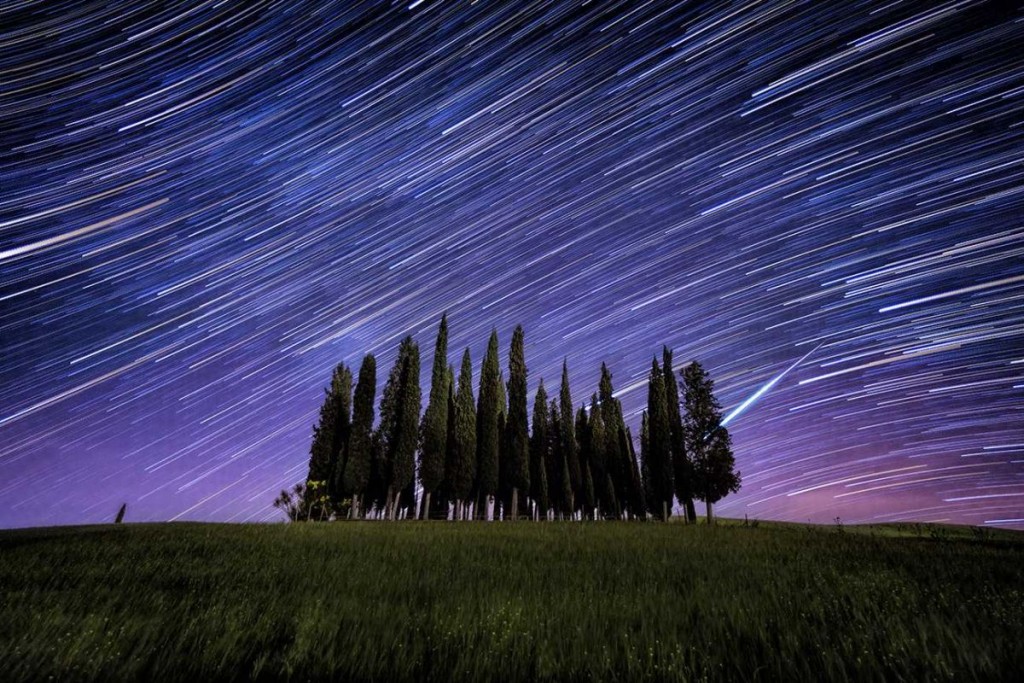
Lightpainting with car headlights in Tuscany
Sometimes I really like to use my car’s headlights so give me something special and I place my tripod right in front of my car with my headlights on. That was the case for the following shot when I was shooting the Milky Way with some of my friends above Flagstaff. I was looking for a perfect road that would coincide with the Milky Way coming straight down. When I found the perfect intersection of the two, I stopped my car and put my tripod in front of the car, between both headlights. I then worked the exposure so that my friend would turn on and off the headlights precisely so that I would get a perfect exposure overall. I could have also tried this with light painting but sometimes there is something just magical about car headlights!
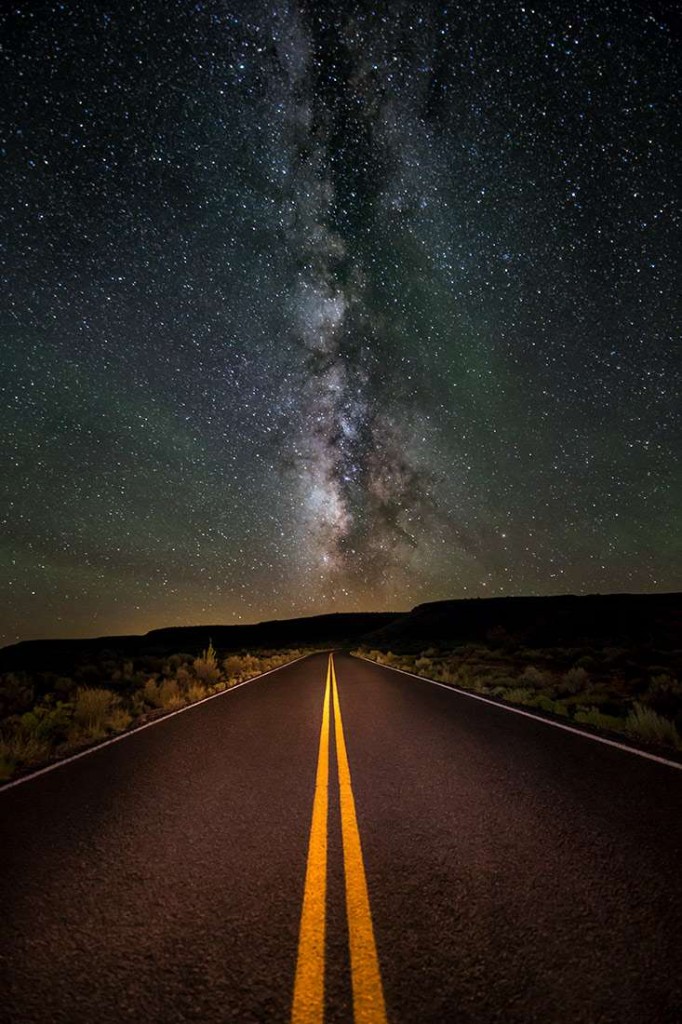
Lightpainting with car headlights in Flagstaff
In this next image, once again a car did a better job overall then my lightpainting as he drove in from our right and with his super bright headlights, gave me just what the doctor ordered!
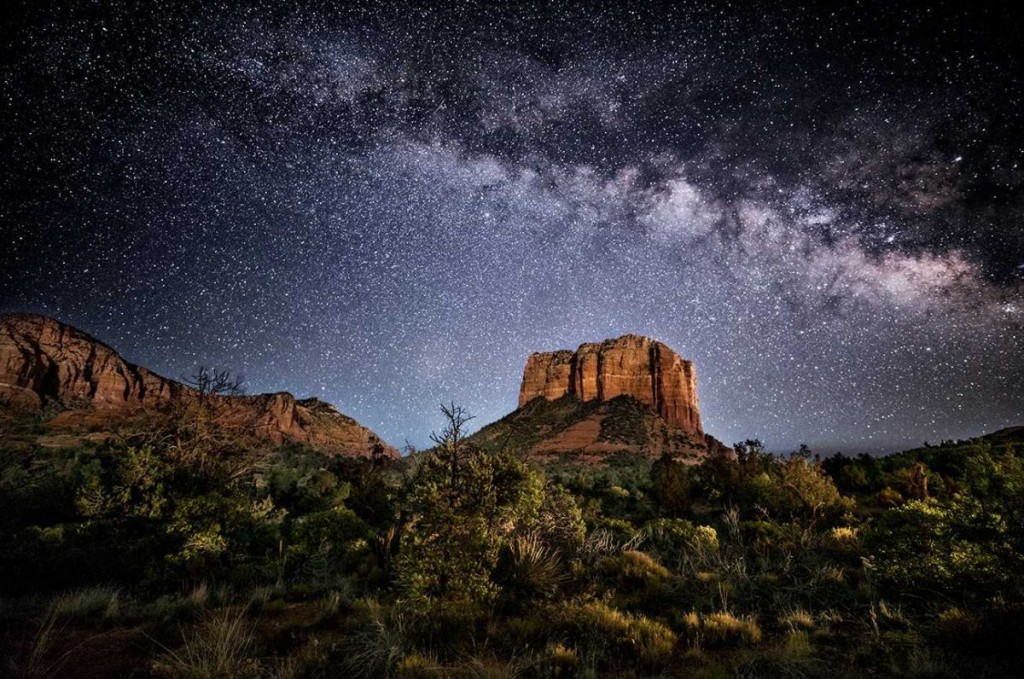
Lightpainting with car headlights in Sedona
Stay tuned for Part III coming soon!
-BPSOP Instructor: Scott Stulberg
Scott Teaches:


