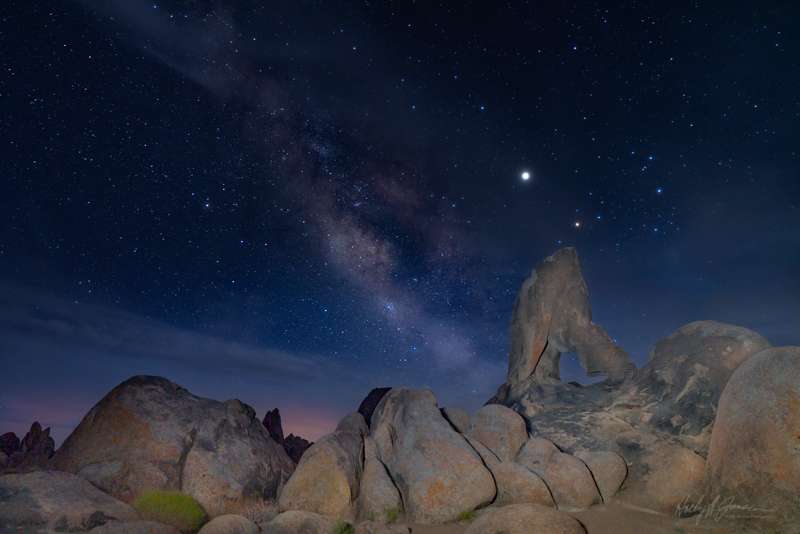
Sony A7RIII, ISO 800, 20 seconds at F2.8
We recently returned from hosting a night photography workshop in the Eastern Sierra Nevada Mountains in California. There are many challenges to astrophotography, and not the least of it is the post processing.
Not only do you need to be aware of the correct settings in your camera, you need to be shooting in an area where the sky is not affected by a lot of city light pollution. Also, the moon needs to be a sliver of a crescent, or none at all. Then, if you have met all those conditions, you will need to have a good grasp on the post processing that will bring out the best in the stars.
Our cameras these days have a much better dynamic range than in the past. Dynamic range meaning the range of light the camera can read from the shadows to the highlights. In low light conditions, the dynamic range (that is the difference between the darkest and the lightest part of the subject) is quite small. As a result with the newer digital SLRs, we are able to shoot in the most challenging situations. We are able to produce images which can be adjusted in Lightroom and Photoshop and bring out the beauty of the night sky.
Even with a camera with high dynamic range, it can be a challenge to deal with the noise and color of the sky when post processing.
Keep in mind when you are shooting in dark conditions, the image on the back of your camera may look great and the exposure may look perfect. Once you are out of the dark conditions, you will see that what looked like the perfect exposure, now appears to be extremely dark. So the lesson here is to watch the back of your camera and make sure that it looks brighter than expected. That way it should look good once you bring it in to Lightroom.
Another helpful note when shooting. Check your acceptable ISO setting on your individual camera before you set out on your night photography expedition.
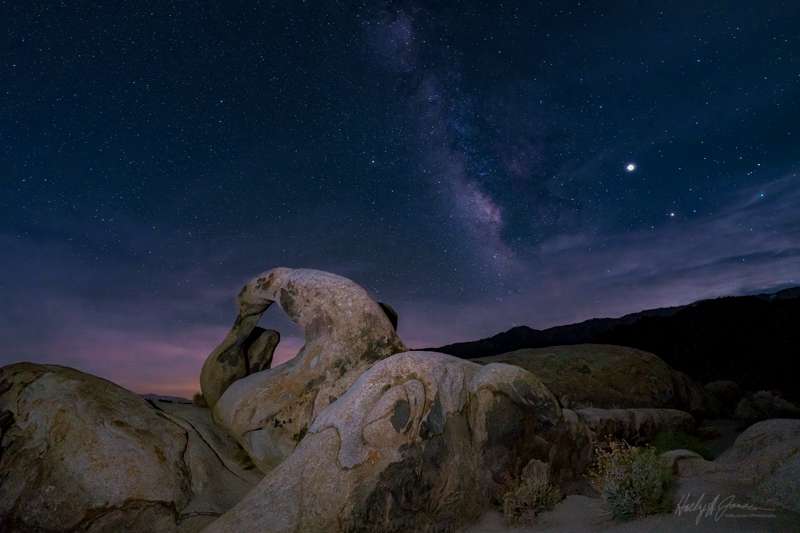
Sony A7RIII, ISO 1000, 20 seconds at F2.8
What exactly does that mean? Each camera deals with digital noise and light differently and each photographer has an acceptable level of noise that they are willing to see in their images. Test your camera before you go out on your shoot. Take the same picture in natural day light with a variety of different ISOs from 100 – 10,000. Check the noise level of each picture and see what you are willing to work with when you bring it back into Lightroom or Photoshop. This will be a good guide as to what ISO will work best with your particular camera in dark conditions.
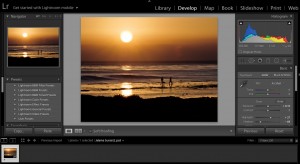
Here is my basic Lightroom workflow which can be adjusted depending on the image. If you are happy with these general settings, you can create your own preset for it in Lightroom. Each camera will render these settings a little differently, so treat it as a preset, a starting point for your digital editing.
The first thing you need to do is bring up the exposure and shadows.
I generally increase the clarity to between +25-30 and increase the dehaze by +18
Sony A7RIII, ISO 1000, 20 seconds at F2.8
Set the color temperature to a color that is pleasing to you. I tend to like the tones in the dark blues the best. Be very careful when you are adjusting color temperature. I tend to set the color and then come back to it to be sure that my eyes haven’t adjusted to a color that doesn’t work with the image. You may also get some light from a city or the sunset on the horizon. This can add some interest to your picture if it is not too bright and adds just a subtle glow.
Be sure that all of the pictures from the same shoot have the same color temperature and similar noise adjustments if you plan on sharing or printing many different images from the same shoot. You can do this by syncing your settings in Lightroom after you have completed the adjustments to your liking.
After you have completed these adjustments, I would go to the curves module and create a gentle S curve that works with the image. That would generally include an increase in highlights and lights, a decrease in the darks, and a decrease in the shadows. It would look similar to this curve, but make sure it works with your particular image.
Then if you have a particular constellation you would like to highlight (like the Milky Way), use the adjustment brush to paint on a little exposure, clarity and saturation. If you would like to highlight the celestial core of the Milky Way, you can add a touch of peach or red to your brush to bring out the stars. These brush adjustments are very minor and will enhance your image with just a subtle touch.
The last thing you would do is add your noise reduction. This can be tricky, because noise reduction will add softness to your image. Keep your luminance and noise reduction to about 15. Again, this will depend on your camera and how sensitive your sensor is to noise.
Night photography can be fun and the results can be great after a few practice sessions. The Milky Way is still prominent in the summer sky in North America. Give it a try when there is little or no moon to light up the sky. You may get hooked on night photography and editing.
If you want to learn more about this amazing program for editing and organization, try my Lightroom Quickstart class, please head on over to the class page here.
Hope to see you in the next class!
BPSOP Instructor – Holly Higbee-Jansen

Holly Higbee-Jansen is photographer, trainer, blogger, and workshop leader who enjoys teaching and the creative process. Her passions include teaching photography workshops in beautiful locations in California, Iceland, Costa Rica and the American West with her husband Mark. Holly also teaches online classes on Lightroom, Photoshop, and photographic technique. Get Holly’s Free E-Book on “Landscape Photography and the Light“ and find out about her newest workshops at Jansen Photo Expeditions.com.
Reach Holly by email at [email protected] and read her blog at JansenPhotoExpeditions.com/Blog
Holly Teaches:
In this class, we will introduce you to the magic of iPhone photography using several shooting and editing apps that will give you the ability to make your pictures sing in a fun and easy way.You will learn how to crop, change saturation, brightness and affect the overall look of your pictures with HDR, drama and grunge filters and other techniques. You will be amazed at the simple and effective methods.
Do you want to learn to create images that show the beauty of the scene you saw when you took the photograph? Do you want to learn the other essential side of digital photography, photo editing and get up to speed quickly?
This course is designed to get you up and running FAST in this incredibly powerful program. In this two week information packed class, you will learn how to import, organize and perform simple and effective editing processes that will let you produce beautiful adjustments to your pictures.
For a complete list of Holly’s current workshops go to:
Jansen Photo Expeditions – JansenPhotoExpeditions.com
Holly’s Blog: http://jansenphotoexpeditions.com/blog
Facebook – https://www.facebook.com/Jansenphotoexpeditions
Instagram – http://instagram.com/photographyexplorations


