Quick Fix for Problem Seamless
My wife Bobbi Lane, and I recently did a photo shoot for some of Bobbi’s musician friends. They needed a couple of group shots, in various ensemble combinations, to use for upcoming gigs. The problem was that getting everyone together at the same time was a little difficult, and it was finally arranged to meet at the band leaders house. Nate Aronow is a keyboard player, with a nice, but modest house, with a relatively small living room, that we turned into a photo studio. I took a quick little iPhone video to give you an idea of the small space we had to work with.
Despite the small space, we were able to achieve a big studio look with the help of our Phottix Indra battery studio lights—here is the final shot:
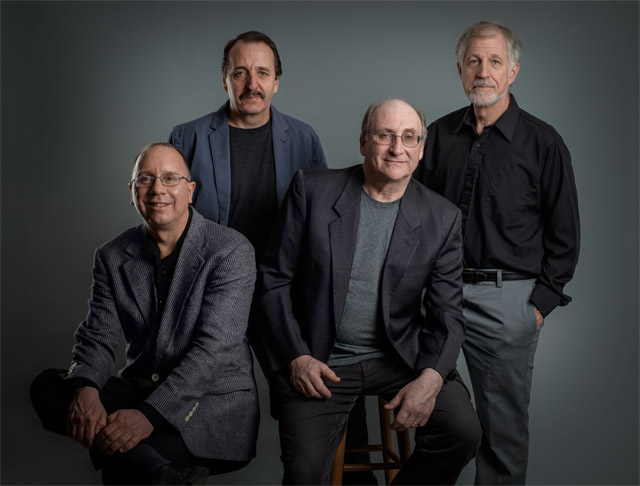
One of the finished shots with all the retouching and adjustments.
However, due to the very tight quarters, the stripbox, at the rear of the set, was pressing into the edge of the 9 foot seamless, and we had a bit more wrinkling on the background than was acceptable—here is the original un-retouched version:
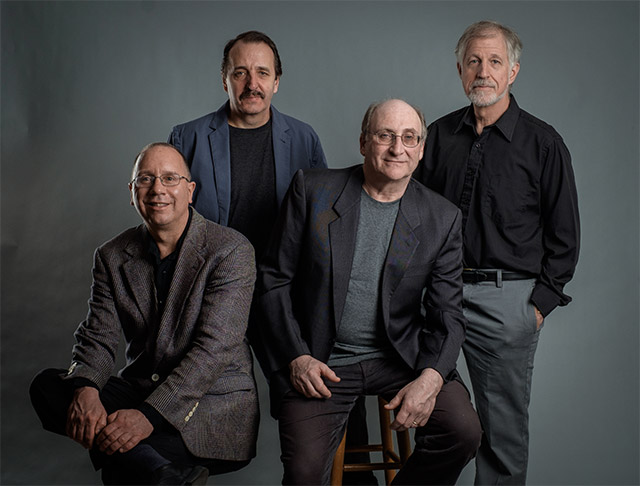

A close-up of the worst area of the background.
The solution to this type of problem is fairly simple in Photoshop. First duplicate the background to a new layer, the run -> Filter-> Blur-> Surface Blur… with enough radus to smooth out the wrinkles, but a low enough threshold that you don’t spread the faces or edges of the figures into the background. In my case the settings were: Radius–72, Threshold-27:

Duplicate of background with Surface Blur applied at Radius-72, Threshold-27.
This smooths out most of the wrinkles, but there is still a bit of a dent because I couldn’t blur enough without spreading the figures into the background. So I simply painted on a new empty layer with a soft edged brush to cover the area with a smooth matching color…

The dent is painted over with a soft edged brush onto a new layer.
At this point, I group the blur layer with the painted layer, in preparation for masking later, but after blurring, there are discrete bands showing up in the background. To fix this I apply noise to a gray overlay layer grouped above the burred and painted layers.
Sometimes, even this amount of noise isn’t enough, so I have to use an alternate technique and apply the “Spatter” filter directly to the banded area!

The application of an overlay layer with noise.
Now I mask off the figures in the blurred background to finish the repair…

The final result.
It may be hard to tell how smooth this looks because of the Jpeg artifacting in this screenshot but you can compare to the original to see how far we’ve come. The layer stack shows how the layers are grouped to achieve the desired result:
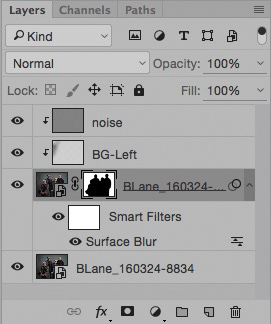
The layer stack shows the blurred group with the paint and noise layers above it.
– BPSOP Instructor – Lee Varis
Lee Teaches:
Photoshop Layers Fundamentals: Selections, Masks & Adjustments
Portrait Retouching Fundamentals in Photoshop


