Shooting After Dark: Lightning

Lightning

Lightning is another great way to capture powerful images, especially after dark. Although I have shot many images with lightning during the day using my lightning triggers, the most powerful ones for me are right after sunset and well into the darkness. My favorite trigger is the AEO Pro 4 and it is a dream to use. It helped me capture the image below in the Grand Canyon which later became a double page spread in National Geographic. Although I love using my trigger, you don’t need to use one as you can try different exposures until you nail the right exposure. But even using a cable release locked down, capturing lightning might be easier than you think. Exposures can definitely vary, especially on how far away and how bright the lightning is so you have to monitor your results. Quite often, the bolts will light up much of the scene in unique ways that can give you images that just defy imagination. You do have to be careful as lightning can kill, so you cannot be too close.  And sometimes, it can be awesome to capture and other times, not too good but when you capture some great bolts, it really is like nothing else! The following images are from here in Arizona where the monsoon season of July and August, bring some of the most amazing lightning storms that you could ever imagine!  The first two below are in Sedona and the third one is one amazing time shooting lightning for two hours in the Grand Canyon.
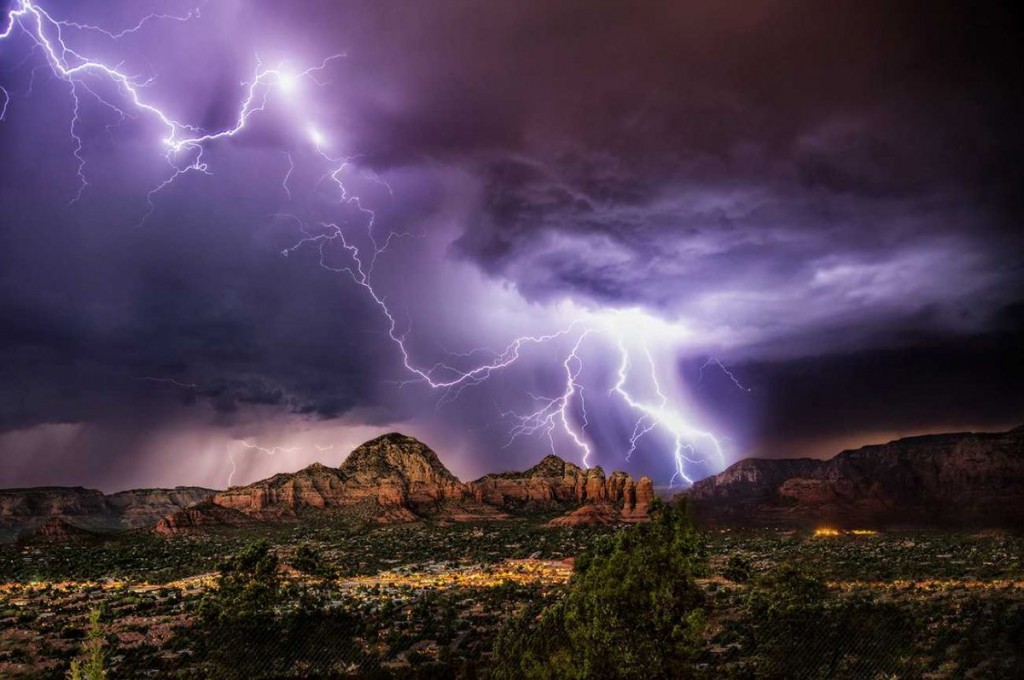
Lightning in Sedona
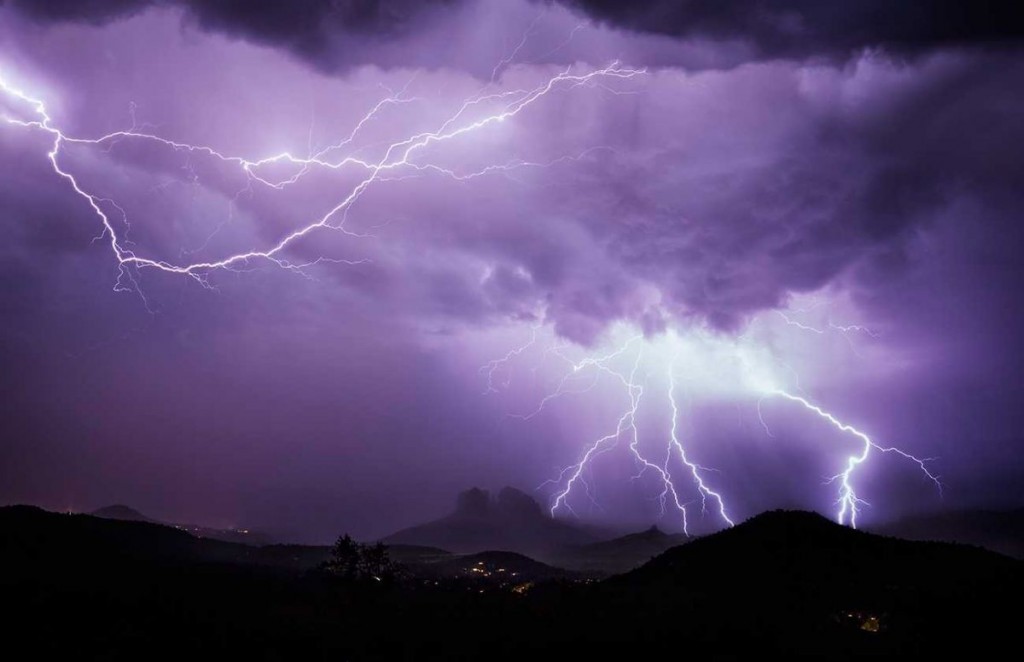
Lightning in Sedona
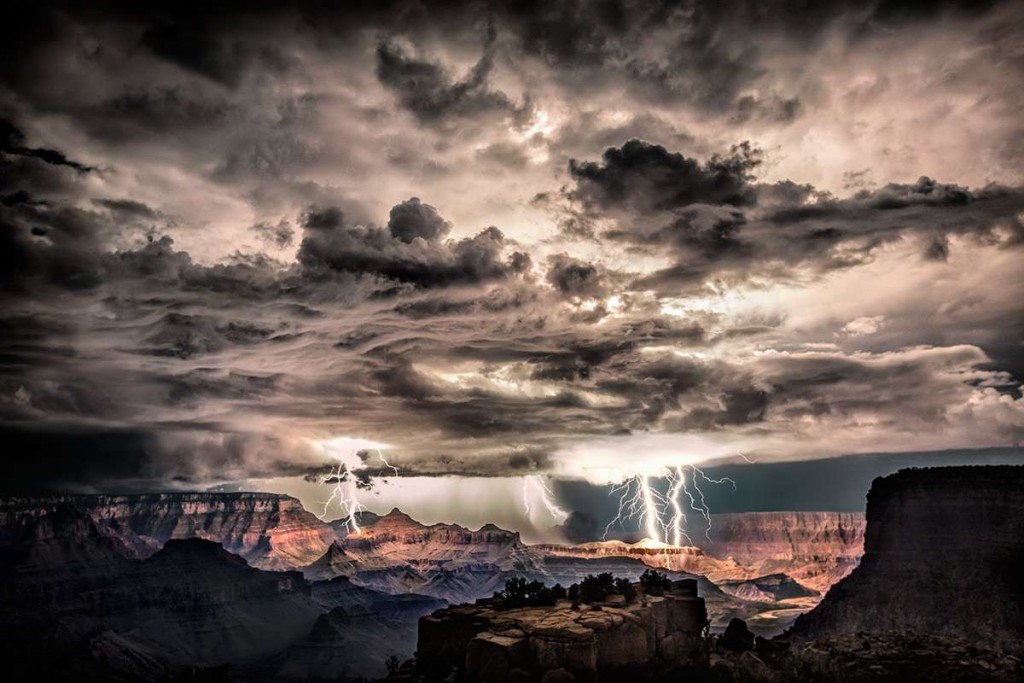
Lightning in Sedona

Lightning in Sedona

Lightning storm in the Grand Canyon. Shot this image at Morna Point in the Grand Canyon on August 30th, 2013. I was there with my girlfriend and my friend Rolf Maeder, and told them I wanted to stay after dark to hopefully get lucky enough to capture lightning over the Grand Canyon. This was my biggest wish in the world as living in Sedona for the past 2 years, I had been teaching people how to shoot lightning and Rolf and my girlfriend were very excited too. When I saw the first bolt, I screamed to both of them to get their cameras and I lightpainted the foreground for both of them and stayed there for hours shooting that amazing night. This is a single shot where i was able to get three different lightning bolts. I post processed it in raw and used Nik Color Efex to bring out more detail.

Lightning storm in the Grand Canyon. Shot this image at Morna Point in the Grand Canyon on August 30th, 2013. I was there with my girlfriend and my friend Rolf Maeder, and told them I wanted to stay after dark to hopefully get lucky enough to capture lightning over the Grand Canyon. This was my biggest wish in the world as living in Sedona for the past 2 years, I had been teaching people how to shoot lightning and Rolf and my girlfriend were very excited too.
When I saw the first bolt, I screamed to both of them to get their cameras and I lightpainted the foreground for both of them and stayed there for hours shooting that amazing night.
This is a single shot where i was able to get three different lightning bolts. I post processed it in raw and used Nik Color Efex to bring out more detail.

Stay tuned for Part V of Shooting in the Dark!


-BPSOP Instructor: Scott Stulberg

Scott Teaches:

Eye to Eye: Capturing the Face


“I just wanted to thank you for another wonderful class. I have to confess that each week when I read the new assignment, my first reaction was mild panic and a deep certainty that I would not be able to produce anything worthwhile that fit within the parameters you had set. But before I knew it, the ideas started to flow, and I quickly became obsessed (no, that isn’t too strong a word!) with exploring the possibilities. I can honestly say that the photos I produced in response to your assignments are among my favorites. Thanks for bringing out a creative side I didn’t know I had!”

Barbara Geiger
Understanding Color

“Thank you so very much for this course! It’s allowed me to take the blinders off and present my images for what I want them to be without being a slave to the “reality” of the camera. I would also add that in conjunction with your printing course, this has been the most useful course I’ve ever taken. Your notes are more than comprehensive and your comments and critiques are direct, clear, and always directed to the improvement of the art.”

Bill
After the click

” I want to thank you for this class and for your patience and availability to answer all of my questions. I have learned very much through this class. I have used LR in the past, but mostly for editing images. I now have a better grasp in the organization of my images, an even better understanding of editing images, and an understanding of the value of presets. I still have a lot to learn, but this has put me on the road to be able to improve my photography. Again, thank you! ”

Dale Yates
Lightroom Quickstart

Classes Starting Soon!

Understanding Exposure and Your DSLR

Instructor: Bryan Peterson Duration: 6 Weeks Cost: US$169 Without que…

After the Click – Refining Your Vision in Lightroom & Camera Raw

Instructor: Mark English Duration: 4 Weeks Cost: US$129 Why do some ima…

Exploring Adobe Photoshop Lightroom & Lightroom for Mobile

Instructor: Holly Higbee-Jansen Duration: 4 Weeks Cost: US$129 In this …

Lightroom Quick Start

Instructor: Holly Higbee-Jansen Duration: 4 Weeks Cost: US$129 Do you w…

Mastering Apple Photos

Instructor: Jon Canfield Duration: 4 Weeks Cost: US$129 Mastering Apple…

Luminar Essentials

Instructor: Jon Canfield Duration: 4 Weeks Cost: US$129 Luminar is an …

The Art of Printing and Selling Your Art

Instructor: Mark English Duration: 2 Weeks Cost: US$76 The print is the…
Translate »