The Art of Printing and Selling Your Art
The Art of Printing and Selling Your Art
05PRNT23 LS1

Take Lesson
05PRNT23 LS2

Take Lesson
Digital imaging has fundamentally changed the way we work as photographers. Digital brings immediacy, flexibility and lowers the on-going cost of creating images: once you own a digital camera, creating thousands of images entails essentially zero incremental cost. For the most part those images live on our hard-drives or somewhere in some cloud. We look at them on our tablets or smartphones, swiping right or left to skim past dozens or hundreds of images in a few minutes. How much thought and consideration can you give to an image you swipe past in a second or two? How easily can you consider your composition, your use of colour or light and shadow when seen for an instant on a 4-inch screen? Printing your work at even modest sizes, holding that print in your hands, allows you to (in fact forces you to) consider your image more thoroughly. You will see things in a printed image that might remain unseen on a smartphone, tablet or even your computer monitor; you’ll be find yourself asking, “What could I do better?” “How can I improve this image?”
“Printing your work helps you become a better photographer”
“Printing your work allows you to complete the artistic process by taking control of the final expression of your work”
Admittedly, printing your work involves climbing a learning curve; fortunately, it’s not that steep or long. You will also have to acquire a capable printer, which is not without additional cost. If you are serious about becoming the best photographer you can, once you have a assembled a basic kit, the next purchase you should consider is a printer rather than the latest camera body laden with features you probably aren’t going to use anyway. As for the learning curve, I can help, read on…
In Lesson #1 we look at calibrating and profiling your monitor correctly so that Photoshop or Lightroom can understand how your particular monitor displays colour (no two are the same). We look at setting up Photoshop or Lightroom for good colour management, and we will look at the appropriate file types for storing images intended for fine art printing. We also consider some common exposure errors that will ruin any attempt at producing a great print. Lastly we will discuss papers appropriate for high quality prints.
Lesson #2 looks at setting up Photoshop for printing, and the use of output profiles to tell Photoshop something about how your printer reproduces colour. And, while output profiles are an essential ingredient needed to produce good prints, they will only get you about 90% there – so we will look at and demonstrate soft proofing to get you that last 10%.
Once mastered, the material in lesson 1 and 2 will a relegate the problems of colour management, of routinely producing prints that closely match your monitor, to an essentially mechanical process. Once mastered, these technical issues fade to the background, allowing you concentrate on editing your images in post for maximum impact in print. We begin to talk about this through sharing images each week, discussing how to increase visual impact through selective editing of sharpness and saturation, for example.
Course Requirement:
To obtain maximum benefit from this course you should be comfortable with basic RAW processing and image adjustments in Photoshop or Lightroom. You should also own and be familiar with the operation of a printer suitable for fine art printing, such as the Epson R2880, R3000, 3880, P600 or P800; the Canon PIXMA Pro series, or similar printers. You should also own, or be prepared to purchase a monitor calibration package such as those from X-Rite or Datacolor.
What do students say about Mark English and this course
Instructor: Mark English
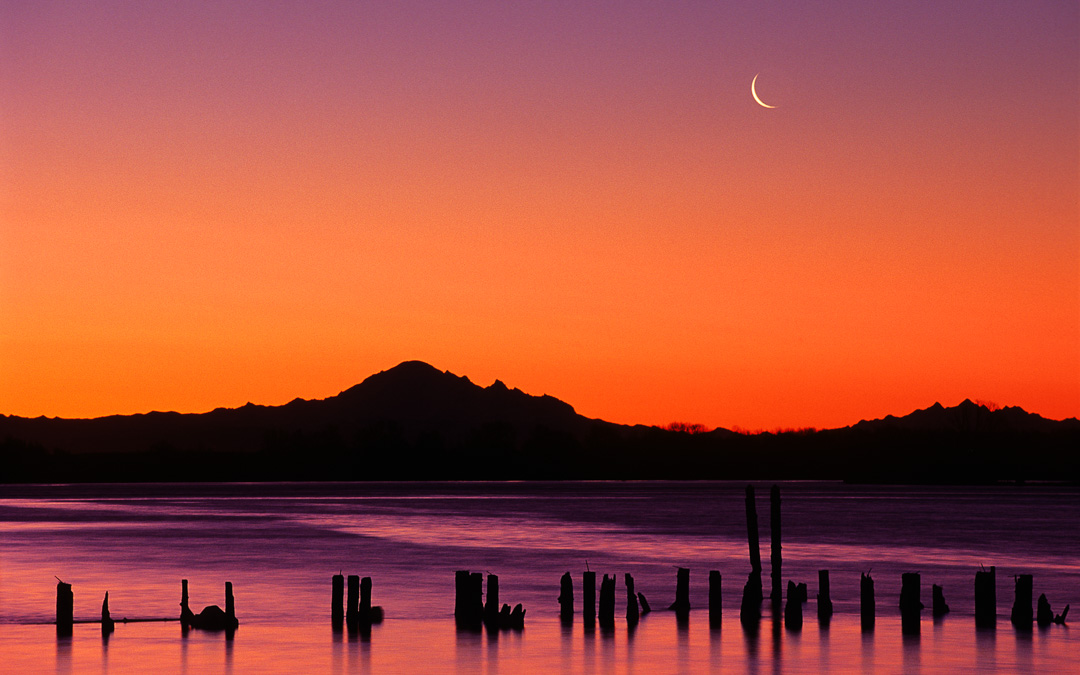
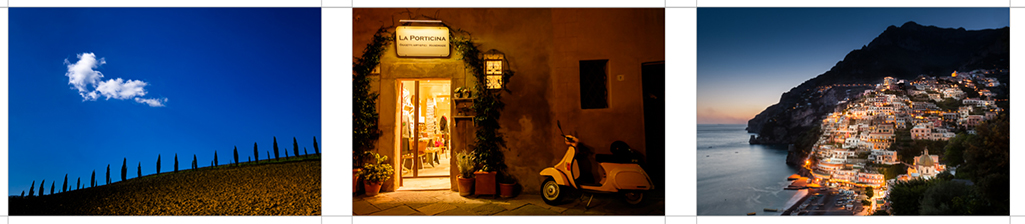
 A photographer for more than thirty years, Mark is a former member of the Professional Photographers of Canada (PPOC). Known for his bold use of color and strong graphic elements in his image making, he now shoots primarily for personal projects. Most of his work is focused on editorial travel and landscape. His work has been published in a variety of media, and may be viewed at www.pacificlight.ca