The world we live in has three dimensions which we can perceive visually. Photography only gives us two dimensions with which to recreate this three dimensional world. As photographers, we must learn to play on the cues our eye-brain visual system use to decode our three dimensional world in order to create strong photographs.
Our eye-brain visual system uses several visual cues to determine relative distance or “depth” in a scene in front of us, among them relative size — whenever we have familiar objects in the frame, we use their relative size as a clue to which one is nearer or farther from us. Other visual cues such as receding lines that appear to converge create the illusion of great depth; lines on a highway would be a familiar example.
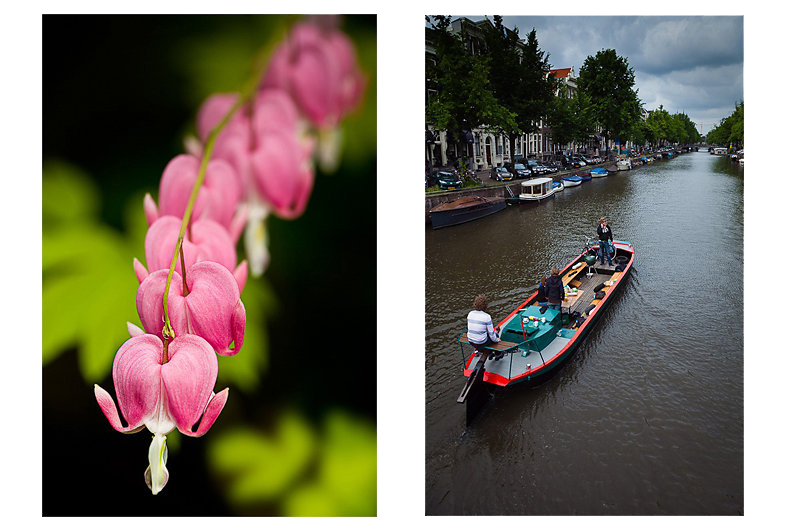
The two images above use size as one visual cue to let us figure out which objects are closer and which are farther away. The flower also uses differences in sharpness to aid in creating an illusion of greater three-dimensional depth: the bloom that is both sharper and larger appears to us as being closer. The image of the Amsterdam canal boat uses relative size, as well as converging liners to create the illusion of depth.
There is also another visual cue that we can use to create or enhance the illusion of “three-dimensionality”: the relationship between light and dark tones in an image.
All things being equal, areas in a picture that are lighter in tone will appear to advance toward the viewer, and those that are darker will appear to recede.
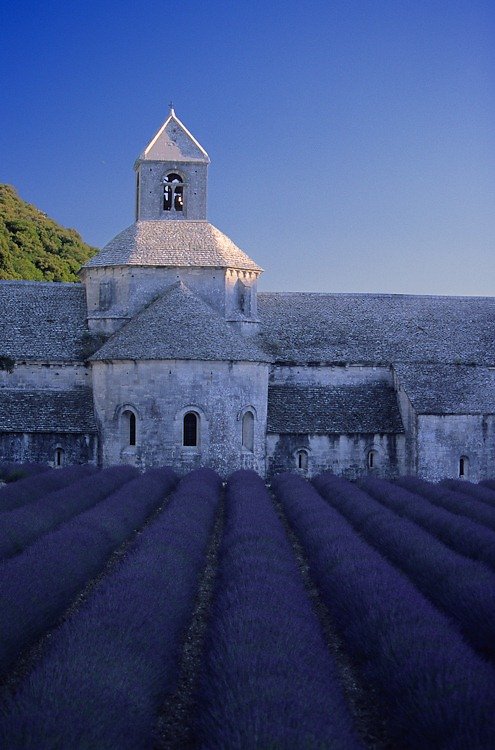
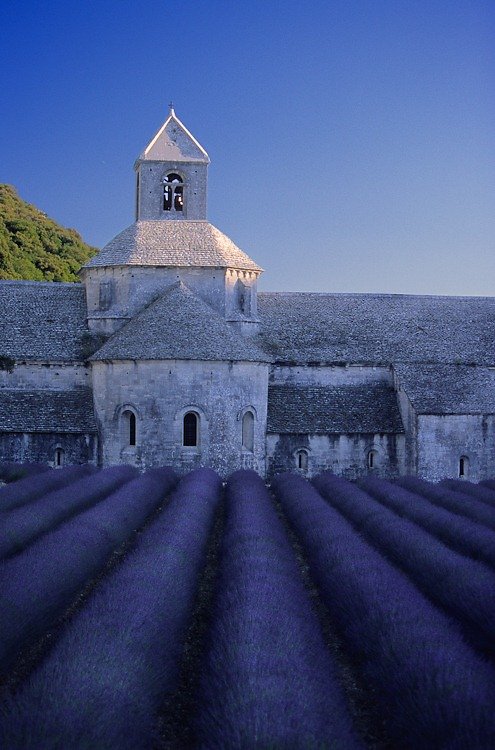
The Abbey Senanque near Gordes in Provence sits in a roughly north-south oriented valley. Because of this, by the time the sun rises above the surrounding hills in the morning, we are well past the time of best light for landscapes. The situation is a little better in the evening, so I prefer to arrive just before the sun’s last rays leave the valley. By then the valley floor with its the rows of lavender in front of the abbey are in shade, while the bell tower is still catching the last warm rays of sunlight. In this image I liked the arrangement of lines and shapes, but the flat lighting of the open sky makes the lavender rows appear flat and a lifeless.
This is a good opportunity to work on the light – dark relationships in the foreground to re-create some of the dimensionality that is missing, but which is so immediately evident when standing there. Creating the illusion of greater depth and dimension is a simple process of making the tops of the rows appear lighter than the ground between the rows. This difference in tone is already present to some extent: all we are going to do is enhance what is already there naturally.
There are several ways to accomplish this task, but this is one that I like because it is simple to do, and easy to control.
1) Begin by opening the image in Photoshop
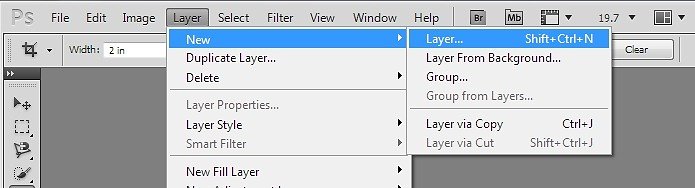
2) Next, add a new layer by selecting Layer>New>Layer from the menu.
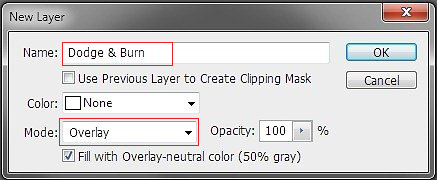
3) Set the Mode for this new layer to “Overlay” and select “Fill with Overlay neutral color (50% gray). Name the layer with a something descriptive… like “Dodge & Burn
4) When set to overlay mode, the neutral gray we have filled the layer with has no effect on the image. If however, we paint on the layer with a gray shade that is lighter than 50%, we will lighten the underlying tones in our image. Painting on the overlay layer with a shade of gray which is darker than 50% gray will darken the underlying tones in our image.
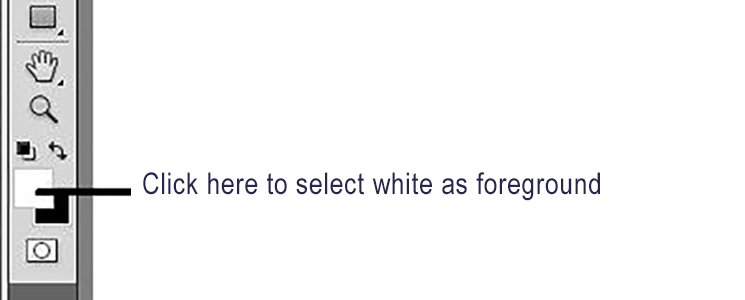
5) You are going to paint on the overlay layer with either white and black, NOT the image layer labelled “Background”. Make sure by clicking on the new layer you created before moving on. Now, hit the “D” key to make sure your foreground and background colours are set to the default of black and white.
6) Begin by setting your foreground colour to white (if it isn’t, hit the “X” key to swap it so White is the foreground colour)
7) Pick up a soft-ish brush and size it for the areas you want to lighten
8 ) Set the opacity of your brush quite low, say around 10%, set the “Flow” to something less than 50% As we paint, we want to build up the areas that we are affecting slowly. It’s easy to overdo the effect of this adjustment..

9) Paint along areas you want to lighten. I painted along the tops of the lavender rows… adjusting the size of the brush as needed. If you work slowly and build up the effect gradually with a low flow setting, you won’t have to be extremely accurate in your brushing.
Swap the foreground and background colours to make black the foreground colour (hit the “X” key), and paint in areas that you wish to make darker. I painted in the spaces between the rows of lavender in this image.
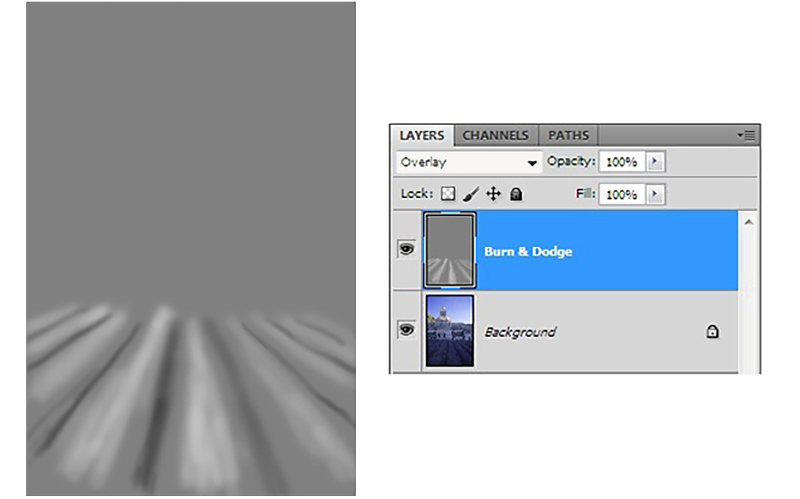
10) Here is my completed overlay layer, and the layer stack in Photoshop. If you wish you can further adjust the intensity of the effect by adjusting the opacity of the overlay layer.
Here is the completed image:
By playing on a few prejudices of our eye-brain visual system, we can easily restore some of the feeling of texture and three-dimensional form lost to the flat lighting of our foreground.
My course “The Art of Printing and Selling Your Art” deals with the basics of establishing a solid colour managed workflow to produce prints that match what you see on your screen as close as possible; that’s the technical part. Along the way we share images to demonstrate techniques like this to produce stronger images; that’s the art. The next class begins November 6th, I hope you will join me!
– Mark English – BPSOP Instructor
Mark teaches:


