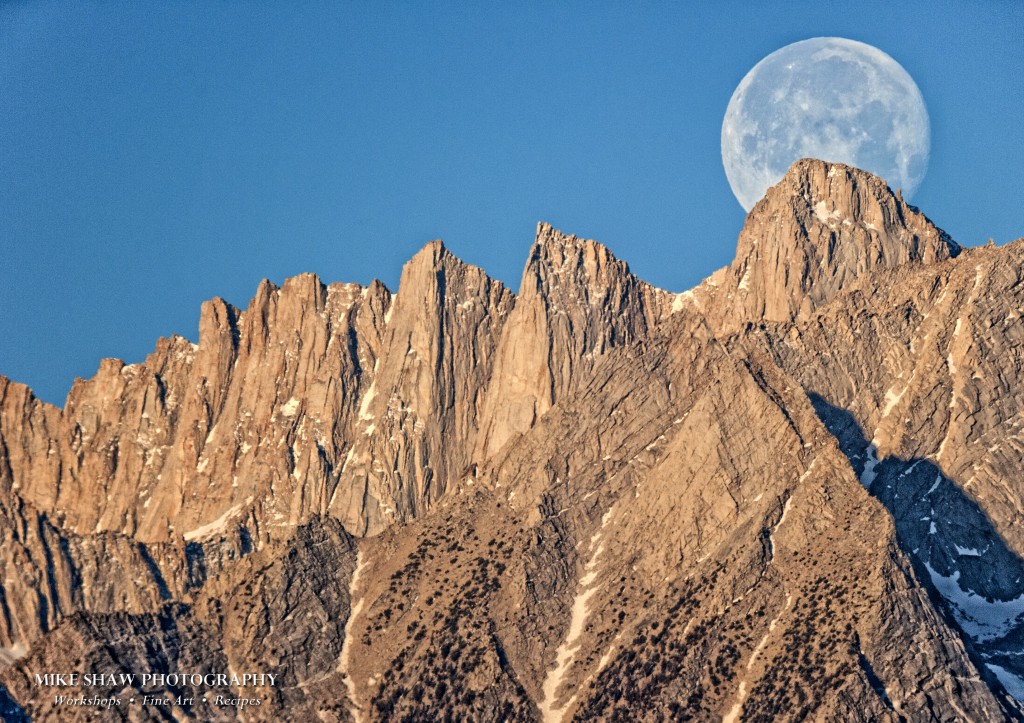
The supermoon phenomenon occurs whatever the moon is simultaneously full and at its perigee, or its closest point to earth, during its monthly orbit. The supermoon in May, 2012, was one such case. I suspected it might be possible to create an image of it setting over Mt. Whitney, thus combining the largest full moon of the year with the tallest mountain in the continental United States. Here’s how this image became a reality.
The first step was to choose a shooting location based on the compass direction of the setting moon. Now in this image, I wanted the moon to clearly stand out as a dominant theme above the mountain. This required the use of a very long focal length lens, otherwise, while the moon would be visible within the composition, its size, and hence “supermoon” qualities would be diminished.
The precise shooting location was found by using the planning app The Photographer’s Ephemeris. It was simply determined to be the point of intersection between a conveniently located dirt road and Mount Whitney along a line with the correct moonset compass direction of 242°. The exact GPS coordinates of this point were noted for field navigation, since there was no cell coverage in the area.

The next step was to estimate candidate exposure settings based on the anticipated light levels of the predawn twilight. Noting that sea-level moonset occurred an hour and fifteen minutes after sunrise on the best viewing day, the low ISO of 200 was chosen as a starting point.
To determine the aperture, I needed to consider the specific details of the lens system I was using. To make this image, the camera was fitted with a 1.7X teleconverter attached to a 4” telescope with a 400 mm focal length. This combination resulted in an effective focal length of 680 mm. Noting that the entrance diameter of the telescope was 4” ~ 100 mm, the aperture was calculated to be 680mm / 100 mm = f/6.8. This aperture was deemed perfectly suitable, since depth of field is not a consideration for such a large subject distance.
Based on experience, a shutter speed of 1/500 second was anticipated to produce a correct exposure for a predawn twilight scene, an ISO of 200, and an aperture of f/6.8. This should be satisfactory, since the moon shouldn’t move perceptibly in this short time interval.
Having identified its exact GPS coordinates, and preliminary exposure settings, the next step was simply to drive to the shooting location, confirm its location with my hand-held GPS device, set up the equipment and await moonset. Needless to say, my pulse was racing as I watched in awe as the enormous supermoon slowly descended in the west as sunrise approached, and quietly slipped precisely behind majestic Mt. Whitney!
Want to learn how you can make images like this one, as well as breathtaking Milky Way images, dazzling star trails and more? Come join us in our brand new Nightscape Photography class!
– BPSOP Instructor: Mike Shaw
Mike Teaches:


