During my on-location photography workshops, I teach post processing at downtime when we are not shooting. An interesting observation is that lots of students jump straight into Adobe Lightroom Classic CC or Camera Raw basic panel to edit the tones, white balance of the photo, without even knowing the existence of Image Profile, and how it can aid your image processing.
As the raw files are imported and displayed in Lightroom, the colors and tones/contrast of the raw file has to be interpreted by the image Profile built into the Lightroom. It’s one of the very first steps in Lightroom workflow.
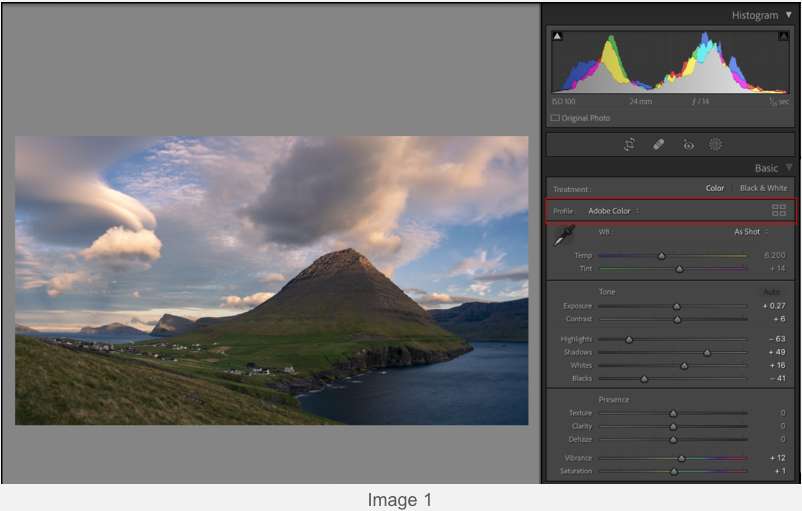
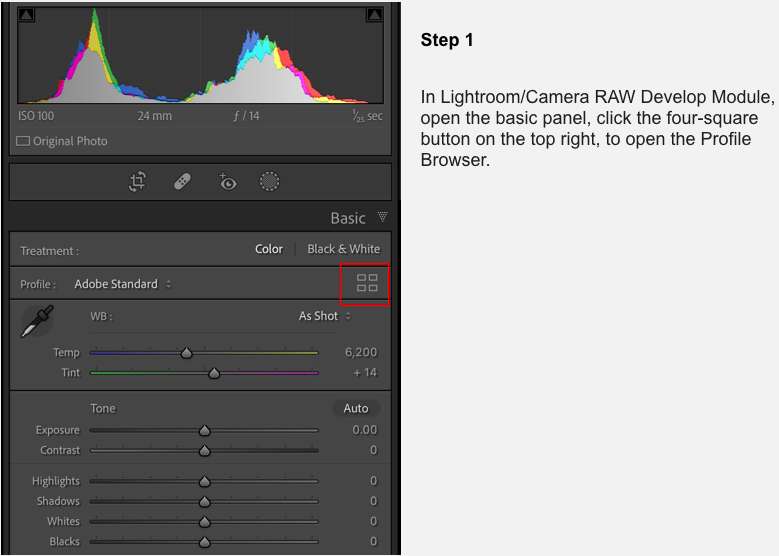
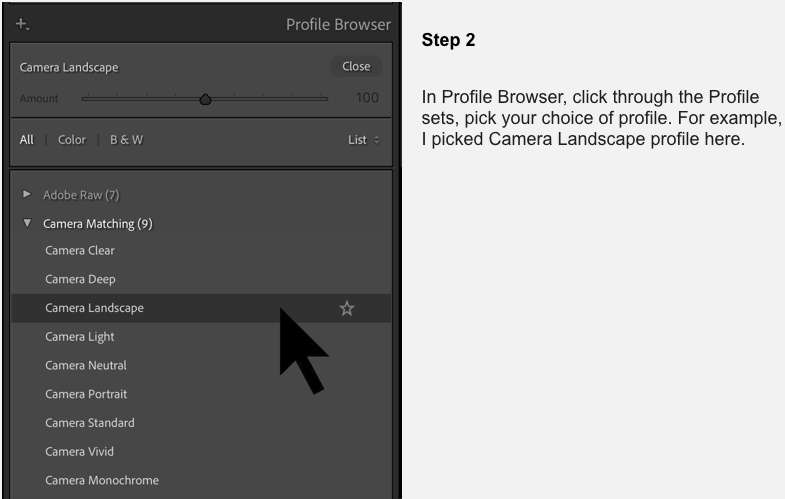
Lightroom Classic has more profiles than earlier versions of Lightroom, so Adobe added the Profile Browser tool to the very top of Basic Panel in Develop Module (Image 1), enabling you to select, compare, organize and search them.
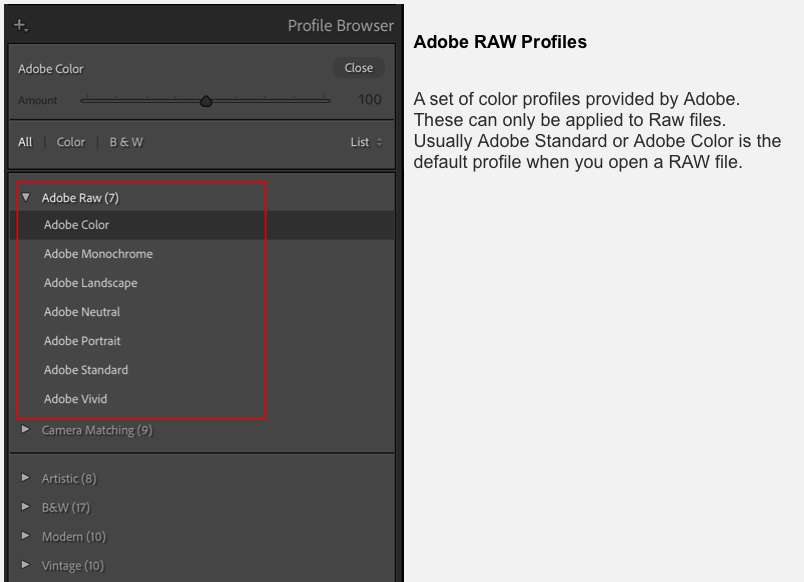
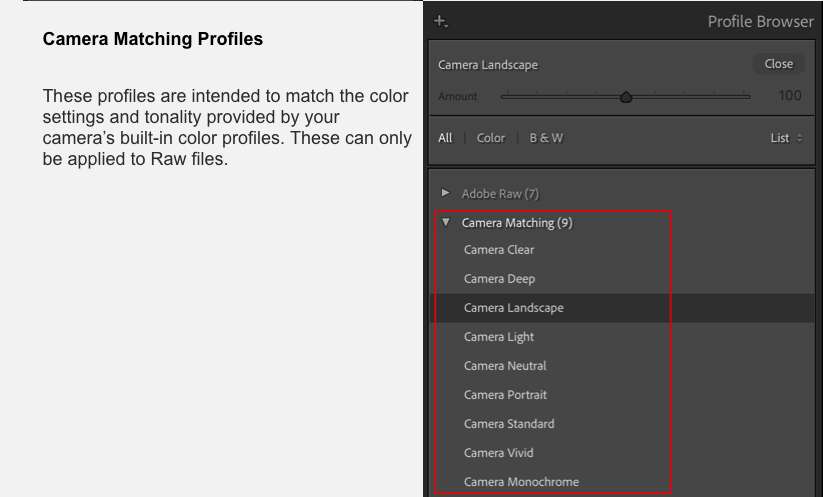
The latest version of Lightroom Classic has 3 sets of built in Profiles (All these profiles are also available in Adobe Camera Raw in Photoshop):
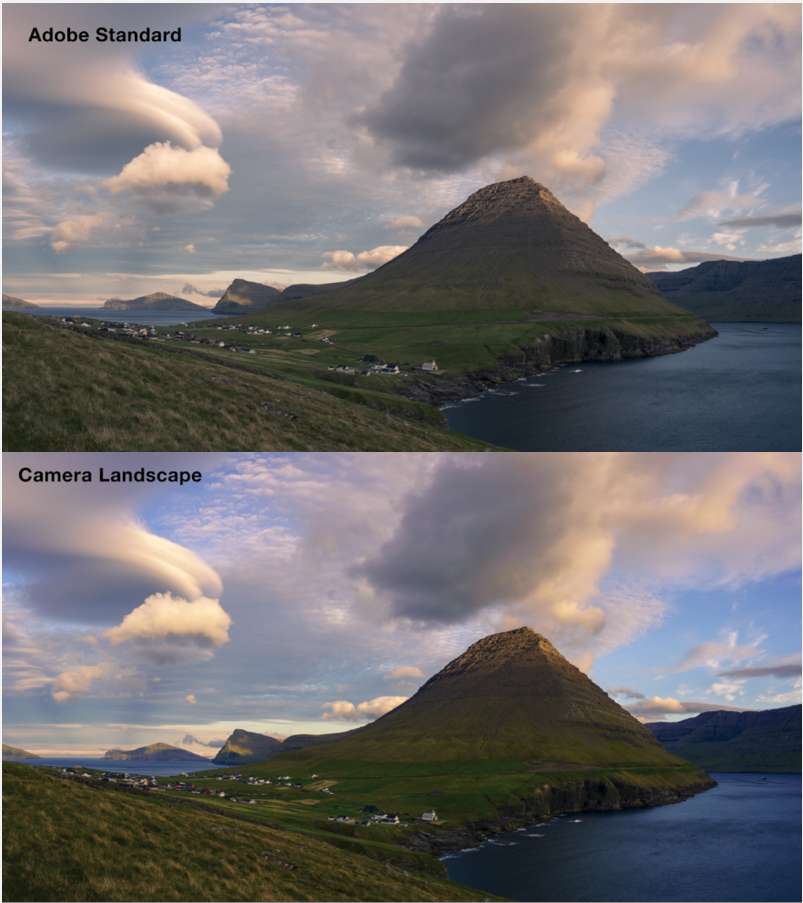
Each profile will interpret and display the image differently in term of colors and tones/contrast. It’s a smart practice to start your image processing by comparing different profiles, and select your most favored one for the image. Here is how to pick your most favored profile for the image.
William Yu Teaches:

