

Image 1
2. The “Add New Mask” dialogue box appears, click “Select Sky” (Image 2), The Artificial Intelligence will analyze the image, automatically identifying and selecting the sky for you. You will see the color overlay (red in my case here) over the masking area (you can toggle on/off the color overlay of the mask by pressing O key). As you see here, the AI created a perfect mask for the sky. It also opens a mask panel on top right of the image, visually displaying the black and white mask (Image 3)
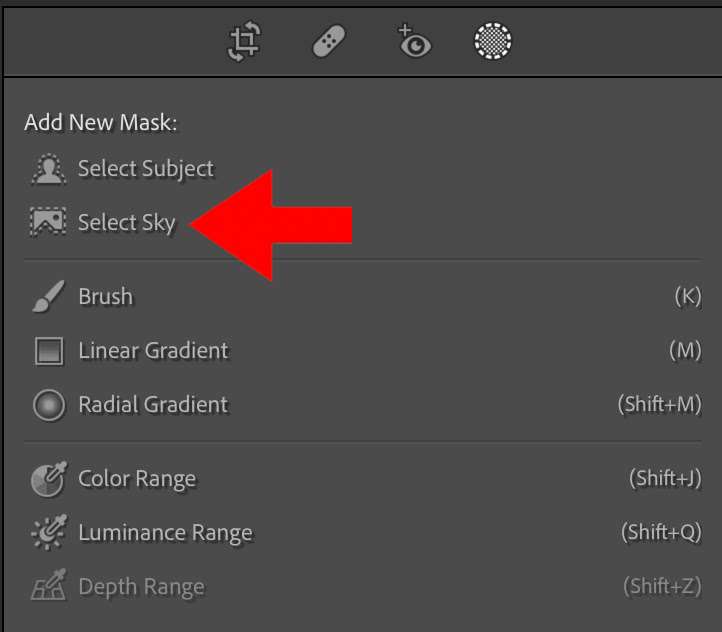
Image 2
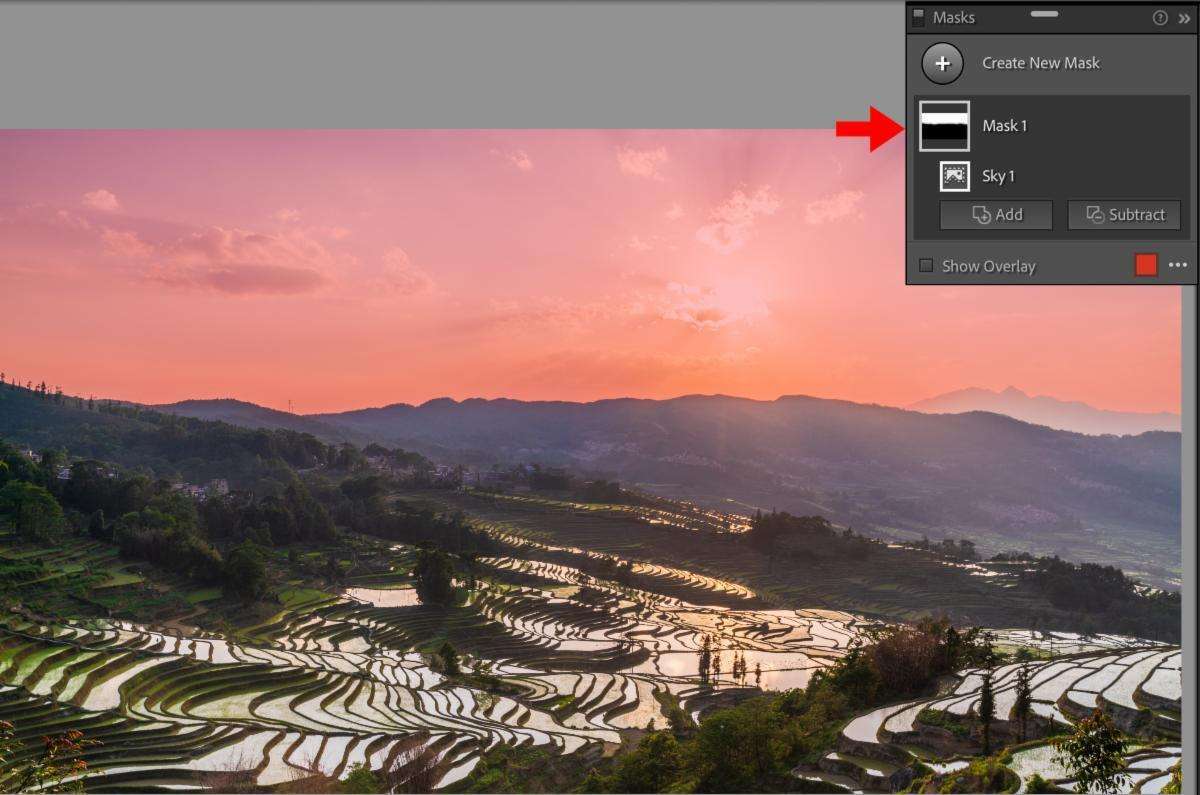
Image 3
3. In the “Select Sky” adjustment panel, I decrease the highlights of the sky, making overall sky a bit darker and more colorful (Image 4).
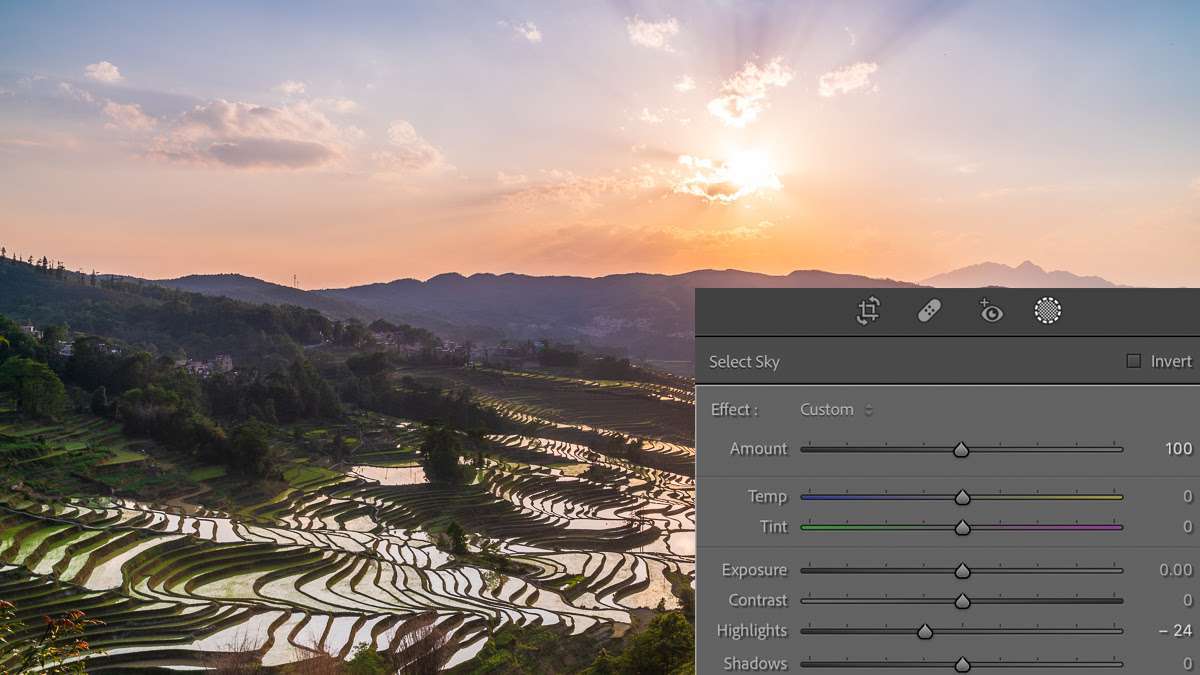
Image 4
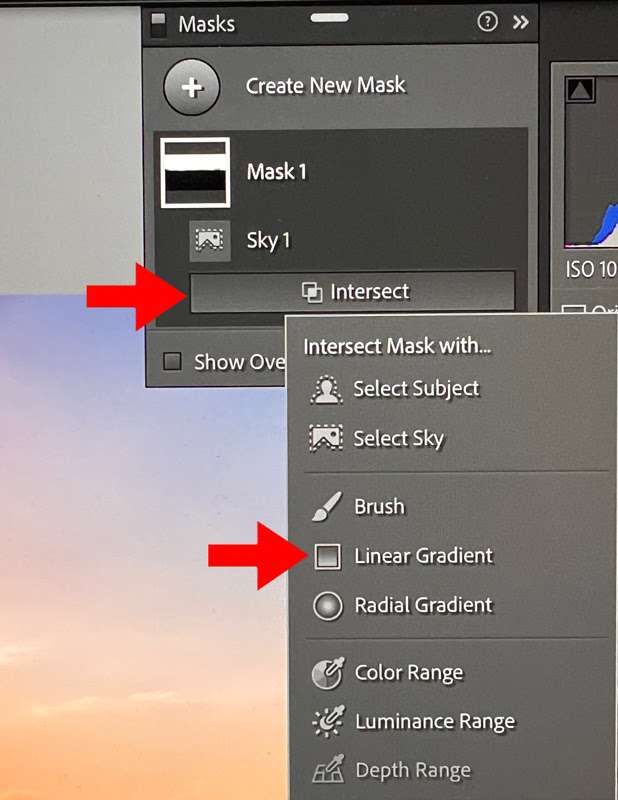
Image 5
4. However, the top portion of the sky is still too bright, I want to darken it without affecting the brightness level of lower portion of the sky. To achieve this effect, this is where “intersecting masks” come into play. I will create a “Linear Gradient” mask, which will intersect with the sky mask. Hold down “Option” key in Mac or “Alt” key in Windows, to bring up the “Intersect” button and click on it, then select “Linear Gradient”.(Image 5)
5. Drag the linear gradient tool across the sky, and make the adjustments in the effect panel, you can toggle on/off the color overlay(pressing O key) to see precisely where the effect will be applied. As you see, I changed color temperature, lowered exposure, increased contrast, reduced highlights to the top portion of the sky. (Image 6)
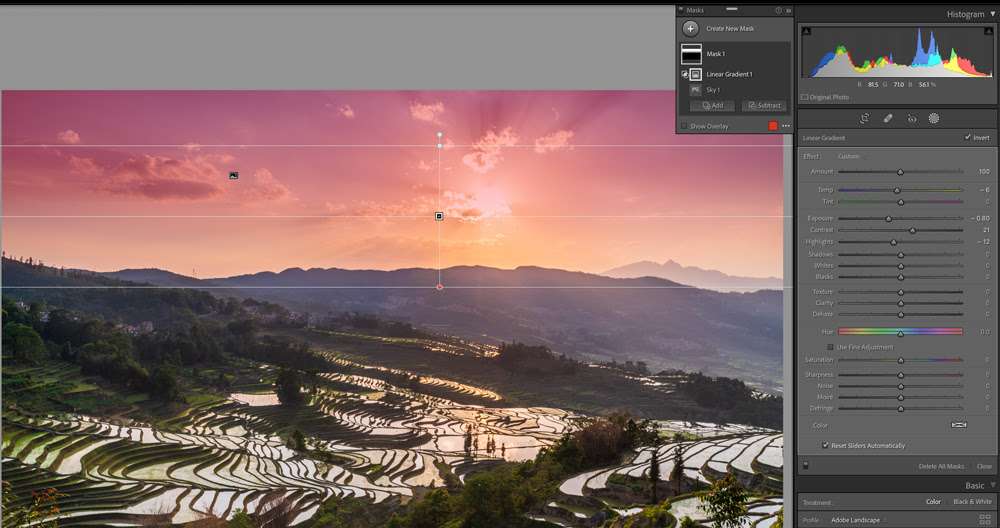
Image 6