Black and White: Getting the Best of Both Worlds

All of us get into an editing rut from time to time. One reason might be that we never really form a decisive reason for creating photographs. It’s like a thing we have to do – which unfortunately results in a lot of seemingly pointless editing.
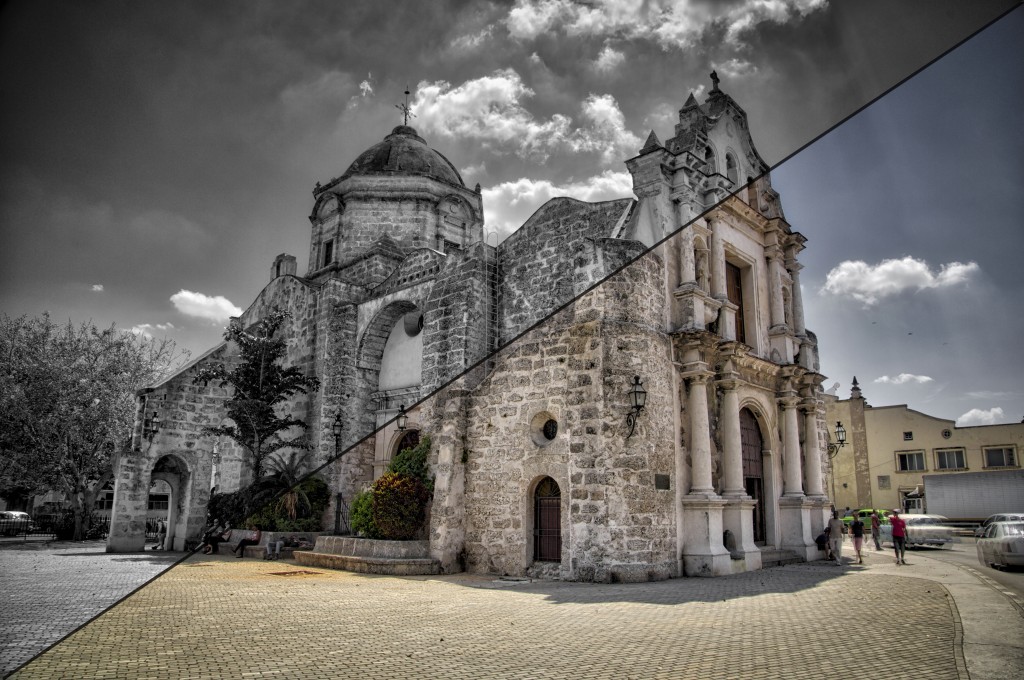
ColourBlackWhite
If you have a specific purpose for editing – like working on a book or an exhibition for example, that’s often enough for us to keep on creating. If you don’t, it can be hard to continue with no clear light at the end of the proverbial tunnel.

When I’m a bit stuck like this, I try changing my images from colour to black-and-white, just to see what it looks like in monochrome. Most of us love a bit of black-and-white but it’s very hard to pre-visualize this on the camera’s LCD – that’s why I always get my workshop students to select ‘Monochrome’ in-camera, but set the menu to capture RAW and JPEGs at the same time. That way you get to see a black-and-white image on the LCD – which then allows you to think in black-and-white, rather than trying to mentally convert from colour. It gets better – when the files are downloaded to the computer, guess what? You get a black-and-white JPEG, but a full colour RAW file. In other words, you get the best of both worlds.

– Robin Nichols – BPSOP Instructor

Robin Teaches:

The Complete Guide to Photoshop Elements

DSLR Video Essentials

“I just wanted to thank you for another wonderful class. I have to confess that each week when I read the new assignment, my first reaction was mild panic and a deep certainty that I would not be able to produce anything worthwhile that fit within the parameters you had set. But before I knew it, the ideas started to flow, and I quickly became obsessed (no, that isn’t too strong a word!) with exploring the possibilities. I can honestly say that the photos I produced in response to your assignments are among my favorites. Thanks for bringing out a creative side I didn’t know I had!”

Barbara Geiger
Understanding Color

“Thank you so very much for this course! It’s allowed me to take the blinders off and present my images for what I want them to be without being a slave to the “reality” of the camera. I would also add that in conjunction with your printing course, this has been the most useful course I’ve ever taken. Your notes are more than comprehensive and your comments and critiques are direct, clear, and always directed to the improvement of the art.”

Bill
After the click

” I want to thank you for this class and for your patience and availability to answer all of my questions. I have learned very much through this class. I have used LR in the past, but mostly for editing images. I now have a better grasp in the organization of my images, an even better understanding of editing images, and an understanding of the value of presets. I still have a lot to learn, but this has put me on the road to be able to improve my photography. Again, thank you! ”

Dale Yates
Lightroom Quickstart

Classes Starting Soon!

Understanding Exposure and Your DSLR

Instructor: Bryan Peterson Duration: 6 Weeks Cost: US$169 Without que…

After the Click – Refining Your Vision in Lightroom & Camera Raw

Instructor: Mark English Duration: 4 Weeks Cost: US$129 Why do some ima…

Exploring Adobe Photoshop Lightroom & Lightroom for Mobile

Instructor: Holly Higbee-Jansen Duration: 4 Weeks Cost: US$129 In this …

Lightroom Quick Start

Instructor: Holly Higbee-Jansen Duration: 4 Weeks Cost: US$129 Do you w…

Mastering Apple Photos

Instructor: Jon Canfield Duration: 4 Weeks Cost: US$129 Mastering Apple…

Luminar Essentials

Instructor: Jon Canfield Duration: 4 Weeks Cost: US$129 Luminar is an …

The Art of Printing and Selling Your Art

Instructor: Mark English Duration: 2 Weeks Cost: US$76 The print is the…
Translate »