Create Depth – For More Engaging Images
Photography is a two-dimensional medium desperately trying to represent a three-dimensional world. Without some help from us, it often fails.
We view the world with two eyes rather than one, so a sense of three dimensional depth is an intrinsic feature of our vision. Not so for our cameras. You simply can’t recreate three dimensions using two, but we can create a sense of that lost dimension, and perhaps suggest a fourth — time…but we’ll leave that for later discussion.
Before we dive in, I need to point out that it is not always necessary push a sense of three dimensions on a viewer. Compressing a scene with a long telephoto tends to flatten the perspective and may reduce the sense of depth. Shooting with wide apertures will (in some situations) reduce backgrounds to soft out-of-focus blurs, also minimizing any sense of three-dimensional depth. Each approach can be highly effective… it really depends on your aesthetic goals.
Images with a strong sense of depth tend to draw a viewer in — creating a heightened the sense of reality; inviting them to explore your image further. So, let’s look at a few ways we can create a sense of depth in a photograph.
Go Wider, Then Get Closer

Getting close with a wide-angle lens stretches the apparent perspective, making objects close to you appear much larger in relation to those farther away. This stretched perspective contributes to a much greater sense of depth. For this to work, you need to push in close to your subject … really close. A bit of care is required if your subject is of the human species; you will both have to be comfortable with the intimacy this might create. Secondly, lenses shorter than about 35mm on a Full-frame camera (23mm for APS-C or “crop frame” sensors) will tend to distort the features of any subject placed near the edge of the frame.
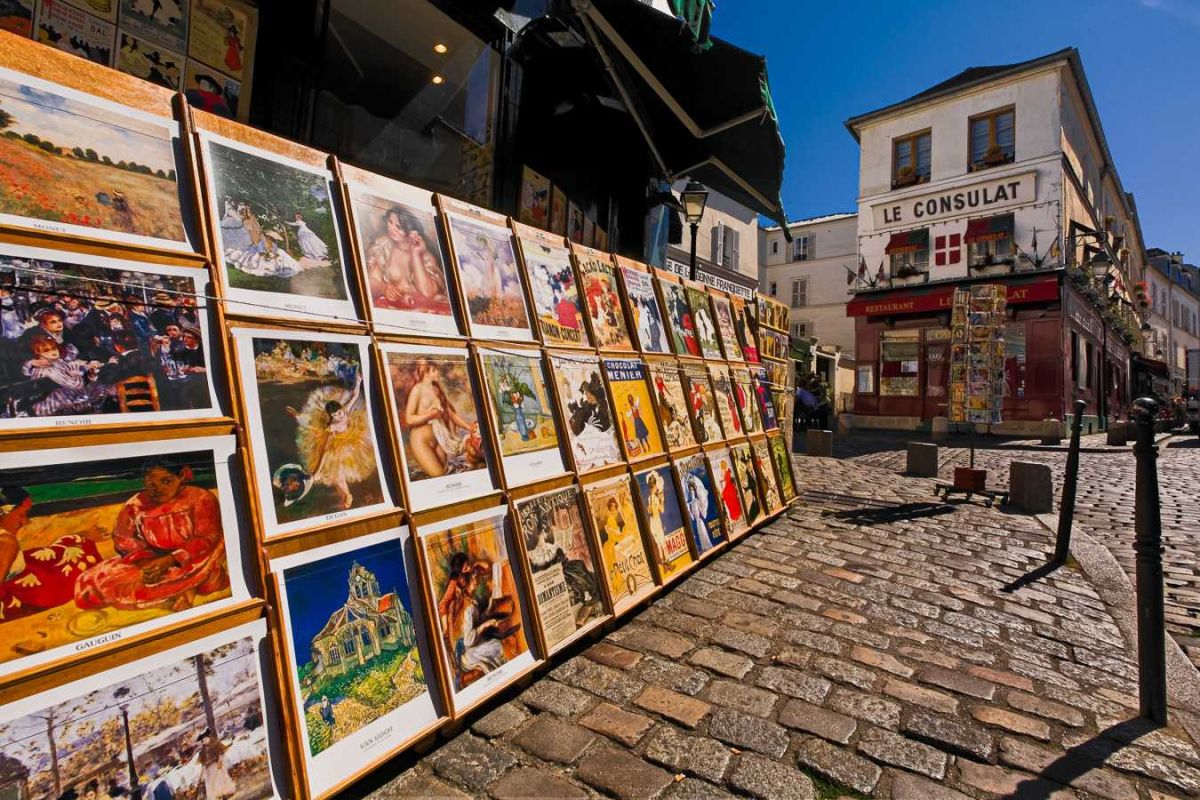
Use Lines When They Are Present
Diagonal lines that recede into the background will become a strong visual pull on the viewer’s eye, greatly enhancing the sense of depth. Altering your point-of-view can turn even horizontal lines into obliques that will lead the viewer’s eye in the direction you wish it to go… toward your subject for example. Getting low and close with a wide-angle lens created strong converging lines from the art displays along this storefront in Montmartre, Paris
Highlight and Shadow

All other things being equal, we tend to perceive darker areas in an image as farther away then those that are lighter. This is why side light reveals form and texture so well. The darker shadow areas in this side-lit portrait are perceived as being somewhat farther away than the brighter highlights. This creates form and dimension in the face and body.
Take Advantage of Aerial Perspective

Any elements in a rural or urban landscape — a distant series of receding ridges for example, that are viewed through progressively more layers of dust and atmospheric moisture, will appear lighter, lacking in contrast, cooler and more diffuse. The less distinct distant ridges are interpreted by our eye-brain visual system as being more distant. All of which contributes to a greater sense of depth in any landscape where this is found.
-BPSOP Instructor – Mark English
Mark Teaches:
After the Click: Refining Your Vision in Lightroom & Camera Raw


