In Brit Hammer’s course Beautiful Black & White you’ll explore how to create a mood and to convey a wide range of emotions.
Black & white is more than the absence of color
What makes for a beautiful image is making use of interesting light or showing off tonal contrast, so let’s look at tonal range.
What is tonal range?

Put simply, the tonal range is the span of tones between the lightest and darkest areas of an image. Images may occupy the entire range or just a part.
Let’s look at the ways you might use the tonal range in your images:
- Entire tonal range
- Light tones only
- Mid-tones only
- Dark tones only
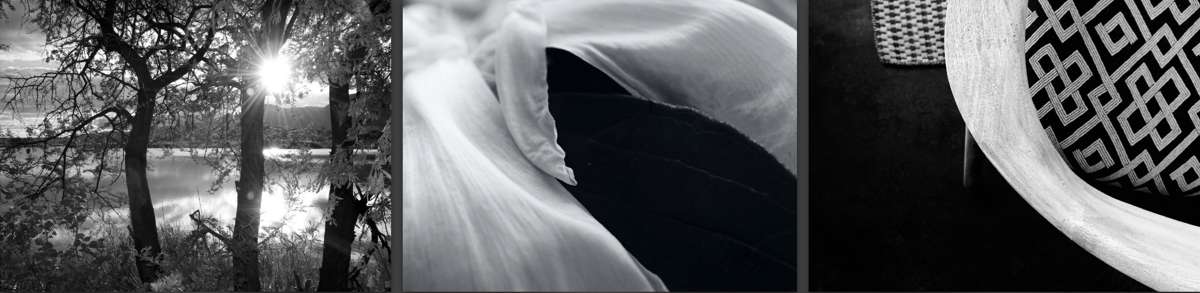
Using the entire range
Images that span all tones include true black, true white, and many shades of grey in between. The histogram data spans the full length of the histogram to maximize tonal range. This is what we photographers usually aim for in our images because using the full array of tones adds depth and interest.
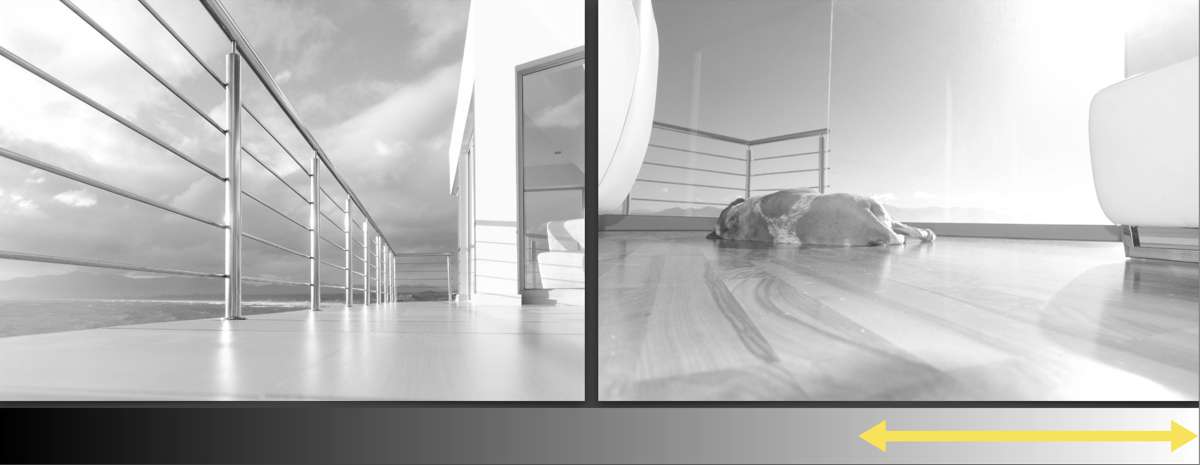
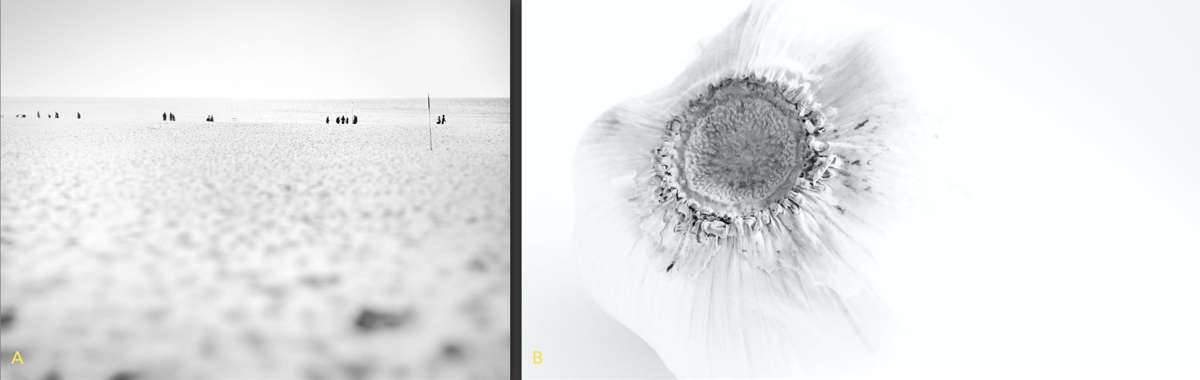
Using mostly light tones (high key)
High key images use almost no dark tones. There is very little contrast. Shadows are barely there or disappear. A high key image retains detail in the light tones. This is different than over-exposure, which renders as pure white with no detail. Scenes and subjects that lend themselves for high key images are those that are already predominantly bright.
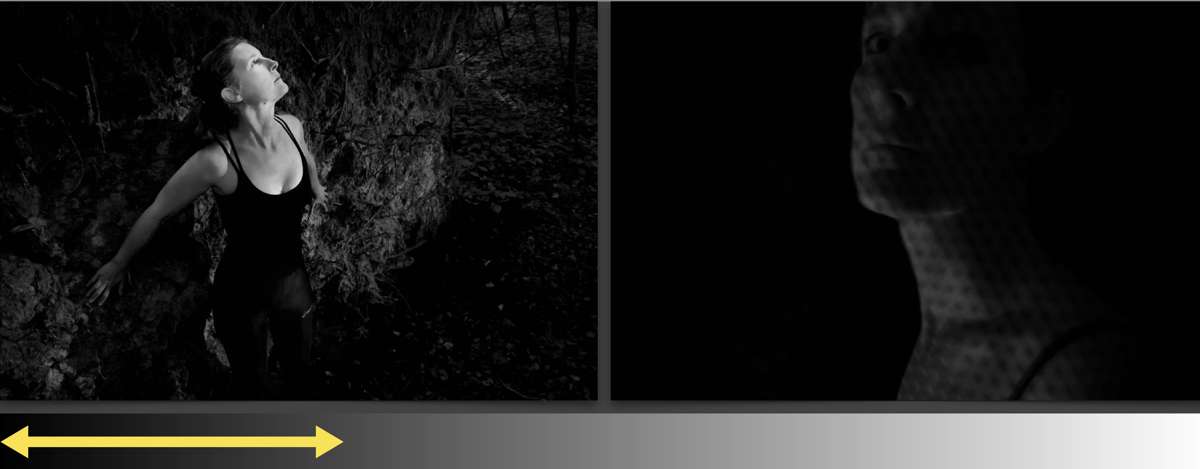
Using mostly mid-tones
An image full of mid-tones often looks like a sea of grey — flat and muddy. The histogram data spans the middle part of the histogram but does not reach either the light or dark tones. Usually this is what we try to avoid as photographers, but it can soften the look and might work for some subjects.

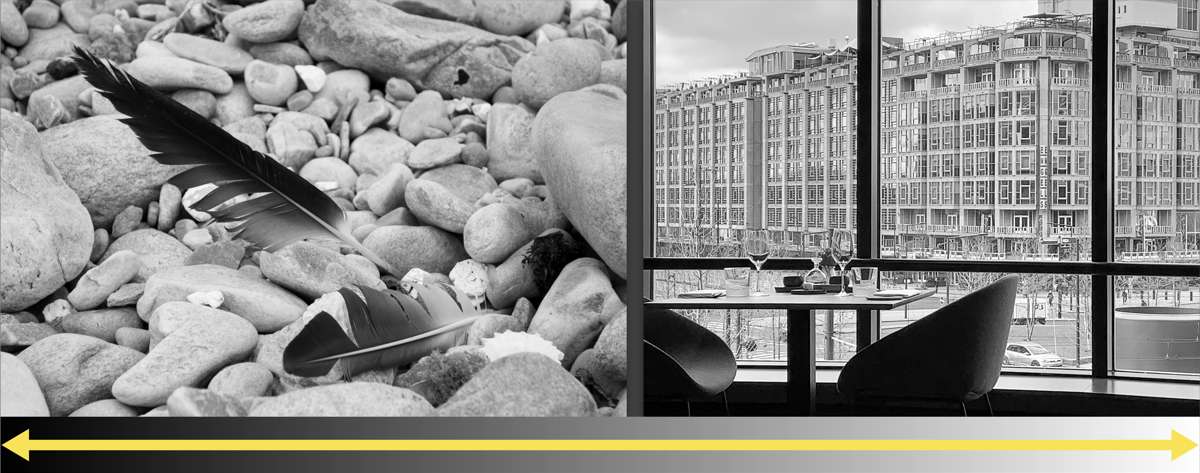
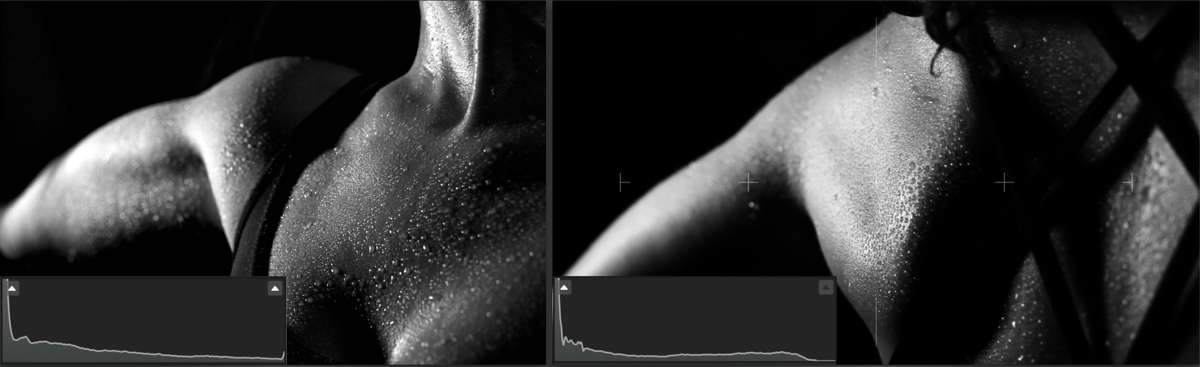
Using mostly dark tones (low key)
A low key image is one that contains predominantly dark tones. Shadows often play a primary role in low key images. A low key image retains detail in the dark tones. This is different than under-exposure, which renders as pure black with no detail. Scenes and subjects that lend themselves for low key images are those that are already predominantly dark.
Tonal range creates a mood

Images that are low key usually feel dramatic or even full of mystery.
Low key images are not always dark. They can also be high contrast, containing some areas of light.
High key images often feel airy, upbeat, or dreamy. This is because these images predominantly occupy the brighter tones. High key images are not always bright. They can also be high contrast, containing some areas of dark.
Did you know B&W images can be created in-camera?
There are two main ways to create black & white images:
- The common method is to convert a color image in post-processing.
- The game-changer is to shoot B&W straight into your camera. This helps you easily see those elusive images that only come alive in black & white.
In Beautiful Black & White we explore BOTH ways. You may even find that a combination of the two is what works best for you!
Take your creativity in an exciting direction
In Beautiful Black & White you’ll learn how to see captivating black & white images all around you.
Case studies include landscapes, architecture, food and lifestyle photography, and still life.
Explore new creative paths. Discover the joy of black & white photography and start finding beauty everywhere!

“This course defined and clarified so many things that I was trying to achieve with my images.”
WHAT BRYAN PETERSON SAYS ABOUT BRIT HAMMER
“I rarely speak out with this level of enthusiasm for any of our instructors because ALL of our instructors are equally great in teaching their individual craft, so why have I chosen to call attention to one of our instructors, Brit Hammer? Simply because of Brit’s ability to transform each of her students’ vision from good to great consistently, time and time again; in part because of her insightful lessons, but I can say unequivocally that Brit’s greatest strength is her in depth and disarming critique style of each student’s weekly assignments. It is the most often comment I receive from BPSOP students: ‘Brit’s critiques were the greatest value in this course. The assignments were great, BUT the critiques were by far the most valuable!’
In closing, if you have yet to take a class from Brit, consider filling the ‘void’ with the best opportunity to grow your photography in ways you have perhaps never imagined!” — Bryan F. Peterson
SIGN UP FOR A CLASS WITH BRIT HAMMER
** No post processing skills necessary for any of Brit’s courses **
MORE WAYS TO WORK WITH BRIT HAMMER


