A STUDY IN COLOR & TONE

Re-working Color and Tone in Photoshop for Enhanced Impact

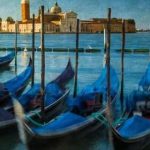
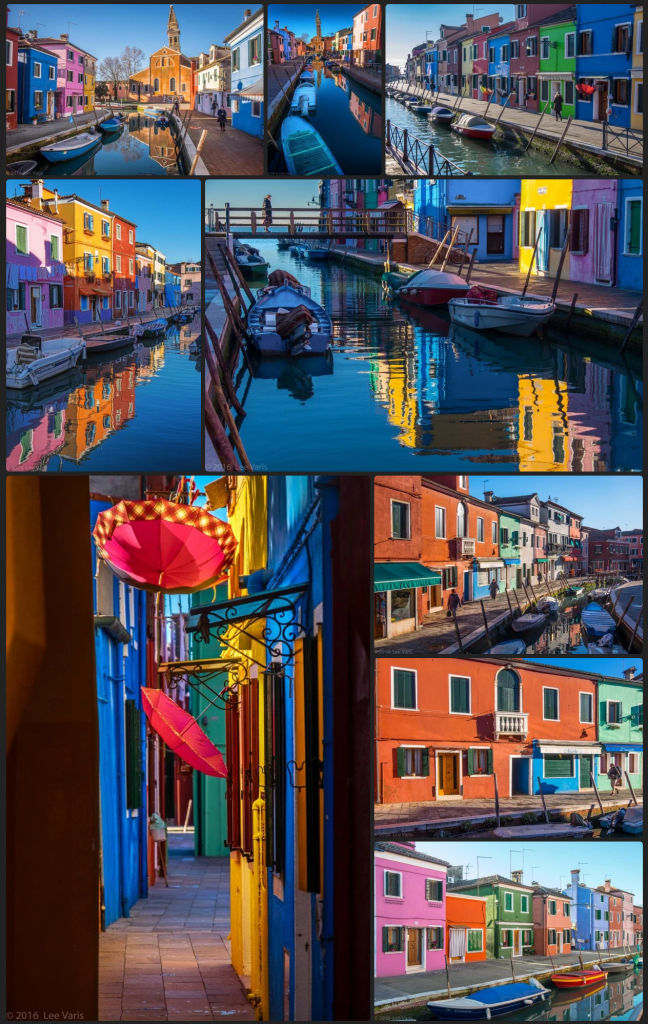
Our last trip to Venice for Carnival included a half day on the island town of Burano, easily one of the most colorful towns on earth! Before I dive into my tutorial on color and tone enhancement, take a look at this small sampling of images from the trip—all captured with my trusty Fuji X-T1 mirrorless.
Photoshop_Tips

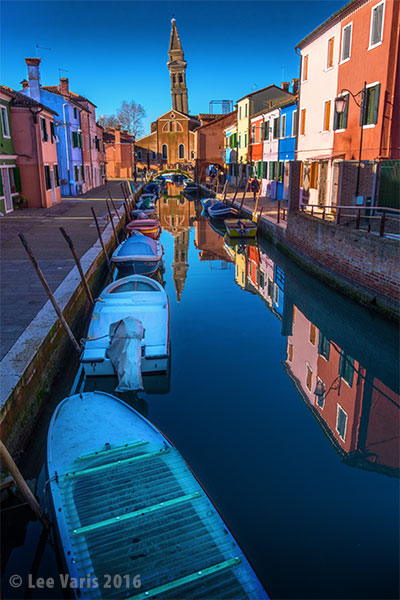
There is a classic view of the tilted church that I have been drawn to since my first visit in 2015. This year I captured the following image from one of the little bridges that cross the many little canals that run through the town.
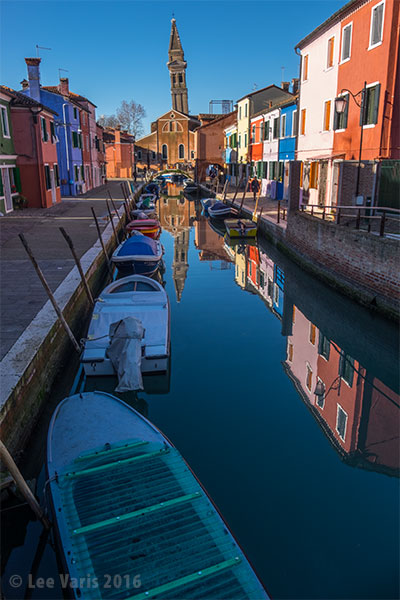
Looking down the canal at the tilted church tower—there are no parallel lines in this image!

Looking down the canal at the tilted church tower—there are no parallel lines in this image!

There is a kind of fun-house mirror quality in the image, where there are no perpendicular lines—everything is tilted at a diagonal !  The boats in the canal create a strong leading line that takes your eye right to the tilted tower with its mirror reflection. This original image has already been adjusted in Lightroom to open up the shadows, with the shadow slider all the way to +100! I want to brighten up the boats and add a bit more saturation to the colors in the most natural way I can without introducing artifacts or obvious selection edges. My first strategy is to examine the individual RGB channels to see if I can use the channel luminosity to my advantage!
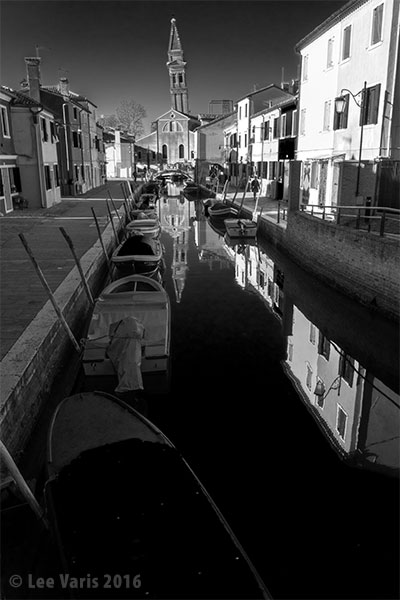
The red channel has a lot of contrast and a much darker sky and water.
The red channel has a lot of contrast and a much darker sky and water.

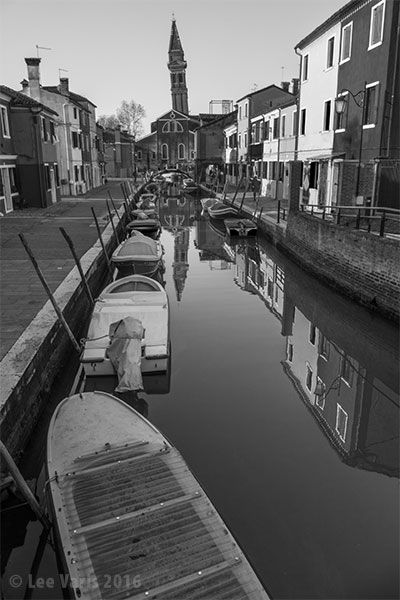
The blue channel has much brighter water and sky, but also brighter boats
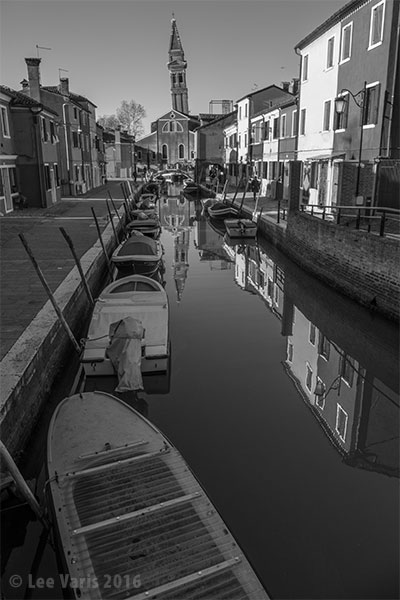
The blue channel has much brighter water and sky, but also brighter boats

The green channel is between the two extremes, no surprise because the green channel holds 60% of the overall luminosity of the image.

The green channel is between the two extremes, no surprise because the green channel holds 60% of the overall luminosity of the image.

I decide the blue channel is going to help me lighten the boats, so I use Apply Image to put a copy of the blue channel into a layer above the background, and change the layer blend mode to Luminosity. Since I don’t want to brighten all the blue in the image, I make a black layer mask and then soft-edge brush in with white in the area of the boats!
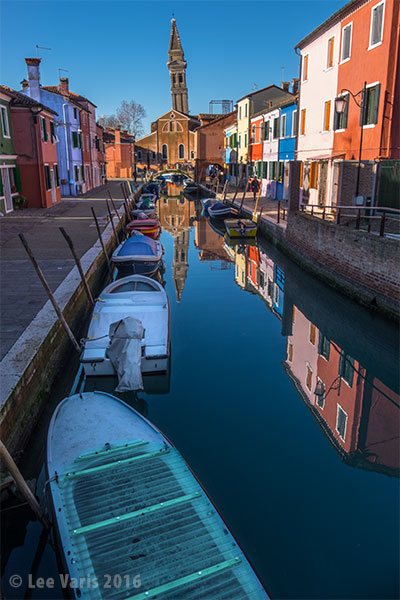
Here the blue channel luminosity is applied to the image through a soft edged mask to lighten the boats.

Here the blue channel luminosity is applied to the image through a soft edged mask to lighten the boats.

Next, I use the red channel to darken the sky through a gradient mask… The advantage here is I don’t have to mask off the tower to get the gradient effect into the sky without darkening the tower as well. In fact, the red channel luminosity brightens up the tower a little!
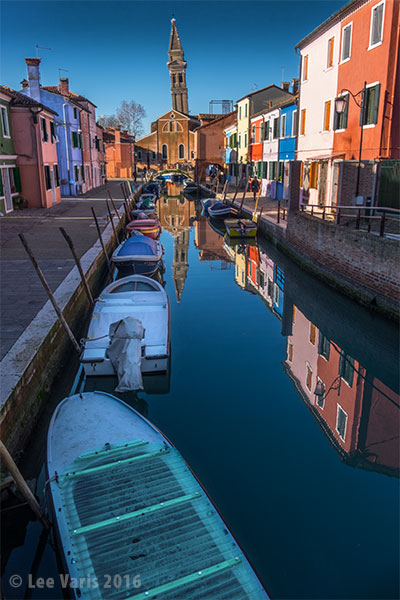
The red channel luminosity is applied to the top edge to darken the sky and lighten the tower.

The red channel luminosity is applied to the top edge to darken the sky and lighten the tower.

Now its time to beef up the color, and so I duplicate the image and convert the copy into Lab…
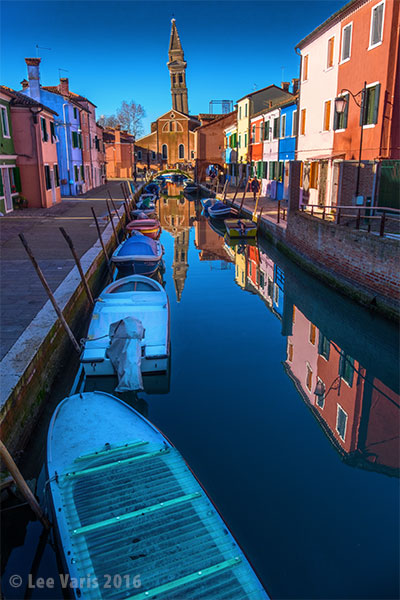
Lab is ideal for increasing color saturation without introducing artifacts.

Lab is ideal for increasing color saturation without introducing artifacts.

The final image has the color from the Lab copy applied in a layer in color mode with a copy of the inverted “b” channel applied in a layer in Soft Light mode. This was used to brighten the 3rd boat from the front and put a little halo of brightness around the tower in the reflection in the water.
Online_Learning_Photography

The final image is the result of a few layers blended through Luminosity, Color & Soft Light.

Here is the layer stack…
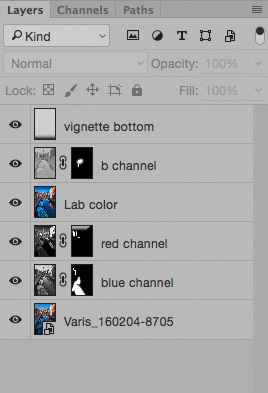
The top layer applies a darkening gradient to the bottom to “contain” the edge a bit.

The top layer applies a darkening gradient to the bottom to “contain” the edge a bit.

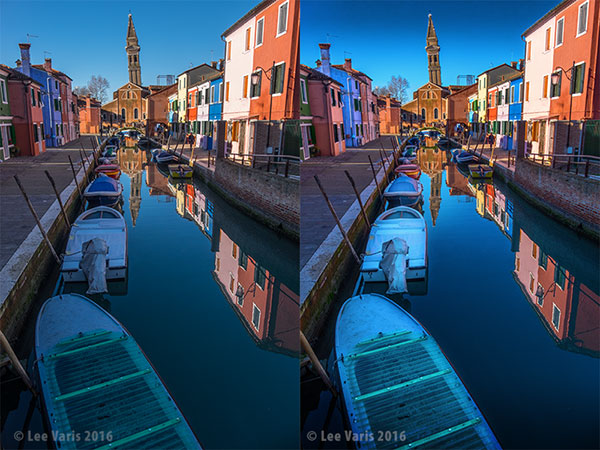
Compare the original to the version edited in Photoshop.
Photoshop_Free_Tips

While this kind of enhancement can be simulated in Lightroom with the adjustment brush, and gradient tool, the result is subtly different, and not quite as natural looking.

– BPSOP Instructor: Lee Varis

Lee Teaches:

Photoshop Layers Fundamentals: Selections, Masks and Adjustments 

Portrait Retouching Fundamentals in Photoshop

“I just wanted to thank you for another wonderful class. I have to confess that each week when I read the new assignment, my first reaction was mild panic and a deep certainty that I would not be able to produce anything worthwhile that fit within the parameters you had set. But before I knew it, the ideas started to flow, and I quickly became obsessed (no, that isn’t too strong a word!) with exploring the possibilities. I can honestly say that the photos I produced in response to your assignments are among my favorites. Thanks for bringing out a creative side I didn’t know I had!”

Barbara Geiger
Understanding Color

“Thank you so very much for this course! It’s allowed me to take the blinders off and present my images for what I want them to be without being a slave to the “reality” of the camera. I would also add that in conjunction with your printing course, this has been the most useful course I’ve ever taken. Your notes are more than comprehensive and your comments and critiques are direct, clear, and always directed to the improvement of the art.”

Bill
After the click

” I want to thank you for this class and for your patience and availability to answer all of my questions. I have learned very much through this class. I have used LR in the past, but mostly for editing images. I now have a better grasp in the organization of my images, an even better understanding of editing images, and an understanding of the value of presets. I still have a lot to learn, but this has put me on the road to be able to improve my photography. Again, thank you! ”

Dale Yates
Lightroom Quickstart

Classes Starting Soon!

Understanding Exposure and Your DSLR

Instructor: Bryan Peterson Duration: 6 Weeks Cost: US$169 Without que…

Wireless Flash Techniques for Outdoor & Nature Photographers

Instructor: Rick Burress Duration: 4 Weeks Cost: US$129 Learn Photoshop…

The Real Photoshop Course

Instructor: Charlie Borland Duration: 4 Weeks Cost: US$129 Are you a …

The Ultimate Guide to Adobe Bridge CC

Instructor: Rick Burress Duration: 4 Weeks Cost: US$129 The Anti-Catalo…

After the Click – Refining Your Vision in Lightroom & Camera Raw

Instructor: Mark English Duration: 4 Weeks Cost: US$129 Why do some ima…

Editing in Adobe Camera Raw

Instructor: Rick Burress Duration: 4 Weeks Cost: US$129 If you love pho…

Exploring Adobe Photoshop Lightroom & Lightroom for Mobile

Instructor: Holly Higbee-Jansen Duration: 4 Weeks Cost: US$129 In this …

Lightroom Quick Start

Instructor: Holly Higbee-Jansen Duration: 4 Weeks Cost: US$129 Do you w…

Mastering Apple Photos

Instructor: Jon Canfield Duration: 4 Weeks Cost: US$129 Mastering Apple…

Luminar Essentials

Instructor: Jon Canfield Duration: 4 Weeks Cost: US$129 Luminar is an …

The Art of Printing and Selling Your Art

Instructor: Mark English Duration: 2 Weeks Cost: US$76 The print is the…

The 50 Most Useful Tips in Photoshop CC and Photoshop Elements

Instructor: Roger Morin Duration: 2 Weeks Cost: US$76 This two-week cla…

50 MORE Photoshop Tips & Tricks

Instructor: Roger Morin Duration: 2 Weeks Cost: US$76 This two-week cla…
Translate »