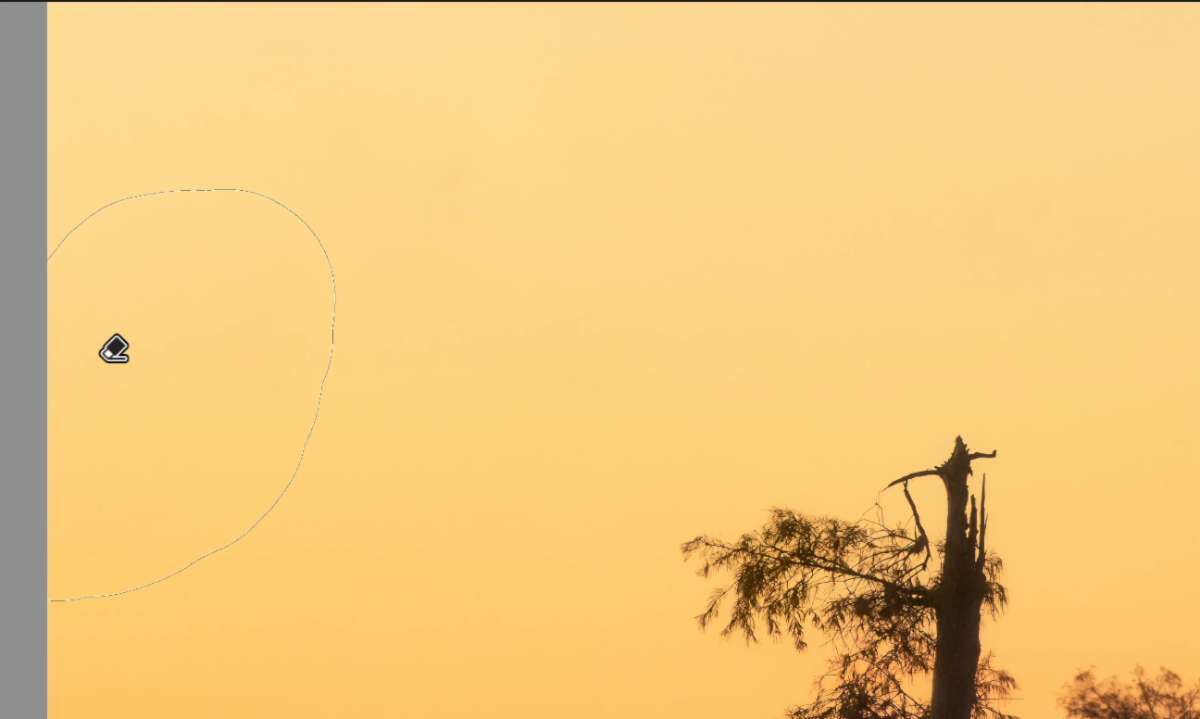
Content-Aware Remove Tool in Adobe Lightroom

Starting with the October 2022 release of Lightroom Classic (version 12.0), Adobe added some exciting new tools making image editing easier and faster. One of these new tools is Content-Aware Remove tool in the Healing panel, lets you remove unwanted spots and objects in an image. Here I will demonstrate how to use this tool effectively.
This images was took at a cold morning last month in the cypress swamp in Texas, I used 100-400 telephoto lens to isolate this group of trees in the distance, silhouetted against the bright and colorful sky.

However, as you can see, a tree branch extends into the frame on the top left side. I couldn’t exclude it on the scene with this composition, but I know confidently that it can be removed easily in Lightroom with the new content aware remove tool.
The other distraction is the wood navigation pole at the left of the trees. It would be removed by the same tool.

Image 1

1.    Go to the Healing panel in Lightroom Develop module(by pressing Q key), you will find the Content-Aware Remove tool is the first icon in the “Mode” line. Click on it. (image 1)

Image 2


Image 3

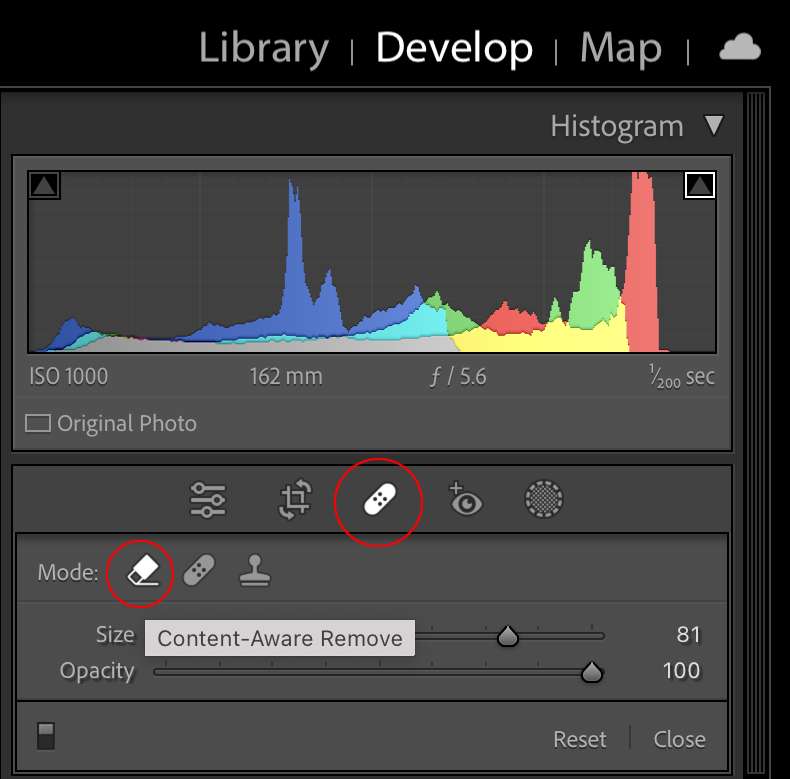
2. A brush appears on the image, place the brush on top of the branch and paint, make sure the size of the brush fully covers the entire branch (Image 2).  Use “[“ or “]” key to adjust the brush size. Once you release the mouse after painting, the branch will be magically gone (removed from the background). A content-aware remove tool icon will be placed on the location of object removal to indicate the editing. (image 3). Technically, Lightroom analyzes the surrounding area of the object that is being removed, and automatically fill the removal area with colors and textures seamlessly.

Tip: To achieve the best result, make sure the painted area is a bit larger than the object you want to remove.(image 3). In case that there is still some leftover or not perfect removal of the object, you can either press the “Refresh” button in Healing Panel to fill in different content automatically(image 4), or Hold down Command (Mac) | Control (Win) key, then drag your mouse to manually select an area of the image to fill in the removal area.  (image 5).

Image 4

Image 5

3.    Now, Repeat the step 2 to remove the wood navigation pole. (image 6)
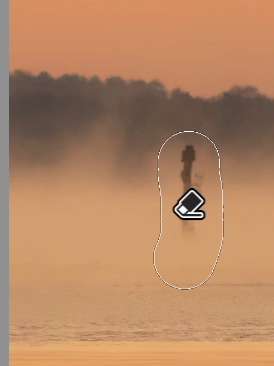
Image 6

Below is the final image after 2 objects removed.
Tip: The use of Content-Aware Remove tool is most effective on spots or objects with simple background with no or little details, like sky, in the case of this image.  If the objects are in the area of details, textures. It’s best to try the healing or clone tool.


William Yu Teaches:

Photographers Guide to Travel Photography

“I just wanted to thank you for another wonderful class. I have to confess that each week when I read the new assignment, my first reaction was mild panic and a deep certainty that I would not be able to produce anything worthwhile that fit within the parameters you had set. But before I knew it, the ideas started to flow, and I quickly became obsessed (no, that isn’t too strong a word!) with exploring the possibilities. I can honestly say that the photos I produced in response to your assignments are among my favorites. Thanks for bringing out a creative side I didn’t know I had!”

Barbara Geiger
Understanding Color

“Thank you so very much for this course! It’s allowed me to take the blinders off and present my images for what I want them to be without being a slave to the “reality” of the camera. I would also add that in conjunction with your printing course, this has been the most useful course I’ve ever taken. Your notes are more than comprehensive and your comments and critiques are direct, clear, and always directed to the improvement of the art.”

Bill
After the click

” I want to thank you for this class and for your patience and availability to answer all of my questions. I have learned very much through this class. I have used LR in the past, but mostly for editing images. I now have a better grasp in the organization of my images, an even better understanding of editing images, and an understanding of the value of presets. I still have a lot to learn, but this has put me on the road to be able to improve my photography. Again, thank you! ”

Dale Yates
Lightroom Quickstart

Classes Starting Soon!

Understanding Exposure and Your DSLR

Instructor: Bryan Peterson Duration: 6 Weeks Cost: US$169 Without que…

Wireless Flash Techniques for Outdoor & Nature Photographers

Instructor: Rick Burress Duration: 4 Weeks Cost: US$129 Learn Photoshop…

The Real Photoshop Course

Instructor: Charlie Borland Duration: 4 Weeks Cost: US$129 Are you a …

The Ultimate Guide to Adobe Bridge CC

Instructor: Rick Burress Duration: 4 Weeks Cost: US$129 The Anti-Catalo…

After the Click – Refining Your Vision in Lightroom & Camera Raw

Instructor: Mark English Duration: 4 Weeks Cost: US$129 Why do some ima…

Editing in Adobe Camera Raw

Instructor: Rick Burress Duration: 4 Weeks Cost: US$129 If you love pho…

Exploring Adobe Photoshop Lightroom & Lightroom for Mobile

Instructor: Holly Higbee-Jansen Duration: 4 Weeks Cost: US$129 In this …

Lightroom Quick Start

Instructor: Holly Higbee-Jansen Duration: 4 Weeks Cost: US$129 Do you w…

Mastering Apple Photos

Instructor: Jon Canfield Duration: 4 Weeks Cost: US$129 Mastering Apple…

Luminar Essentials

Instructor: Jon Canfield Duration: 4 Weeks Cost: US$129 Luminar is an …

The Art of Printing and Selling Your Art

Instructor: Mark English Duration: 2 Weeks Cost: US$76 The print is the…

The 50 Most Useful Tips in Photoshop CC and Photoshop Elements

Instructor: Roger Morin Duration: 2 Weeks Cost: US$76 This two-week cla…

50 MORE Photoshop Tips & Tricks

Instructor: Roger Morin Duration: 2 Weeks Cost: US$76 This two-week cla…
Translate »