Video shot with DJI Mavic Pro done during first 2 days of March 2017 Iceland photo tour, before I lost it on the third day.
As a travel photographer and photo tour leader, I led photo tours around the world every year. Among the destinations, Iceland is one of my favorite places to shoot. It’s unique natural beauty and variety of photographic interests really make it paradise for photographers. I have been shooting there couple of times in past years. during every trip, I always look for new perspectives, new tools and ideas to explore the photo opportunities there.
This March, I led a photo tour there with a new tool: DJI Mavic Pro camera drone. Although have played flight simulation on computer when I was young, I’m an absolute rookie to fly the drone, taking videos and photos on location.
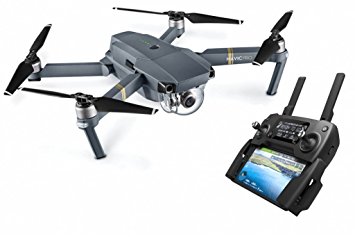
The drone enables me to capture the same sites with a entirely new perspective. However, all previous iterations of drones are just too heavy and bulky to travel with. This is totally changed when DJI Mavic Pro hits the market late last year. It’s extremely compact, easy to pack and move around, with a high quality camera that shoots 4K video and 12MP still photos. It’s a dream coming true to me.
However, It took me 2 months to get the drone after placing the order. The Iceland trip is imminent, it doesn’t leave much time for me to practice the flying at home. I literally shot my first drone videos and photos in Iceland. It’s a blessing, but also a curse. Eventually I paid a hefty price for being a bold rookie: I crashed and lost the drone inside a canyon in Iceland)-: Here are some lessons I learned and would like to share with you, hopefully you won’t make the same mistakes.
- If you’re a beginner, it’s good idea to insure your drone.
There are 2 kinds of people flying drones: those who have lost the drone(s) and those who are about to. It’s a very good idea to insure your newly bought drone if you’re a beginner. Companies like State Farm offer such insurance. For about $60/year, it covers loss, crash, and theft. I think, it’s totally worth the price. Especially, when I look it at rear view mirror, as my uninsured drone is lost forever.
- Learn how to set up and operate the drone as much as you can before the first flight.
There are lots of resources online, from which you will find tons of information/tutorials/tips covering all aspects of flying the drone. First, DJI, the manufacturers’ website has good tutorials videos. Second, Youtube is another excellent resources to learn, channels like “Drone Valley” is a fantastic treasure trove.
- Bring extra batteries and immediately land the drone when battery indicator is below 30%.
One fully charged battery only allows about 20 minutes of flying, that includes take off and landing. You really have to fly conservatively in terms of battery life. Keep you eyes on the battery indicator on the controller. If it falls around 30%, it’s time for the drone to come home. Remember, it takes time and battery to fly back home. If the battery runs out, the drone will be a falling brick!
- Don’t forget to press the record button.
As a beginner, a few time, I found myself just flying the drone, without videotaping or photographing. The excitement of flying makes me forgetting to press the record button, wasting precious time and battery.
- Back up your videos and photos after each flight if you can.
DJI Mavic Pro carries a micro SD card onboard, storing all the videos and photos I shot. It’s a good idea to back up the files to your laptop or external hard drive after every flight. Because, if something bad happens to your drone, you still have all the videos and photos shot during previous flights. I learned this lesson hard way: when I crashed and lost my drone in a canyon, the earlier sunrise videos I shot at the beautiful Reynisfjara black sand beach, are also gone forever in the belly of the drone. To me, this is worse than the loss of the drone.
- Very useful accessories for DJI Mavic Pro
DJI Mavic Pro has very low ground clearance, it’s easy to blow up dust and debris when taking off or landing. This is the perfect accessory to raise the ground clearance for cleaner takeoff and landing.
- Don’t fly bold and aggressive when you’re still a rookie, otherwise, you will regret for sure.
Finally, a heart felt advice: As a beginner, be humble and cool-headed to fly the drone, never get aggressive and bold to try anything beyond your skill and experience.
After just couple of flights in 2 days, I flew the drone deep into a rocky canyon without straight line of sight. Consequently, the propeller hit the canyon wall. On the screen of the controller, I watched it tumbling down to its death. End of the drone photography for the rest of the trip.
With all above cautions, I’m still passionate about drone photography and videography! With lessons learned, I will continue to do it in next photo tours after my replacement drone arrives. The above video are the edits of 2 days of drone footage before its death on the 3rd day.
William Yu
www.williamyuphotoworkshops.com
Instructor of Photographer’s Guide to Travel Photography

Northern lights shot in Iceland.
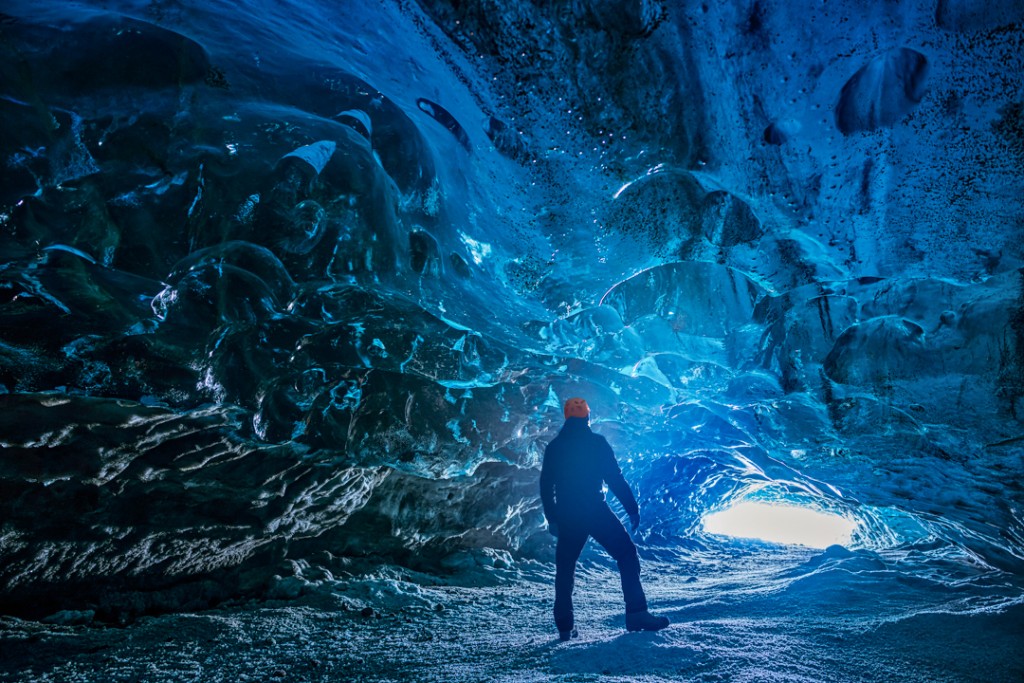
In the ice cave, Iceland


