Texture overlays are a great way to add additional depth and dimension to your images. It’s not for everyone, and it doesn’t work with every image. The technique though, has been around long before Photoshop: in the past you might have sandwiched two transparencies (or two negatives) together and printed them as a single image.
What is texture?
It’s simply an image of some surface with an interesting texture, pattern or colour. In digital terms you add it as an additional layer in your editing program. You can buy packages of texture images from many sources on the internet, or create your own: weathered wood, peeling paint, fabrics such as canvas or burlap, worn leather, carpet, the pattern of burned on grease a well-used roasting pan… the possibilities are endless. A texture overlay cannot be counted on to turn a weak image into a gallery piece, but it can sometimes rescue an image that isn’t quit there, making it into something more interesting.
Getting started with texture overlays
If you have a subscription to Adobe Creative Cloud, you already have access to a great starter set of textures (if you don’t: Why not? For the price of a couple of lattes a month, you can have the best post-processing software available). In Photoshop CC, go to Help>Browse Add-ons. This will open your browser and take you to the Adobe Add-ons web page. On the right, below the featured Add-ons, enter “Adobe Paper Textures” in the search box.
On the next pages follow the instructions to download and install the “Adobe Paper Textures Pro” add-on. It will install itself into Photoshop automatically.
Back in Photoshop, over on the right, you will find a new item in the Properties panel. Click the blue “fly” icon to access the Paper textures properties sheet.
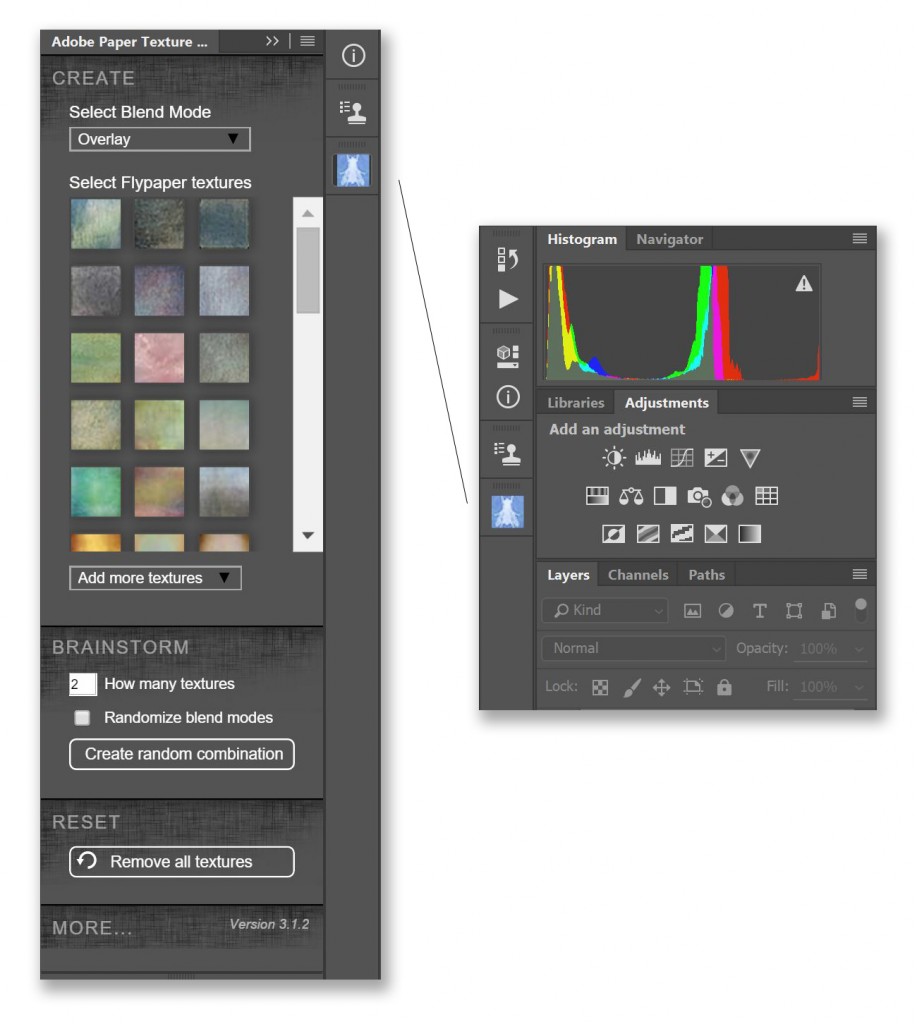
To apply a texture to your image, simply choose one that looks promising and click it. A new layer will be added, and the chosen texture will appear on that layer. If you choose to, you can add a second (or even a third) texture to your image as well.
Part of the magic in adding textures to your image is created by your choice of a blending mode for the texture. A “blending mode” in Photoshop simply determines mathematically how the pixel values in one layer interact with the pixel values in the underlying layer you are blending it with. We don’t care about the math, we just care about what it looks like, so feel free to try and to use any blending mode that achieves an effect you like.
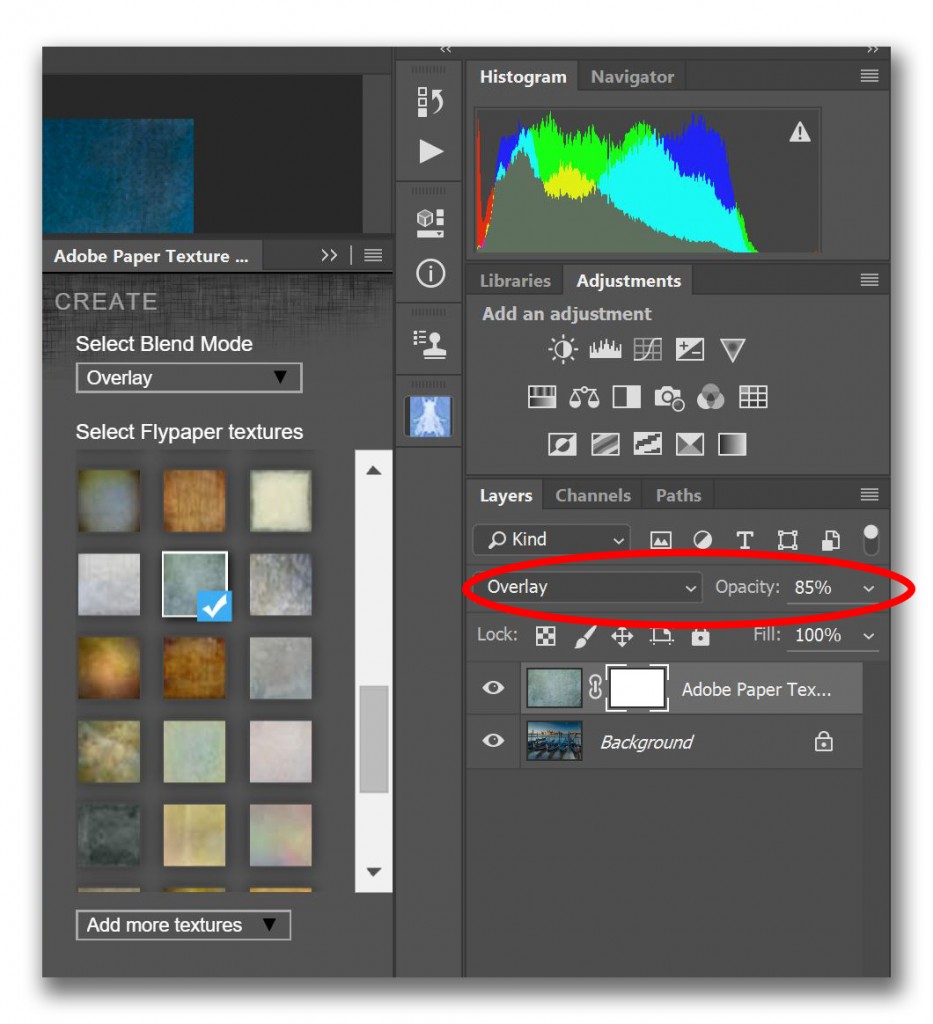
To select or change the blending mode, select the layer with your texture in the layers panel and then select from the blending mode drop down at the top of the layers panel. With Adobe Paper Textures Pro, the default blending mode is always “Overlay”, and this is a good starting point. Try any of the others as you like, but generally I find that Overlay, Soft Light, Hard Light and sometimes Multiply produce the effects I like.
But you don’t have to stop there. If you like the effect of the overlay, but it appears to strong for your taste; simply reduce the opacity of the texture layer (the Opacity slider is just to the right of the Blend Mode dropdown in the Layers panel.)
Like the texture, but prefer to retain the original colours in your image? Select the texture layer and de-saturate it (Image>Adjustment>Desaturate)
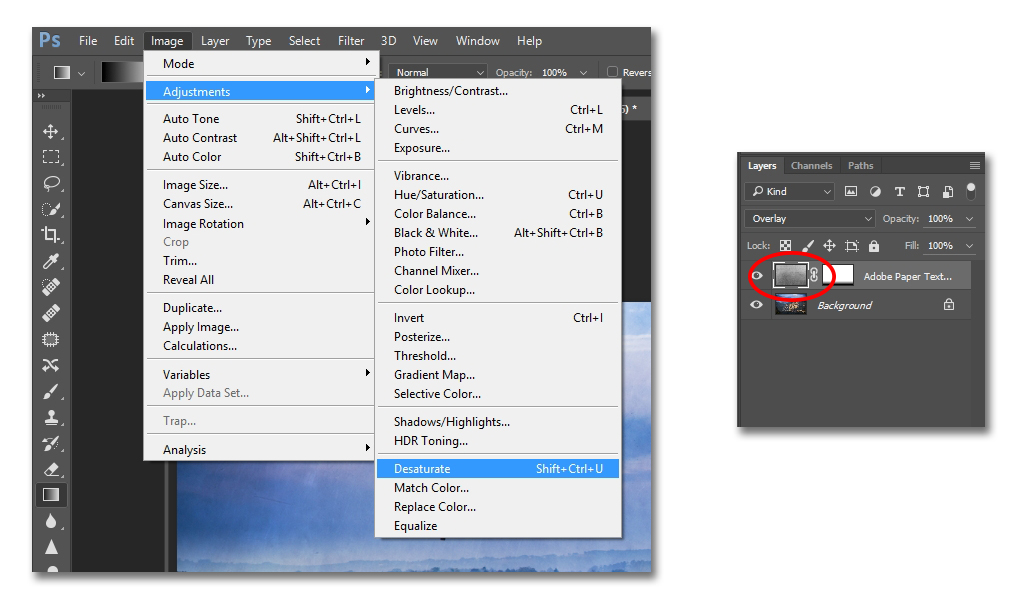
Just be sure to select the Texture layer (circled in red above) before you desaturate, or you may desaturate your image as well.
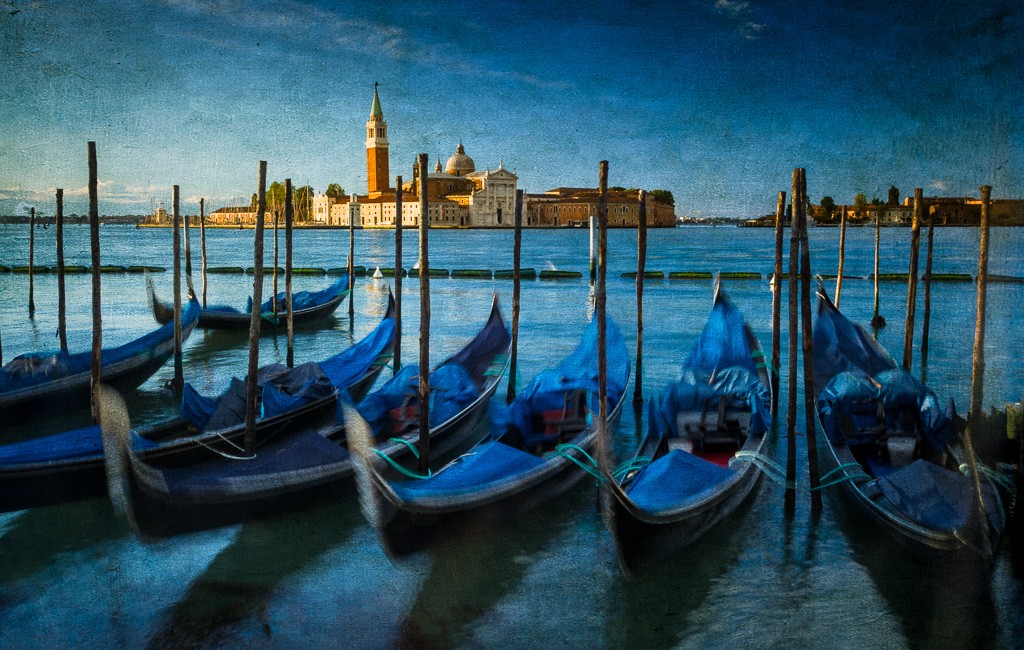
Here are a few examples, starting with the opening image. Both examples here were created using the Overlay blending mode.
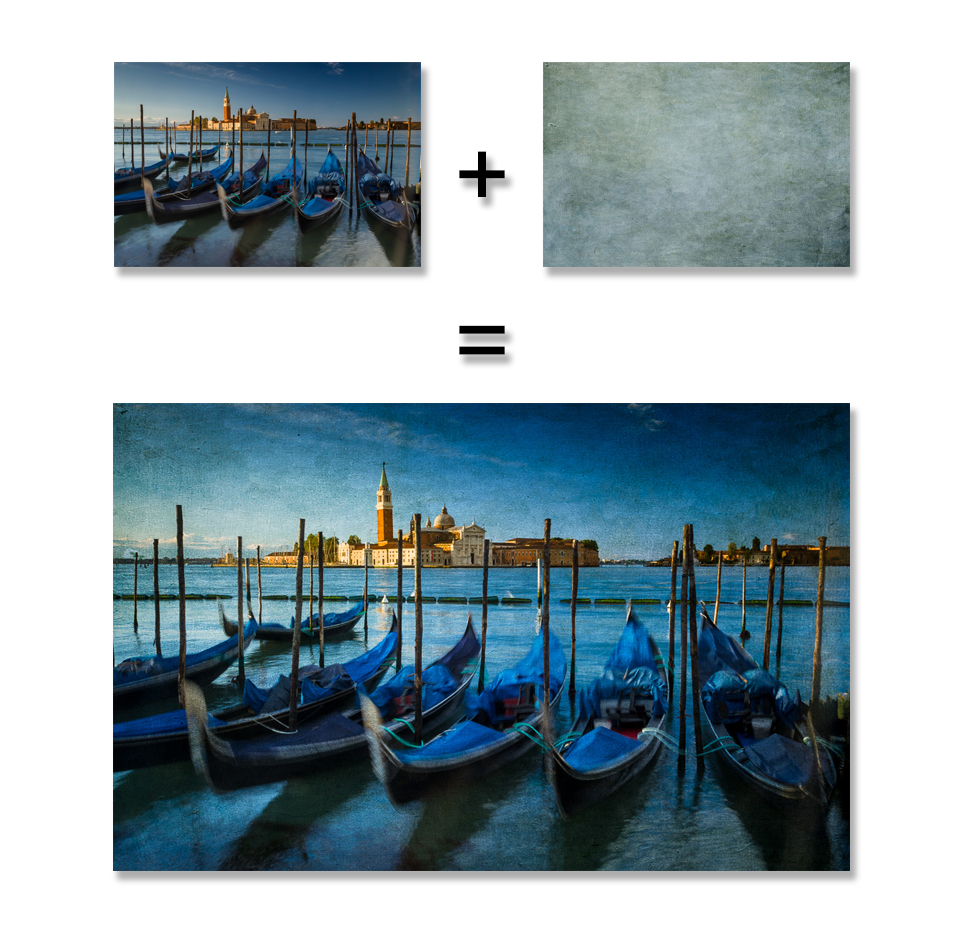
Everyone visiting Venice shoots this view from Piazza San Marco. A texture overlay added nice twist to a familiar scene.
Here is another, this time from Paris. The original was first converted to Black and White, and then toned before adding the texture.

– BPSOP Instructor Mark English
Mark Teaches: The Art of Printing & Selling Your Art


