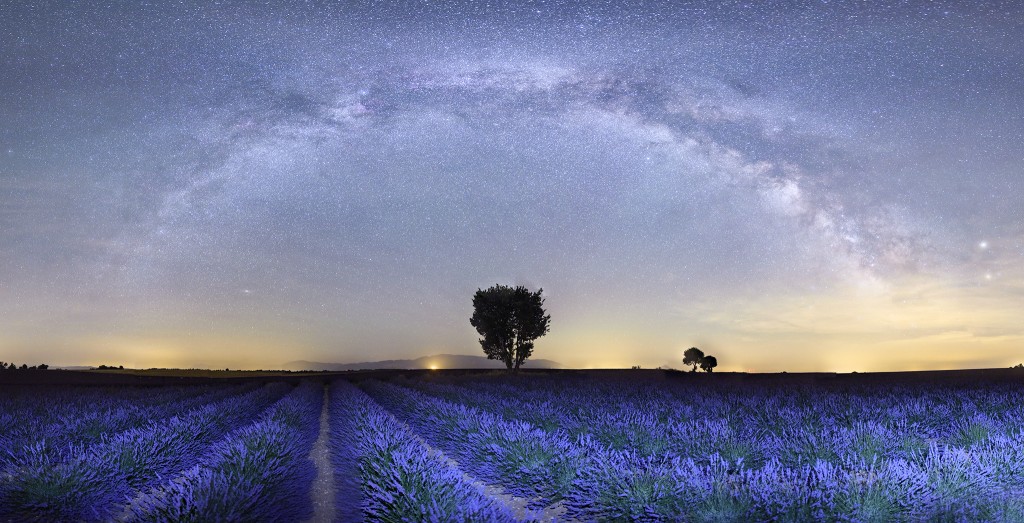
The Milky Way arch is a beautiful sight to behold – especially when you’re standing thigh-deep in lavender fields! This panoramic image was made while assisting Bryan Peterson during his recent photography workshop in lovely Provence, France. It was made from two rows of thirteen images per row, all combined in Photoshop. The exposure settings of each image were: ISO 12,800, f/2.8 for 20-seconds. The images were made with a 24-mm focal length lens on a Nikon D810A. The camera was rotated 15 degrees between adjacent images, and thirty degrees between the two rows. The lavender field foreground was illuminated using a hand-held flash briefly popped during each 20-sec exposure.
Do you see the white oval patch in the lower left of the sky? That’s the Andromeda Galaxy, M31 – the only object visible in this image that lies outside the Milky Way. It’s about two-and-a-half million light years away – which means that the light that created this image in Provence left the Andromeda Galaxy two-and-a-half million light years ago; long before the earliest homo sapiens existed!
Want to make a panorama of your own? Panoramas like this one are easy to do IF you make sure of the following:
- Level your tripod head (not just your camera!) so that it swivels horizontally. You can check this by comparing the horizon in images from the left and right extreme ends of the panorama – if a level horizon shifts between these images, then the tripod head is not level.
- Set your camera’s focus to Manual Focus
- Set your exposure mode to Manual, and then select your desired combination of ISO, aperture and shutter speed. Keep these the same for all your shots. You may wish to set them based on the brightest or darkest region of the entire panorama. High-dynamic-range (HDR) panoramas are another option for scenes with a very wide dynamic range (Hello, huge image storage requirements!).
- Take your white balance off Auto to any of the preset choices, like Sun, Cloudy, 4350K, etc.
- Ensure at least 50 – 75% overlap between adjacent images to allow successful image blending
Once you’re made your images, open them all in Photoshop and select: File -> Automate -> Photomerge. Select “Add Open Files” in the popup menu for “Source Files.” Voila! Your panorama should appear shortly! If not, try merging each of the rows separately, then merging the two rows together.
Keep in mind that the merged panoramic image will almost certainly will show distortion – quite possibly a lot of it! Not to worry; this is perfectly normal. After all, you’re taking a curved, three-dimensional sky and flattening it into a two-dimensional image. Just like rectangular world maps show high-latitude countries being distorted, so do our panoramas. Tip: The “Transform” option within the Camera Raw Filter of Photoshop can work wonders in reducing this distortion; definitely worth exploring.
The next step is to crop and perform the other usual editing steps to achieve your final result. Also: you may choose to perform a “Distortion” lens correction in Lightroom prior to merging the files, however, the “Vignetting” lens correction is not recommended as it tends to introduce color artifacts that are difficult to remove in the final panorama.
Finally, as is always the case, it is recommended that you try out your panorama source image shooting and blending techniques well ahead of time, so when the right opportunity presents itself, you’re fully prepared, confident in your technique and outcomes. Best of luck; would love to see what you create!
– BPSOP Instructor – Mike Shaw
Mike Teaches: Star Trails & Night Photography


