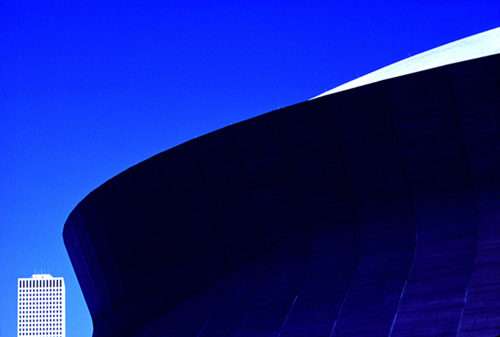
 Closing in on fifty years of taking pictures, I can turn the composition I’ve created in the viewfinder upside-down in my mind, without having to physically rotate my camera to see my photo inverted on the display. So, you’re probably asking yourself why in the world would I want to do this? To make sure my photograph has balance, either symmetrical (formal) or asymmetrical (informal).
Okay, have you ever looked at one of your images and for some reason it didn’t feel quite right to you; and you weren’t sure why? One potential reason is that it wasn’t a balanced composition.
In my “Stretching Your Frame of mind” workshop I conduct around the planet, and in my online class I teach with the BPSOP, students submit photos that (hopefully) represent the assignment or the discussion of the day. In my workshops, I teach photographers how to use the Elements of Visual Design to make their photos stronger. One of the basic elements is Balance.
Images submitted to me will often have a strong subject or a point of interest on one side, leaving the other side empty, or areas of color or light that aren’t compatible with one another. A good photograph will have an equal amount of color, shapes and areas of light and dark. Each one needs to have a certain amount of value or visual weight (mass) in relation to all the other elements in your photo, and be placed accordingly to create a sense of balance.
In my classes, I deal specifically with the balance between Negative and Positive space. If a student submits a photo that is obviously out of balance, I’ll turn their photo upside down and show it to them. Why you ask again?

Because when the student views his or her photo upside down, they’re now using a different part of their brain to process information. When they’re looking at it right side up, they’re looking at it with the right side of their brain. It’s the creative and visual side. They’re looking at the parts that make up the whole. i.e., Shape, Pattern, Texture, Form, and Color.
When I turn their photo upside down, they’re using the left side of their brain, the analytical side. They’re now looking at the whole first then putting them into a logical order and drawing a conclusion.
In other words, their image is no longer a photo that has a subject, meaning, or tells a story. It’s simply shapes, colors and areas of light and dark; it now reads only as Negative and Positive space. The student immediately sees that their photo is out of balance.
Try it yourself sometime.
-BPSOP Instructor: Joe Baraban
Joe Teaches:


