Top Ten Wildlife Photography Tips

10 Things You Can Do RIGHT NOW To Improve Your Wildlife Photography

Wildlife photography is a journey. It can take you to all kinds of places as you explore the world around us in ways you may never have seen before which is why wildlife photography is a very popular subject.

In order to consistently take photographs that capture people’s attention and to showcase your subjects, you need to know your equipment like the back of your hand, have an intimate understanding of your subjects and have started to develop your own vision and style whether it be on a particular subject, area or whatever you find the most enjoyable. However, there are some things that you can start doing right now that will have an instant positive impact on your images. Here are my top 10 things to help you get started on your journey RIGHT NOW:
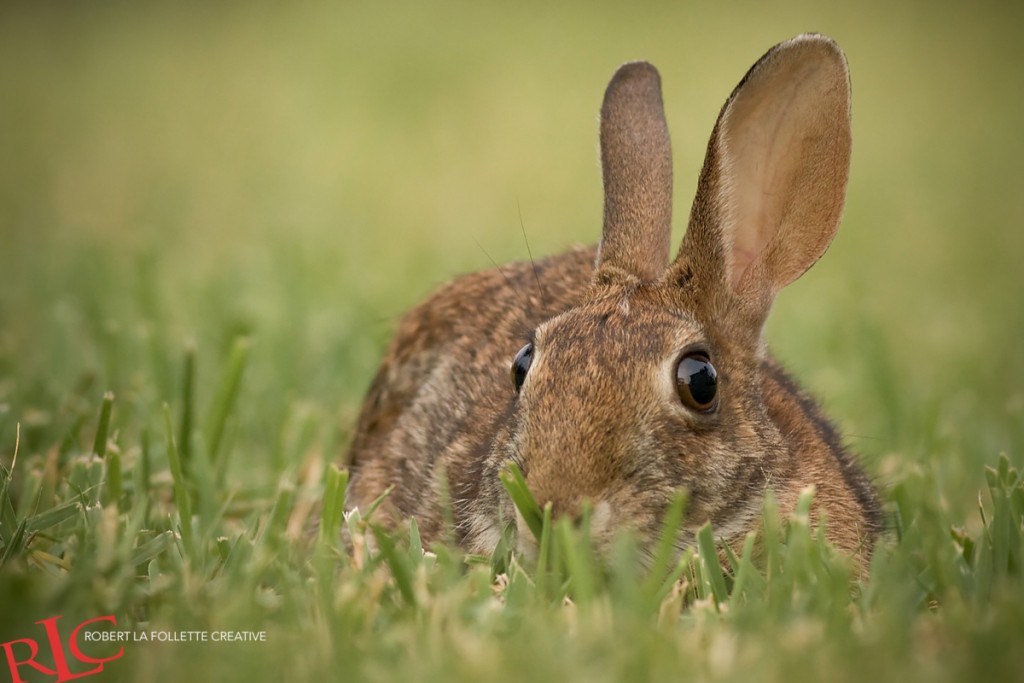
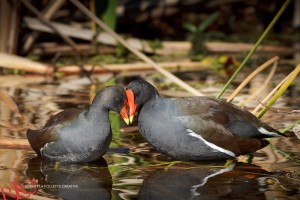

1) Get At Eye Level

To capture your subject so that it not only captures the attention of your viewer but also is the most flattering, your best images will be those taken at their eye level or sometimes depending on the size even lower.
This is important for two reasons:
• It gives the subject greater presence and helps the viewer connect with your subject
• It increases the distance between the subject and the background, which helps throw the background out of focus and draw attention to the subject by isolating the subject from it’s surroundings

If possible, lie on the ground to get as low as possible or set your tripod as low as it can go to dramatically improve your images right off the bat.

01


2) Keep Your Shutter Speed Up 
Most of the time, wildlife is photographed with a telephoto lens. Long lenses exaggerate camera shake because a small movement of the camera results in a large movement of the picture frame that can look like a tornado in your viewfinder. To eliminate camera shake use a faster shutter speed to get sharp images. The longer the lens, the faster the shutter speed needs to be.

Today many cameras and lenses have Image Stabilization or Vibration Reduction enabling you to push the boundaries further even further. However, I always use a of thumb of making sure my shutter speed is faster than 1 over the the focal length of the lens. For example, with a 400mm lens, you should keep your shutter speed faster than 1/400th second. With a 200mm lens then 1/200th sec should be fine. With wide-angle or medium focal length lenses this becomes a lot less of an issue but I always stay around 1/40th sec.

02


3) Focus On The Eyes
You’ve probably already heard that you should focus on the eyes. If the eyes aren’t sharp then it becomes very hard for the viewer to connect with the subject. For portraits you may also want to try to get the tip of the nose in focus too. Eye contact can help the viewer to connect with the subject. However, it is not always necessary. A good rule to remember when it comes to depth of field is that depth is obtained at the focus point we select and fills in behind it. Very little to any depth is obtained forwards so you may wish to select the closest point to you and increase your depth of field (aperture) to ensure that the eyes, if nothing else, is in focus.

If the animal isn’t looking at the camera, you should aim to have it facing and/or looking towards the center of the frame. For example, if the animal is looking to the right then place the animal on the left-hand side of the picture. This is more commonly referred to as the “Rule Of Thirds”.
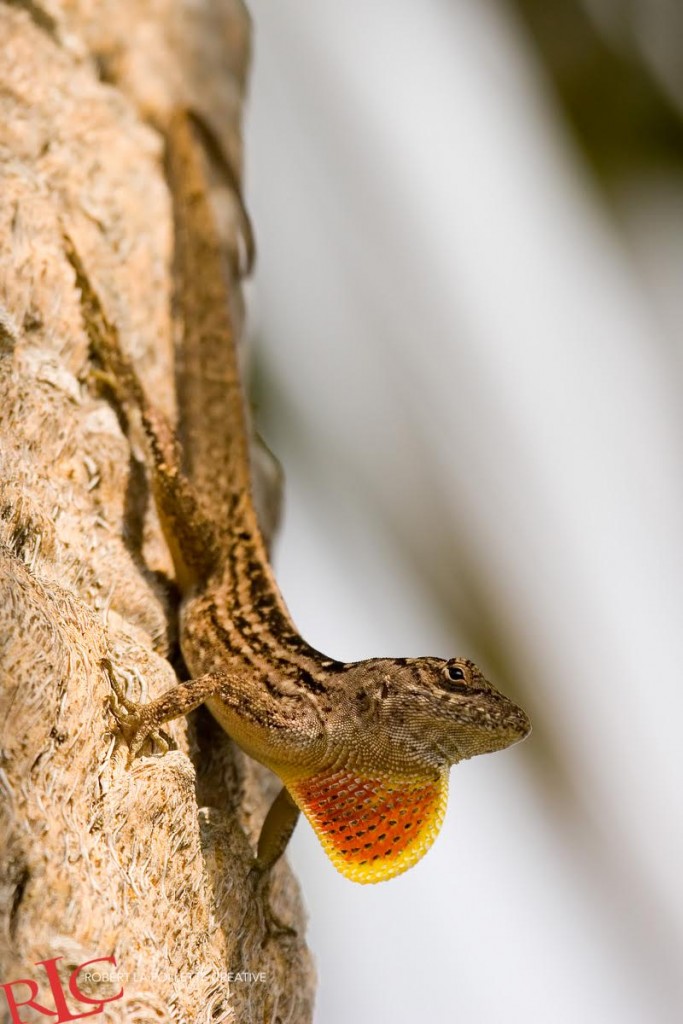
03
4) Lighting Is King

Good light can turn an average photo into an extraordinary photo. The best time for photographing wildlife is around sunrise and sunset. The light is most beautiful in the ten minutes after sunrise and before sense and then the light rapidly becomes cooler and harsher as the sun moves up in the sky which causes exposures issues such as strong contrast, deep shadows and even blown highlights. It is still very good for at least an hour or so at the beginning and end of the day.

There are two ways to use beautiful sunrise and sunset light. The number one rule is to always shoot with the sun behind you so that your subject is bathed in lovely warm light. However, you can also experiment with back-lighting your subjects, particularly if the light is low and strong to create some very compelling silhouettes.


unnamed (2)


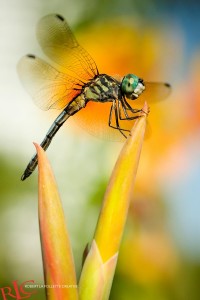
5) Watch Your Backgrounds
The background can often make or break a photo and I always preach that it is as, if not more important, then the subject itself. First and foremost you want to make sure it is clear of any distractions such as bright spots or distracting foliage like branches, dead leaves or weird color spots that draw attention to the eye. You also should ensure your subject stands out from the background and is attractively framed using the Rule Of Thirds.

Often just moving slightly to the left, right, up or down can shift the subject in relation to the background dramatically and completely change the composition and framing. You should explore these very minor tweaks to see if your shot could be improved by adjusting your position and if changing your composition from perhaps a horizontal to a vertical changes they way your subject and the background is presented.
unnamed (3)

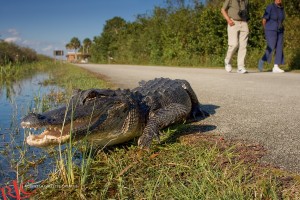
6) Leave Space Around Your Subject
Tight portraits certainly have their place but they are just one type of photograph you can take. Sometimes it is possible to be more creative, and make a more interesting image by leaving space around your subject to “breathe”.

This allows you to:
• Use elements of the landscape to frame your subject
• Show the animal in its environment
• Perfect your composition by cropping later

Try experimenting with different focal lengths to maximize your opportunities for a compelling subject. Once you have a frame-filling portrait try switching to a medium range zoom or wide-angle lens to capture more of the environment that can sometimes be a much more visually exciting photograph.

06


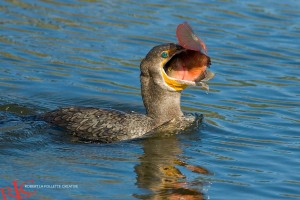
7) Spend Time With Your Subject
I used to stay with an subject until I got a shot I was happy with and then move on to the next subject. This resulted in a number of good shots with one or two unique images. What was disappointing is that I only had that one image or two and threw away the rest. Today I find that sticking with one subject for longer and really working my subject has made a big difference to the quality of my images as it allows me to experiment with my techniques and what I initially thought was a good approach may not of been the best.

The longer your spend with an subject the more chance you have of witnessing (and capturing in camera) something special. It may also be that the subject becomes more comfortable with you being there and you end up with something that you may of never of seen before. I have personally been allowed to peer into a subjects world by keeping still, low and quiet enough it was almost as if they accepted me as one of them and this is what separates a good photograph from an outstanding photograph.

07


8) Be Prepared For Anything
Being prepared will increase the odds of you capturing great images. This starts with knowing your gear as you should understand the main features of your camera and how they work so that in the field you can adjust your settings without having to think about them or even look at your camera to adjust them. You also should research your location and your subject as well as other opportunities that may be present in the area for what you may of originally were hoping to capture may not present itself but others one will. If you have a good understanding of subject you will be able to start predicting behavior and your chances of being in the right place at the right time will drastically improve.

Try to envision the shots and subjects you want to take so that you can seek them out when they present themselves. If you have an idea for a few unique images then you can make sure you have the necessary equipment and have thought about your camera settings in advance so you are ready in the blink of eye.

08


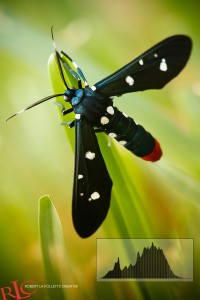
9) Shoot In RAW & Understand Your Histogram
It is important to get your exposure correct because with wildlife you may not get a second chance. One of the most important things you can do is shoot in RAW not JPG. This will ensure your camera maintains details in the shadows and highlights so that you can darken or brighten the image later if necessary. This gives you more flexibility if you don’t quite perfect the exposure in-camera.

When you are out shooting it can be hard to see if the image is well exposed on your camera screen, particularly if you are in bright sunlight. This is where your histogram is useful for you don’t want to rely on that tiny camera screen to see exposure. I only use it for composition and to check sharpness but never for exposure. The histogram is a graphical representation of the brightness of the pixels in your image. The graph shows dark pixels on the left and bright pixels on the right. The height of the trace shows how many pixels are present at each brightness level.

If you have a spike of pixels at the black-end of the histogram you will not be exposing detail in the shadows and therefore you won’t have much leeway to brighten the image on the computer. Likewise, if pixels are bunched at the right of the histogram, you will probably be losing detail in the highlights. You should aim to expose your image so that the majority of the pixels fall in the middle zone of the histogram and you aren’t clipping details in the highlights or shadows.
09

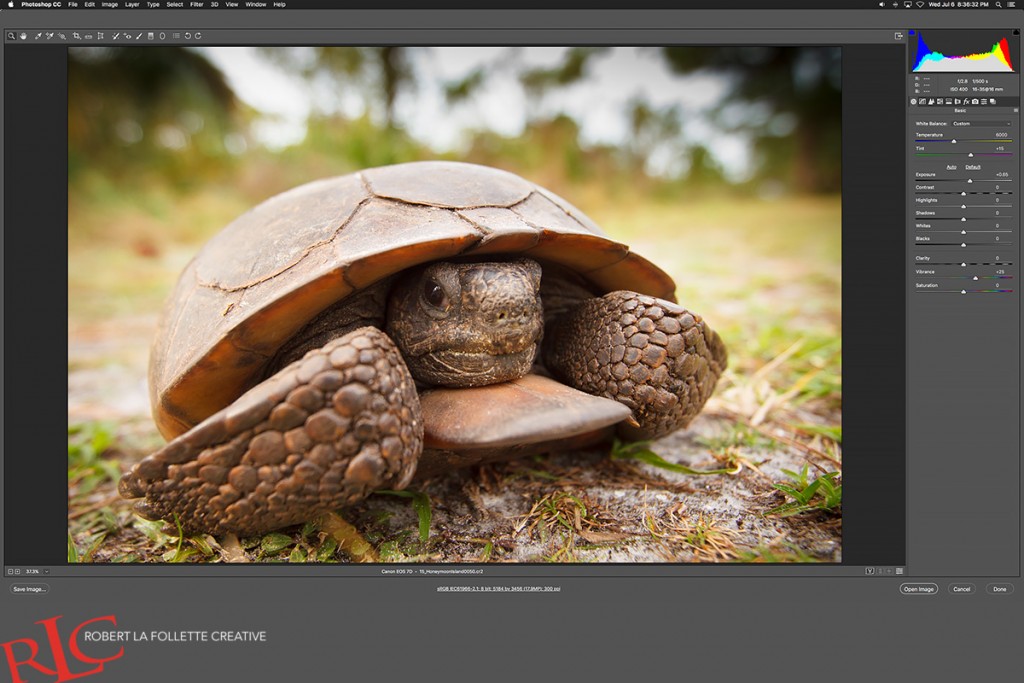
10) Process Your Images
In reality, the images you get straight out of your camera are not as good as they could be. So did you do anything wrong? Absolutely not. Camera RAW images have no “settings” applied to them such as white balance, contrast, color, brightness, shadows and so on. They are very “flat” in appearance so this is when you can tweak all those aspects in order to get them to look life-like as you saw the subject through your viewfinder which is why Camera RAW is “the” file format choice. With a little editing your images will be 100x better then if you just shot in JPG for the camera will apply all kinds adjustments and almost impossible to reverse or change without a lot more work.

As with many things in life, practice helps when it comes to image processing. Don’t be intimated to edit your images for the more you practice the better your images will get. For those who may be nervous about just shooting in Camera RAW, almost all cameras today allow you to shoot in RAW+JPG so you can still have your JPG, but now a RAW version you can play with until you get comfortable and never look back. And you’ll be glad you did!

10 (1)
Robert Teaches:

Wildlife Photography

“I just wanted to thank you for another wonderful class. I have to confess that each week when I read the new assignment, my first reaction was mild panic and a deep certainty that I would not be able to produce anything worthwhile that fit within the parameters you had set. But before I knew it, the ideas started to flow, and I quickly became obsessed (no, that isn’t too strong a word!) with exploring the possibilities. I can honestly say that the photos I produced in response to your assignments are among my favorites. Thanks for bringing out a creative side I didn’t know I had!”

Barbara Geiger
Understanding Color

“Thank you so very much for this course! It’s allowed me to take the blinders off and present my images for what I want them to be without being a slave to the “reality” of the camera. I would also add that in conjunction with your printing course, this has been the most useful course I’ve ever taken. Your notes are more than comprehensive and your comments and critiques are direct, clear, and always directed to the improvement of the art.”

Bill
After the click

” I want to thank you for this class and for your patience and availability to answer all of my questions. I have learned very much through this class. I have used LR in the past, but mostly for editing images. I now have a better grasp in the organization of my images, an even better understanding of editing images, and an understanding of the value of presets. I still have a lot to learn, but this has put me on the road to be able to improve my photography. Again, thank you! ”

Dale Yates
Lightroom Quickstart

Classes Starting Soon!

Understanding Exposure and Your DSLR

Instructor: Bryan Peterson Duration: 6 Weeks Cost: US$169 Without que…

Wireless Flash Techniques for Outdoor & Nature Photographers

Instructor: Rick Burress Duration: 4 Weeks Cost: US$129 Learn Photoshop…

The Real Photoshop Course

Instructor: Charlie Borland Duration: 4 Weeks Cost: US$129 Are you a …

The Ultimate Guide to Adobe Bridge CC

Instructor: Rick Burress Duration: 4 Weeks Cost: US$129 The Anti-Catalo…

After the Click – Refining Your Vision in Lightroom & Camera Raw

Instructor: Mark English Duration: 4 Weeks Cost: US$129 Why do some ima…

Editing in Adobe Camera Raw

Instructor: Rick Burress Duration: 4 Weeks Cost: US$129 If you love pho…

Exploring Adobe Photoshop Lightroom & Lightroom for Mobile

Instructor: Holly Higbee-Jansen Duration: 4 Weeks Cost: US$129 In this …

Lightroom Quick Start

Instructor: Holly Higbee-Jansen Duration: 4 Weeks Cost: US$129 Do you w…

Mastering Apple Photos

Instructor: Jon Canfield Duration: 4 Weeks Cost: US$129 Mastering Apple…

Luminar Essentials

Instructor: Jon Canfield Duration: 4 Weeks Cost: US$129 Luminar is an …

The Art of Printing and Selling Your Art

Instructor: Mark English Duration: 2 Weeks Cost: US$76 The print is the…

The 50 Most Useful Tips in Photoshop CC and Photoshop Elements

Instructor: Roger Morin Duration: 2 Weeks Cost: US$76 This two-week cla…

50 MORE Photoshop Tips & Tricks

Instructor: Roger Morin Duration: 2 Weeks Cost: US$76 This two-week cla…
Translate »