How to deal with the unfortunate facial expression in group portraits
To help you along during your portrait taking sessions, I’d thought I’d share a technique for a common problem with group portraits.
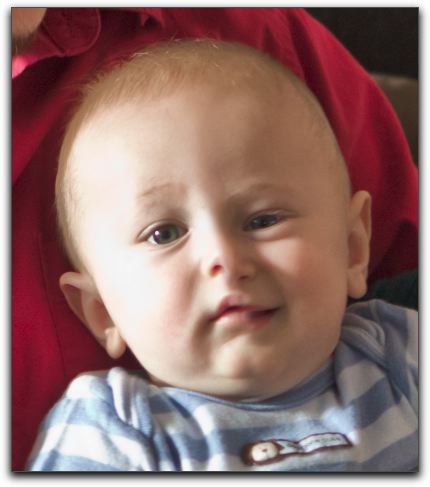
Most of the time, but especially with shots including babies, if you have more than one person in the shot, someone is not going to look as good as the others in the shot. The example below shows two images from a recent photo shoot I did of my daughter, her husband, and their new baby (yep, I’m a grandfather now)!
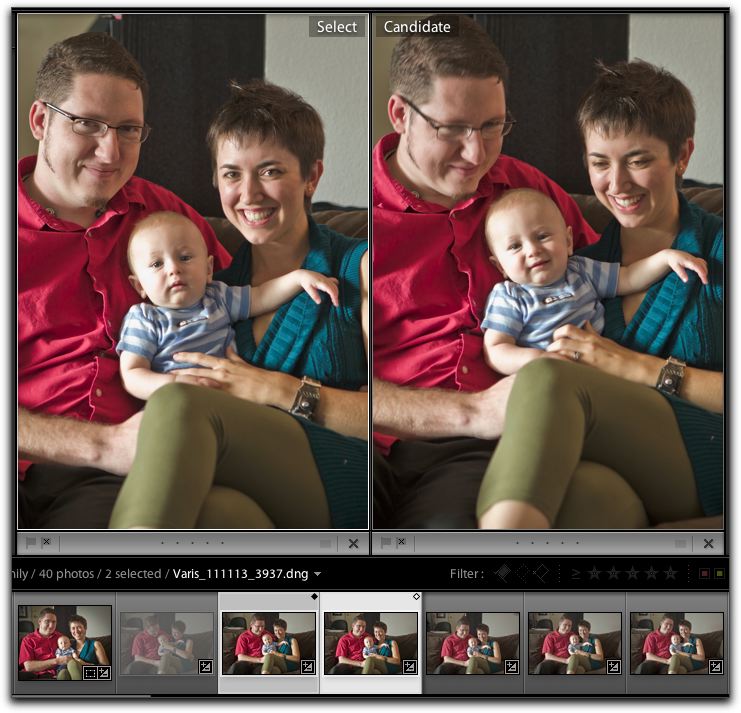
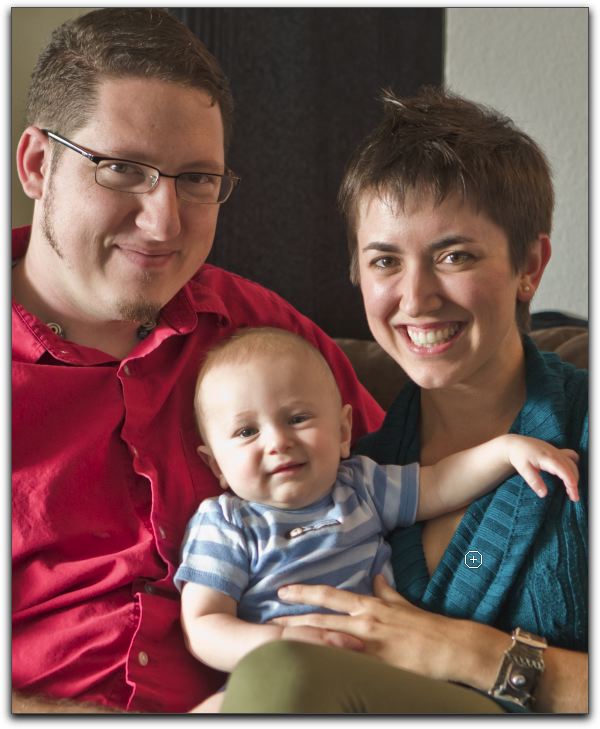
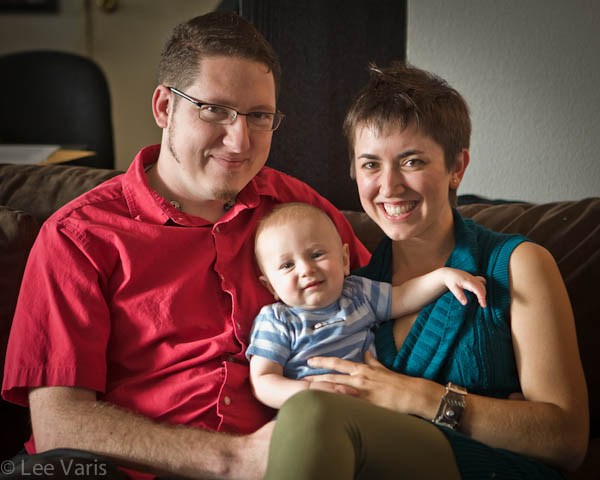
Comparing two candidates for a final image.
The proud parents look great in shot on the left, but the baby looks best on the right. When I’m photographing small children and babies, I tend to concentrate on their fleeting expressions and mostly ignore the adults. Despite coaching the adults to “keep looking at me,” there is almost always a shot or two like this, where the kid is great but the adults are not. In this particular instance, I was making aggressively funny noises to get a smile out of the baby, and when I succeeded, I snapped the shutter immediately; the parents obviously thought I was funny as well, and they couldn’t contain their composure. Fortunately it was easy to find a shot from the same angle where the parents look good. Now, one only has to combine the two shots with the best heads from each!
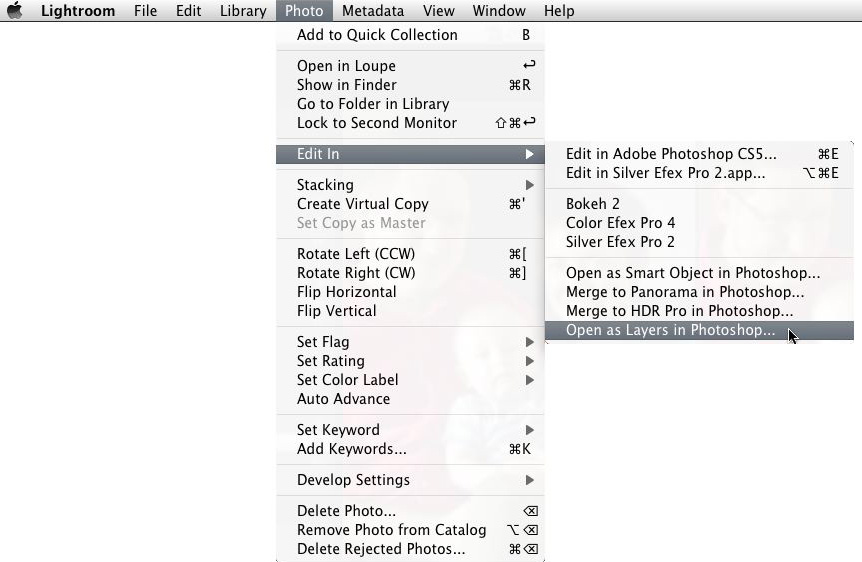
Open as Layers in Photoshop
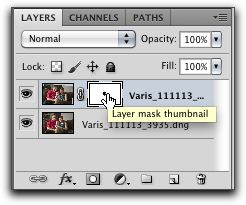
It is easy to bring these two shots into Photoshop as layers by using the Edit in… menu in Lightroom as shown above. When they open in Photoshop they will be in one document as layers. You might have to rearrange them so that you have the replacement head, in this case the better baby head shot, on top. Now you have to position the top layer so that the baby’s head is lined up with the head underneath. Make a layer mask by clicking on the mask icon at the bottom of the Layers panel and, to facilitate lining up the two heads, temporarily change the layer blend mode to Difference…
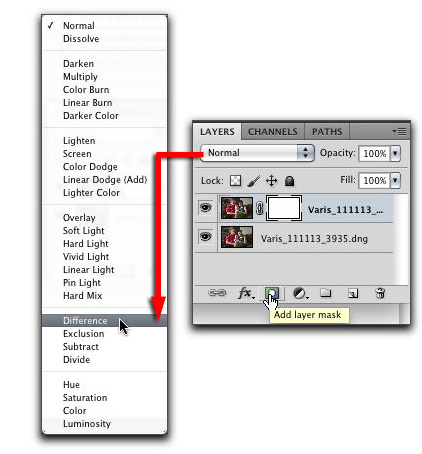
Add a white layer mask and change the blend mode to Difference
Ideally, the two heads will be almost the same except for the expression. Difference shows the degree to which things differ in how much they deviate from black—if things are exactly the same they will show as featureless black— otherwise it tends to look like an inversion. Here, only the overall shape of the head is the same, but by moving and rotating I can get things to be close to black, and I can see where things don’t line up easily by the light “mackie-lines” that show up. I’ve concentrated on lining up the ears and the outside edges of the head to make the blending process easier.
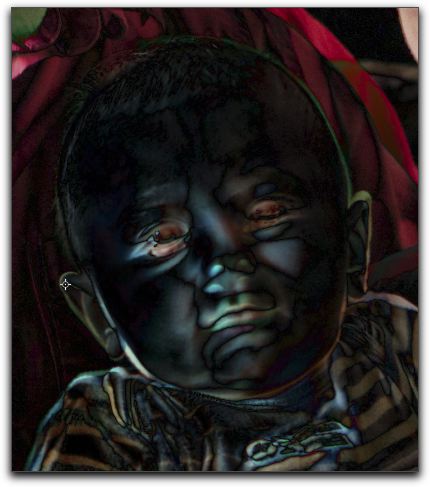
Difference cancels like things out to black when things are lined up.
Once you are satisfied that the heads are as closely aligned as possible, change the blend mode back to Normal. Now you have the good head on top of the bad head, but we want to hide the rest of the layer. I’ve found that the easiest way to proceed here is to mask out the good head, and then invert the layer mask; you end up doing a lot less painting that way. Take the Brush tool and paint into the head with black, making sure that you have the layer mask selected in the Layers panel.
left side= bad head revealed
Gradually reveal the underlying head by painting black with a soft-edged brush over the head. The following image shows half the head masked away.
left side = bad head revealed
To make sure your mask doesn’t have any “holes,” you can “solo” the mask by option/alt clicking on the mask thumbnail. This turns off all the RGB channels to reveal what the mask looks like.
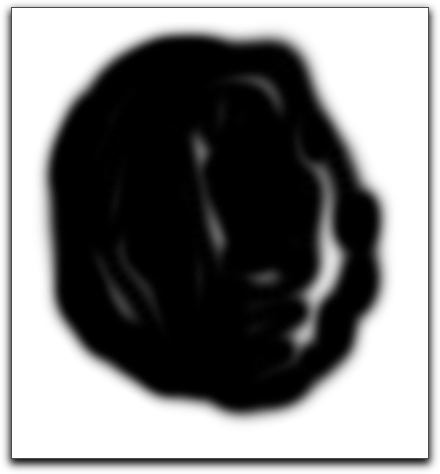
The “soloed” mask reveals any holes
Fill in any holes and then invert the mask by hitting Command/cntrl-“i,” or selecting from the image adjust menu…
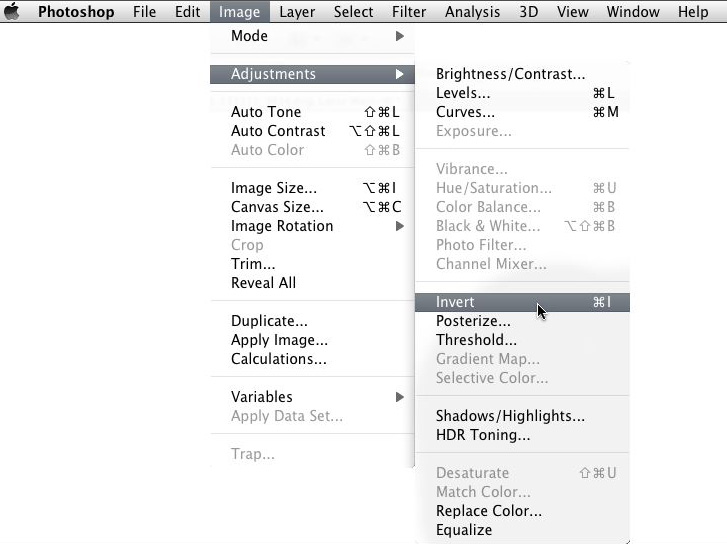
Invert the Mask
Now the white areas of the mask reveal the good head.

The white mask reveals
Good Baby
You can toggle the visibility of this top layer by clicking the little “eye” icon in the Layers panel—go back and forth a couple of times to check that everything is lined up properly—and make adjustments as necessary.
Good Baby
The final image has the best of both shots seamlessly combined into one. This quick and easy technique helps to take the stress out of the holiday shooting session, because you no longer have to obsess over how everyone looks in any given shot. It is relatively easy to shoot enough coverage to insure that you have enough good heads to go around!
Good luck!
-BPSOP Instructor: Lee Varis
Lee Teaches:


