Most who photograph sports would agree it can be frustrating to capture an otherwise great shot of your subject in which you’ve cut off a hand, or foot, or head or ball or something else essential to the image. But did you know that thoughtful selection of a specific focus point on your camera can reduce if not eliminate the likelihood of such unwanted amputations?
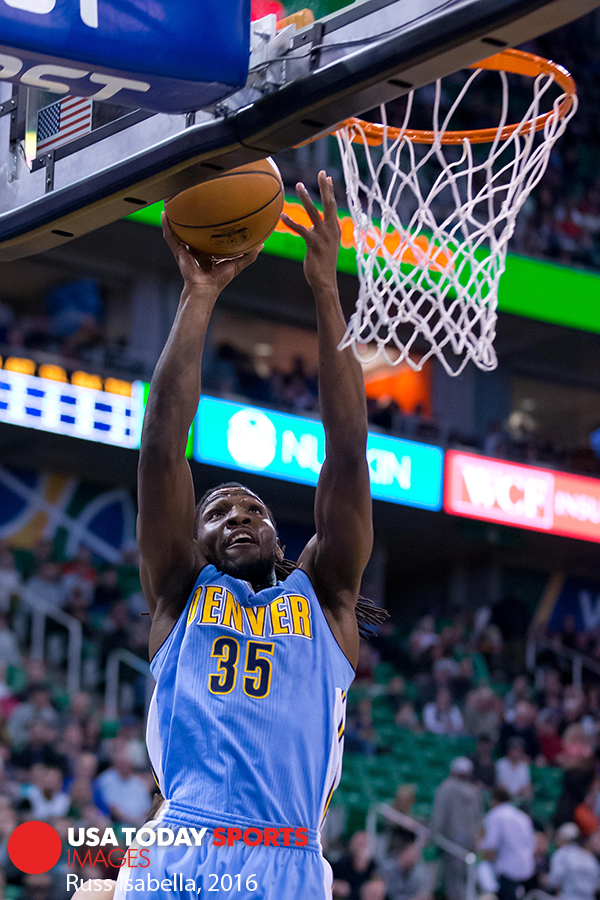
Feb 3, 2016; Salt Lake City, UT, USA; Denver Nuggets forward Kenneth Faried (35) goes up for a shot during the first quarter against the Utah Jazz at Vivint Smart Home Arena. Mandatory Credit: Russ Isabella-USA TODAY Sports
Aside from using a lens that is wide enough for the activity you are shooting, selection of a specific focus point represents a most critical decision. When photographing basketball, for example, shooting with my camera in a vertical position, I select a focus point on the vertical center line that is 2 points below the central point. This in effect ‘raises’ the frame of the photos I capture and provides more space at the top of the frame (above my focal point), which is where a good deal of relevant action occurs in basketball. This may seem counterintuitive, but the basic idea is that using a lower focus point (rather than the central point, which is what I typically use) increases the amount of space in the frame above my focus point. Particularly as the action gets nearer to me, this focus point selection greatly reduces the likelihood of my cutting off hands/ball in my photos. It’s a very minor adjustment that makes a huge difference for my photographing of basketball, and this same basic strategy can be applied to other sports as well. The main idea is that by anticipating the area within your frame the action is likely to move into quickly, you can make adjustments that will help to avoid cutting off parts of your subject (or his/her activity) that are crucial to your photos.
In the photo above, my focus point is in the area of the number on the player’s jersey, and because I’ve selected a point relatively low in the frame, I have the necessary space above to capture the relevant action (ball, hands, basket). If I was using the center point and had to move the frame to bring the center point down to the numbers, I’d cut off the ball/hands.
– BPSOP Instructor Russ Isabella
Russ teaches: Sports Photography


