This is an excerpt from Photography Essentials, taught by Brit Hammer.

What is exposure?
Having the “correct” exposure means your image is neither too light nor too dark.
When shooting in aperture priority mode the camera chooses the settings to create the correct exposure. This means the camera sets shutter speed and ISO.
How does a camera know how dark or light an image should be? A camera will try to make the image a medium level of brightness, not knowing anything about what you’re photographing or how it’s supposed to look. That means your image might turn out darker or lighter than how the scene looks in reality.
Most of the time it works just fine for the camera to guess the correct exposure. That’s because the things we usually photograph in everyday life are made up of a mix of dark and light elements. But sometimes the camera guesses wrong, and you need to tell the camera to go brighter or darker…
What the camera thinks is a correct exposure is not always right
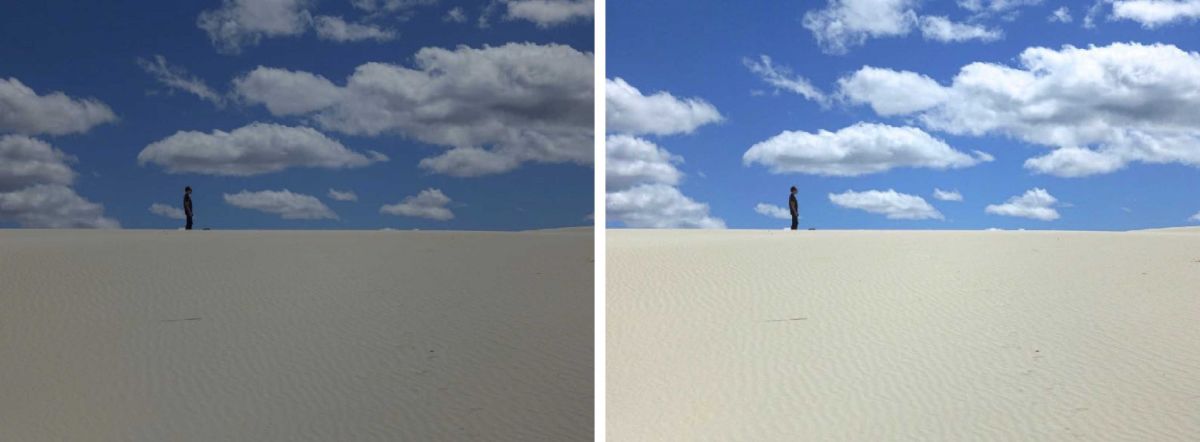
In the example at top left, this is what the camera chose for the exposure, but this was not how it looked in reality. The camera does not know that these sand dunes and white clouds look very bright in reality. It just makes the image a medium level of brightness.
This is why you sometimes have to help the camera and tell it to brighten or darken things. You do this by using exposure compensation.
In the image at top right I used exposure compensation to make it look more natural.
What is exposure compensation?
Exposure compensation is a setting that tells the camera to go slightly brighter or darker than what it thinks is correct.
Just like aperture, exposure compensation is expressed in stops. A stop means simply to halve or double the amount of light. Most cameras have an exposure compensation range from -2 to +2 stops.
Negative values make the image darker, and positive values make the image brighter. Behind the value, you’ll often see “EV”, which stands for exposure value.
Where to find exposure compensation on your camera
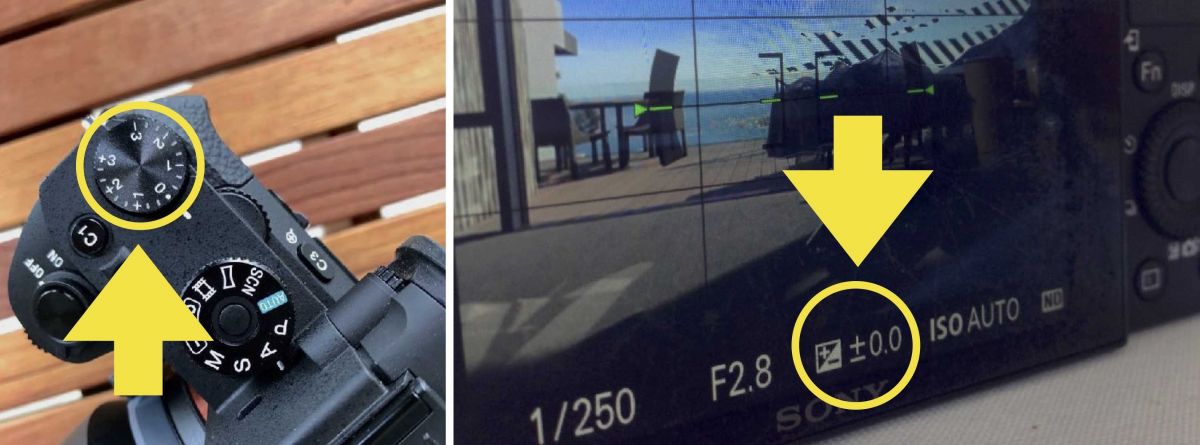
Depending on your camera, exposure compensation might be easily accessible or not. If your camera doesn’t have a designated exposure compensation dial (left image), then it’s worth digging through your manual to see if you can assign this function to one of the buttons or dials on your camera so it’s handy.
On most cameras, exposure compensation is adjustable in increments of one-third of a stop. One-third stops are expressed in decimal numbers: one-third is 0.3 and two-thirds is 0.7. Your camera’s current setting is visible on the LCD display, such as shown in the above right image set to ±0.0 (i.e. no exposure compensation).

When to use exposure compensation
There are two typical situations in which the camera will make a wrong judgment of the exposure:
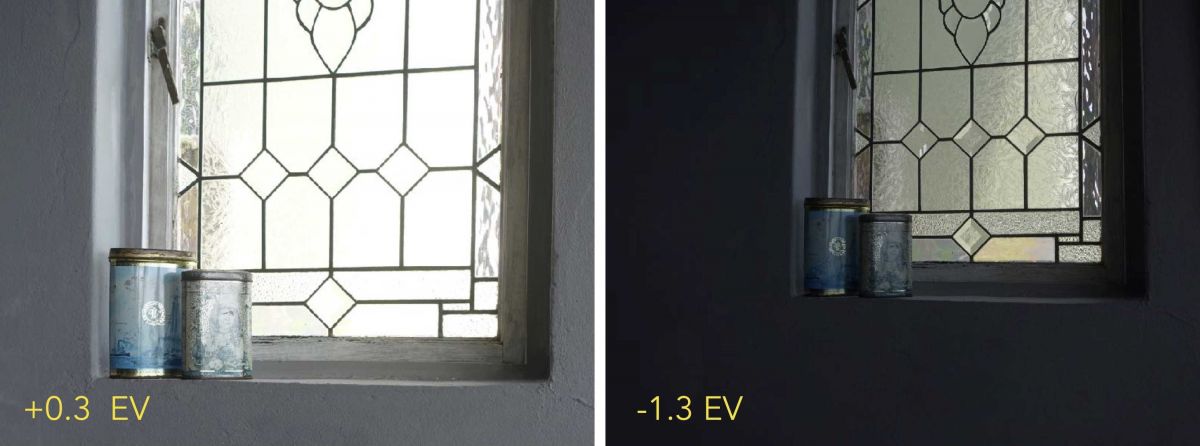
- Almost everything in the frame is light. (Left image) In this case the camera will make the image too dark. Correct this by using positive exposure compensation.
- Almost everything in the frame is dark. (Right image) In this case the camera will make the image too light. Correct this by using negative exposure compensation.

Photographing a light scene
In each image above, almost everything is white. Because the camera doesn’t know what’s being photographed, it made the exposure a medium brightness. That resulted in images that look too dark when compared to reality.
I used an exposure compensation of +1 EV (left) and +0.7 EV (right) to brighten the images to make them look like more natural.

Photographing a dark scene
Because the camera will always try to create a medium bright image, it will make images of night scenes lighter than in reality. That means when photographing night scenes you have to tell the camera to make the image darker so it results in a natural looking image.
The above two images were taken with the exposure compensation set to -1.7 EV. That’s one and two-thirds stops darker than what the camera chose for the exposure.
Photographing a scene with medium brightness
It’s not just extremely light or dark scenes that benefit from some exposure compensation.
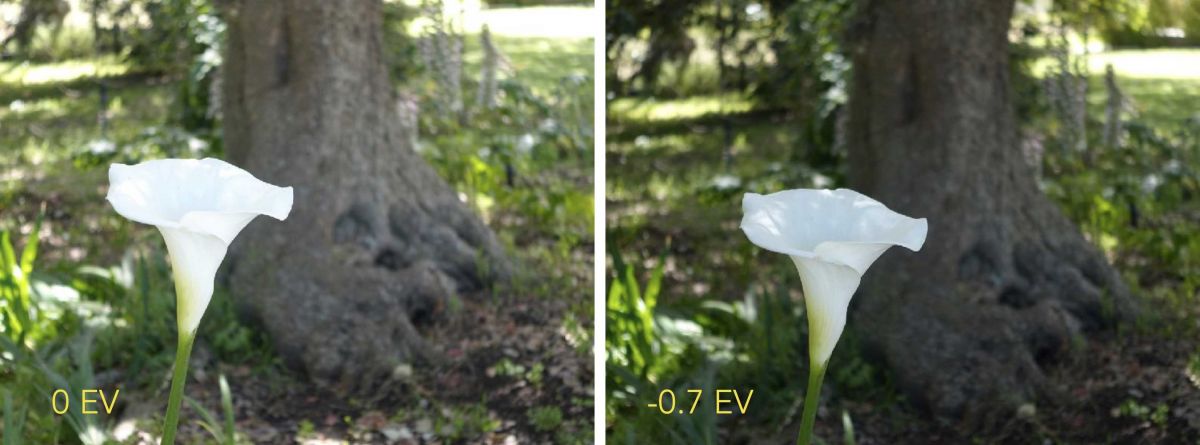
The image on the left shows what the camera chose as the exposure for this scene. On average, this exposure might be fine, but the detailed texture in the bright white flower is almost invisible. That’s why I used an exposure compensation of -0.7 EV to make it a bit darker.
The lesson here is to always ask yourself, would this image look better if it were a bit lighter or darker? Take a shot using what the camera thinks the exposure should be (i.e. 0 EV) and another using exposure compensation. You can choose which looks best when you compare images side by side on your computer.
Exposure compensation as a creative tool
Sometimes you might deviate from the “correct” exposure for creative reasons.
Like aperture, exposure compensation can be used as a creative tool. You can create an atmosphere or mood with a little (or a lot) of exposure compensation.
At first this might seem like yet another thing to think of when you’re shooting, but after playing with it for a while it will become second nature to ask yourself before pressing the shutter, “What if I applied a bit of exposure compensation?”
You can use exposure compensation to over-expose or under-expose for creative purposes.
Instructor: Brit Hammer
In Photography Essentials you’ll learn the techniques Brit uses so you can arrive at your own great images quickly and easily. With a bit of practice, they will become second nature to you!
Everything is explained simply and clearly.
We’ll work on one essential aspect at a time, broken down into parts like building blocks. By the end of the course the pieces will be put back together again so it all makes sense.
This course is for both beginners as well as experienced photographers desiring consistently great shots.
Brit teaches several classes at BPSOP
Celebrate Your Life in Beautiful Images
Celebrate Your Life in Beautiful Images Part II
Amazing Travel Photos Made Easy
What students say about Brit’s teaching:
“I’ve taken many classes. With the way Brit taught and explained things, I finally said, ‘I get it’. She made me enjoy taking photographs.”
“I have taken quite a few courses offered by BPSOP and learned so much from each one of them. All of your teachers are stellar. Brit Hammer’s class and method of critiquing took me to another level, and I am so appreciative. The video format and her commitment and energy she puts into her students’ work is inspiring and makes you want to work that much harder to utilize her suggestions for improving your photographs.” – Patricia Tedeschi – Galarneau (Celebrate Your Life in Beautiful Images)


